项目目录结构
后端项目结构
后端项目结构如下所示:
1 | ├─febs-apm ------ 微服务APM模块 |
前端项目结构
前端使用 vue element admin构建,所以可以参考 vue element admin目录结构。
如何添加自己的子系统
新建微服务子系统
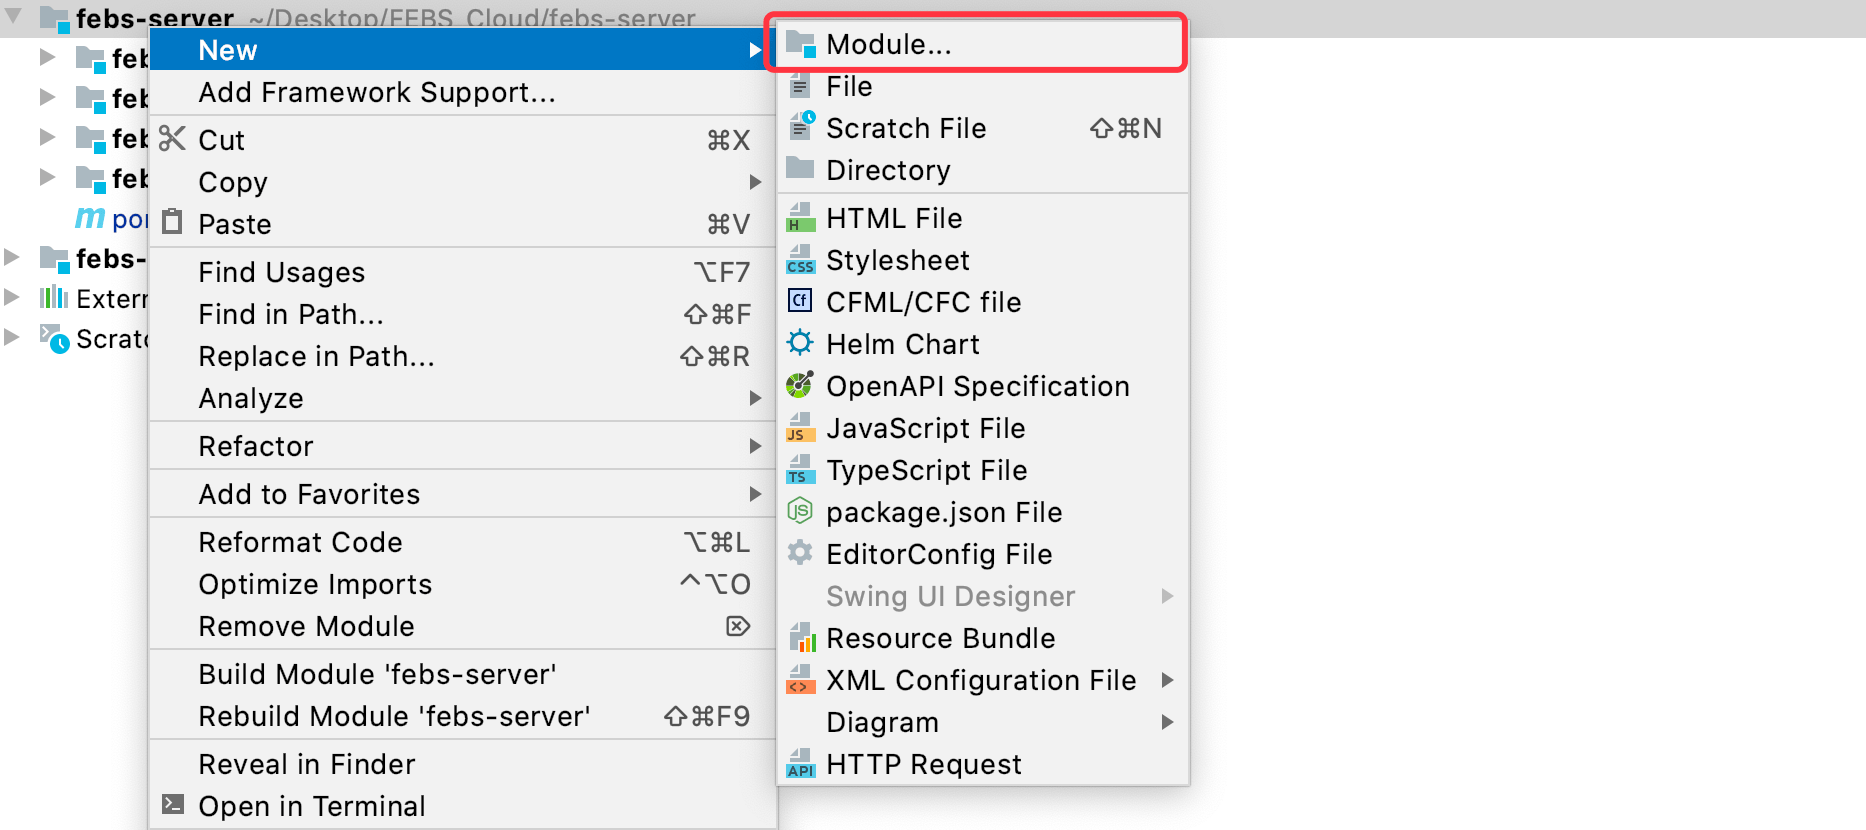
为了规范,建议将微服务子系统添加到febs-server层级下。在febs-server上右键新增一个Module:
选择Spring Initializr: 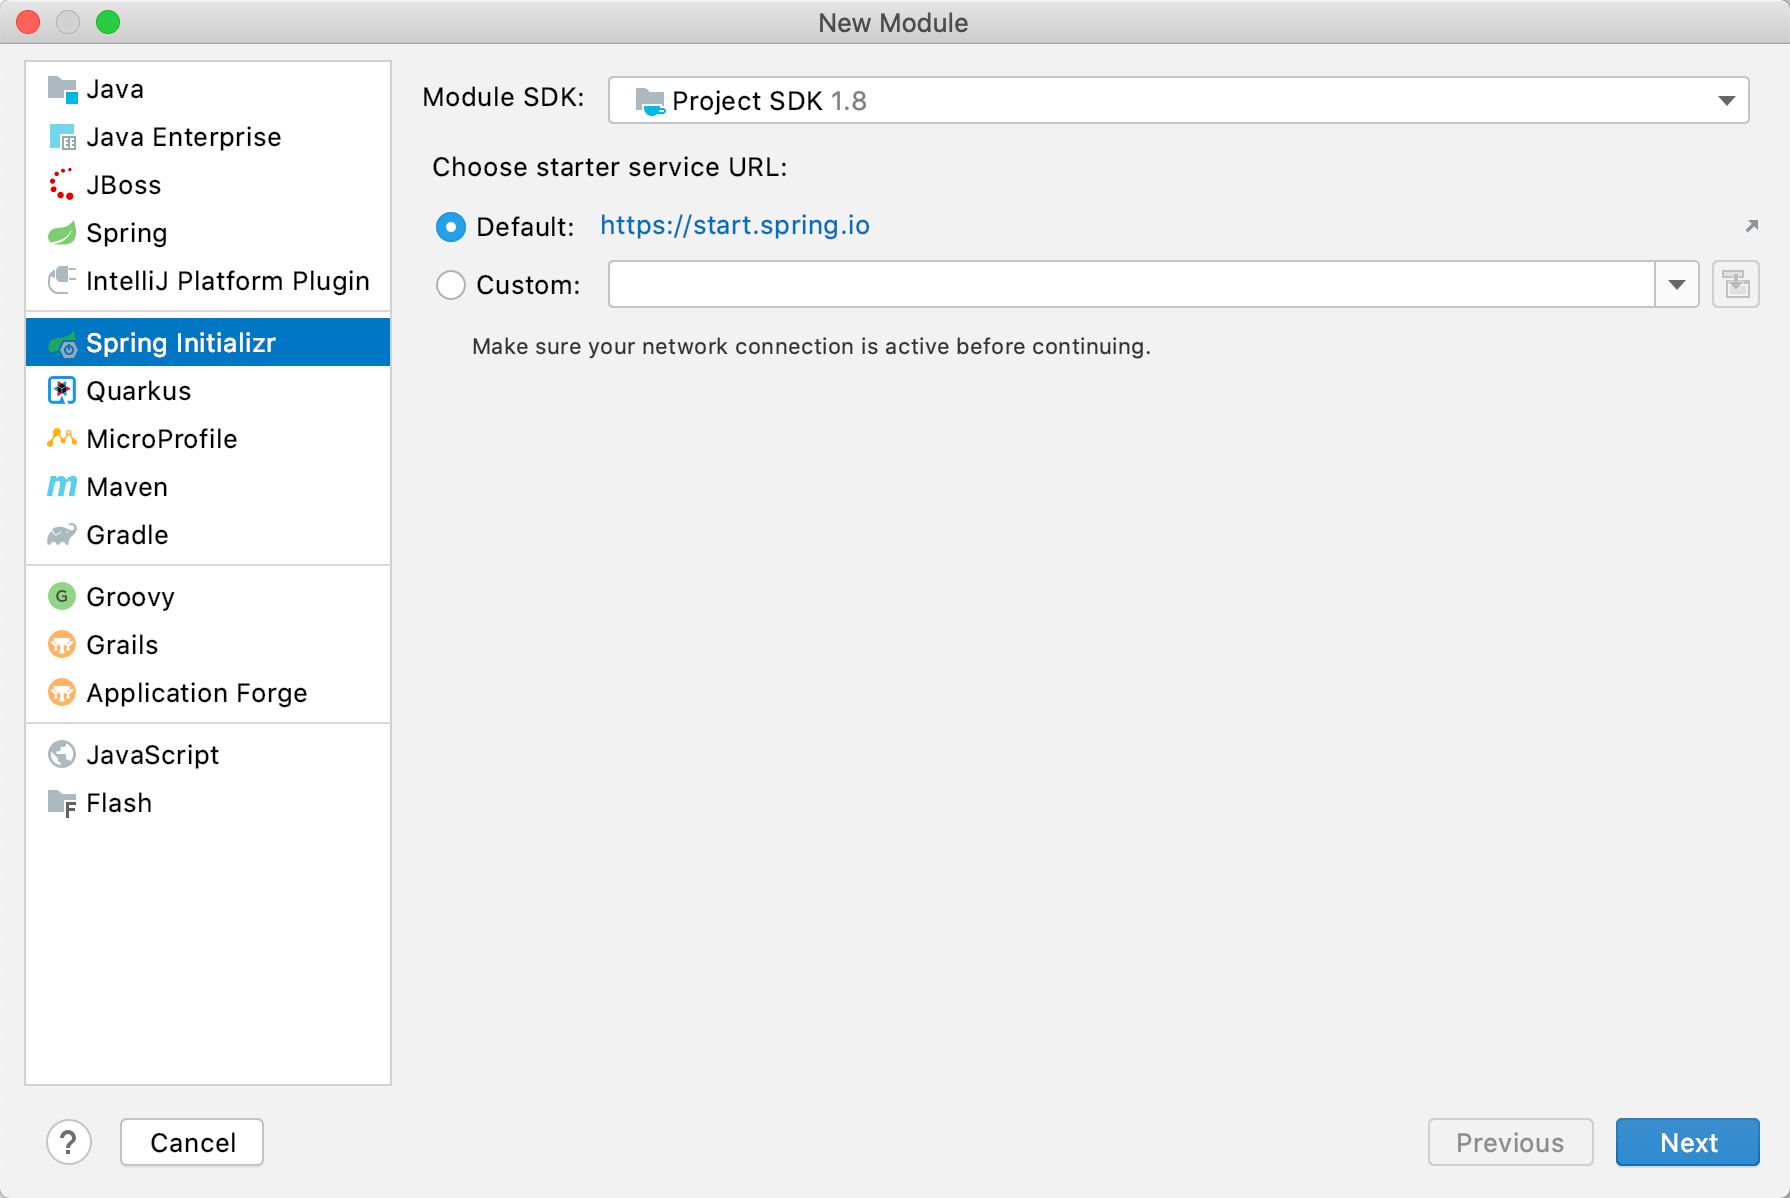
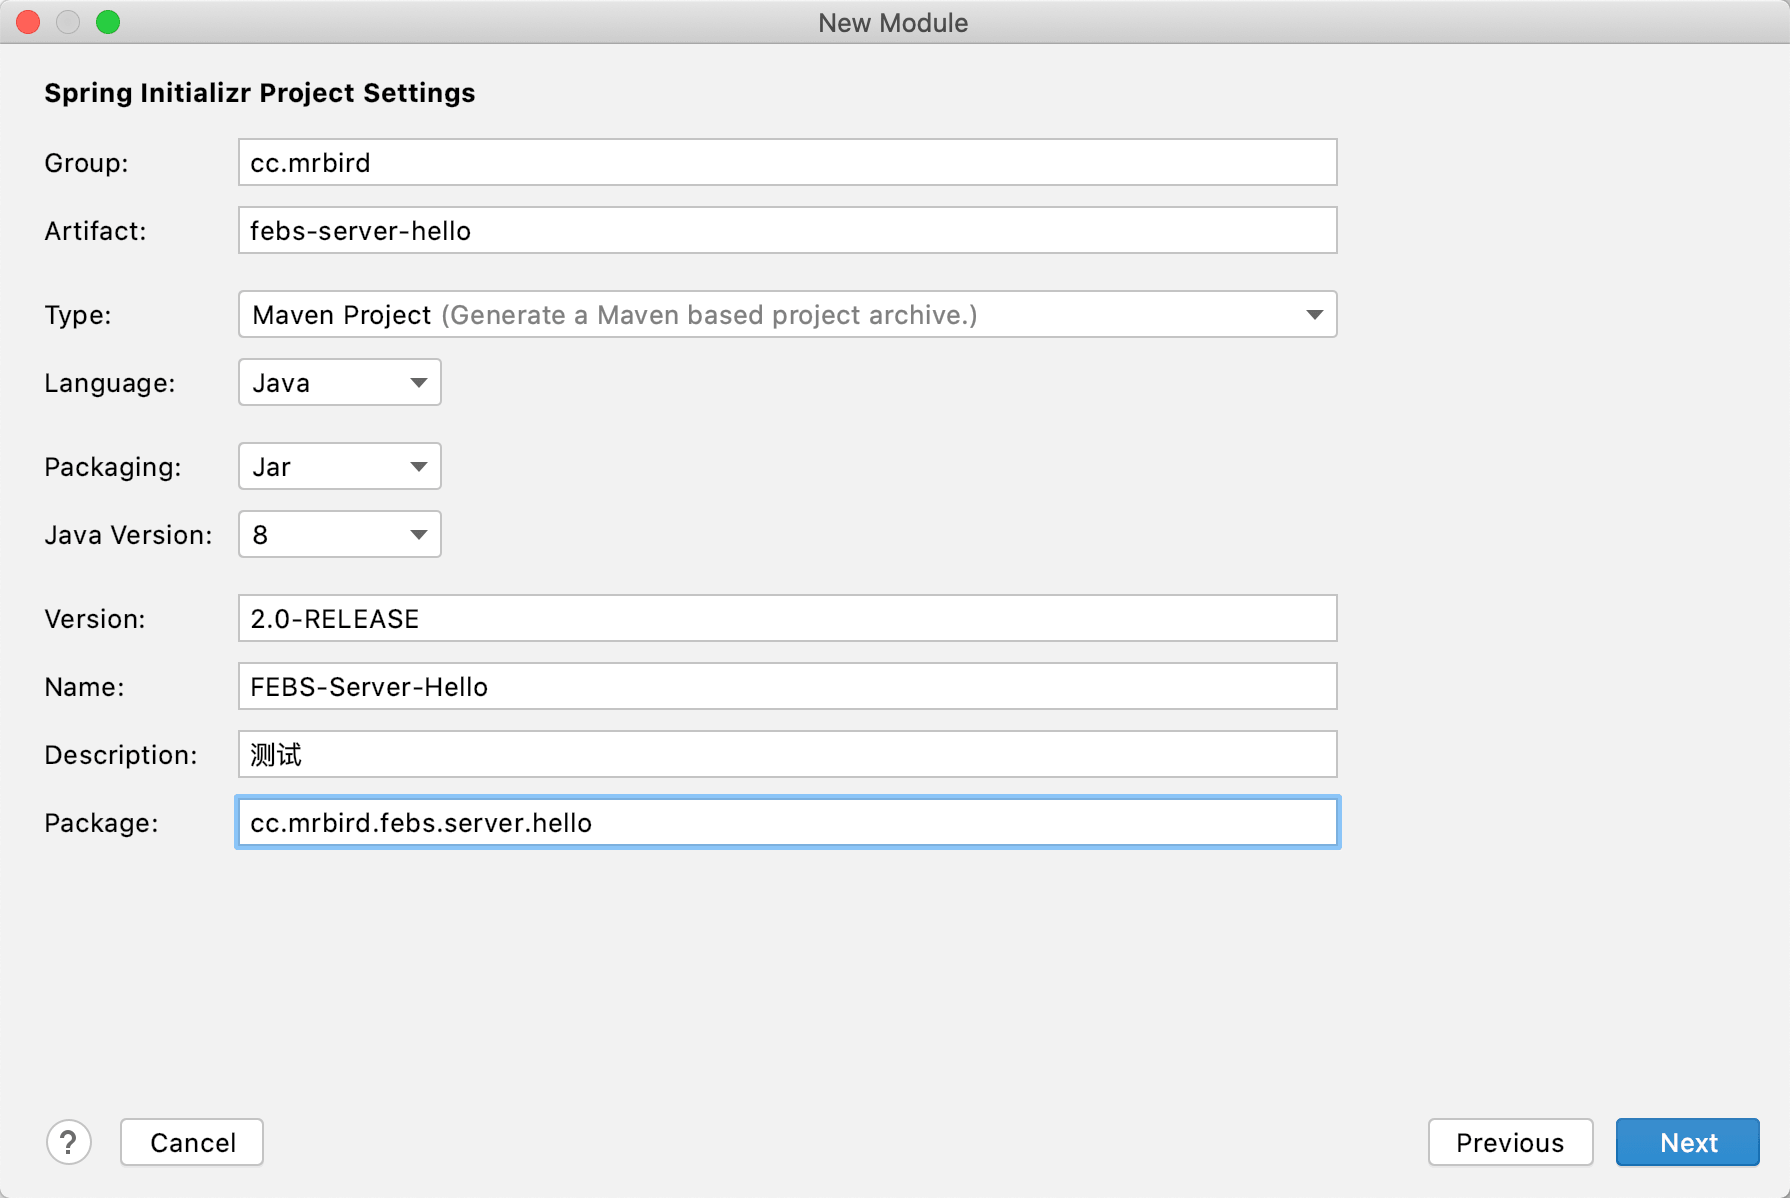
如下所示填写相关内容:
点击Next,跳过依赖选择,直接点击Next:

点击Finish:
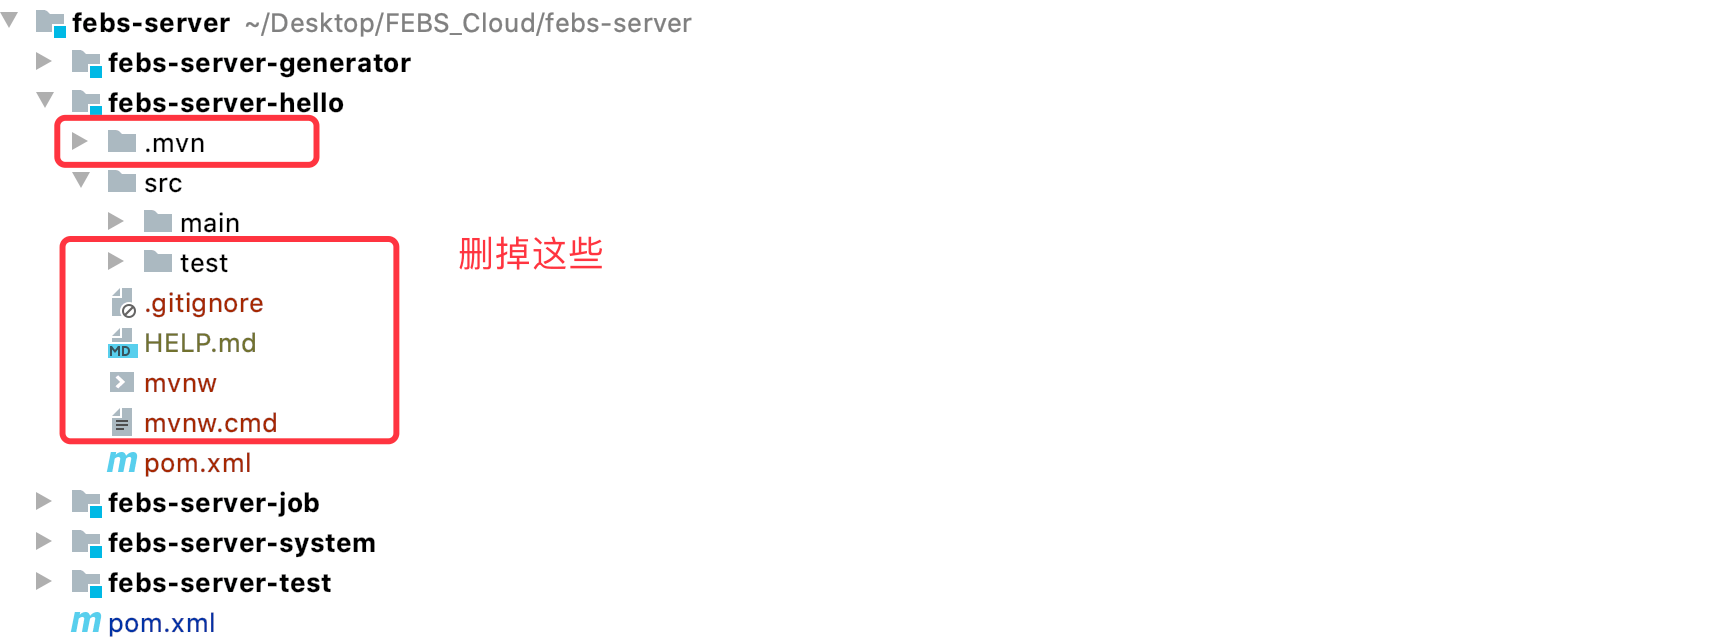
修改项目的pom,改后如下所示:
1 |
|
引入了系统核心依赖febs-common-core。
修改febs-server的pom,在modules标签下添加该Module:
1 | <modules> |
因为我们暂时没有整合数据库,所以需要先排除数据库自动装配,修改启动类:
1 | (exclude = DataSourceAutoConfiguration.class) |
删掉resources目录下的application.properties,新建bootstrap.yml,内容如下所示:
1 | spring: |
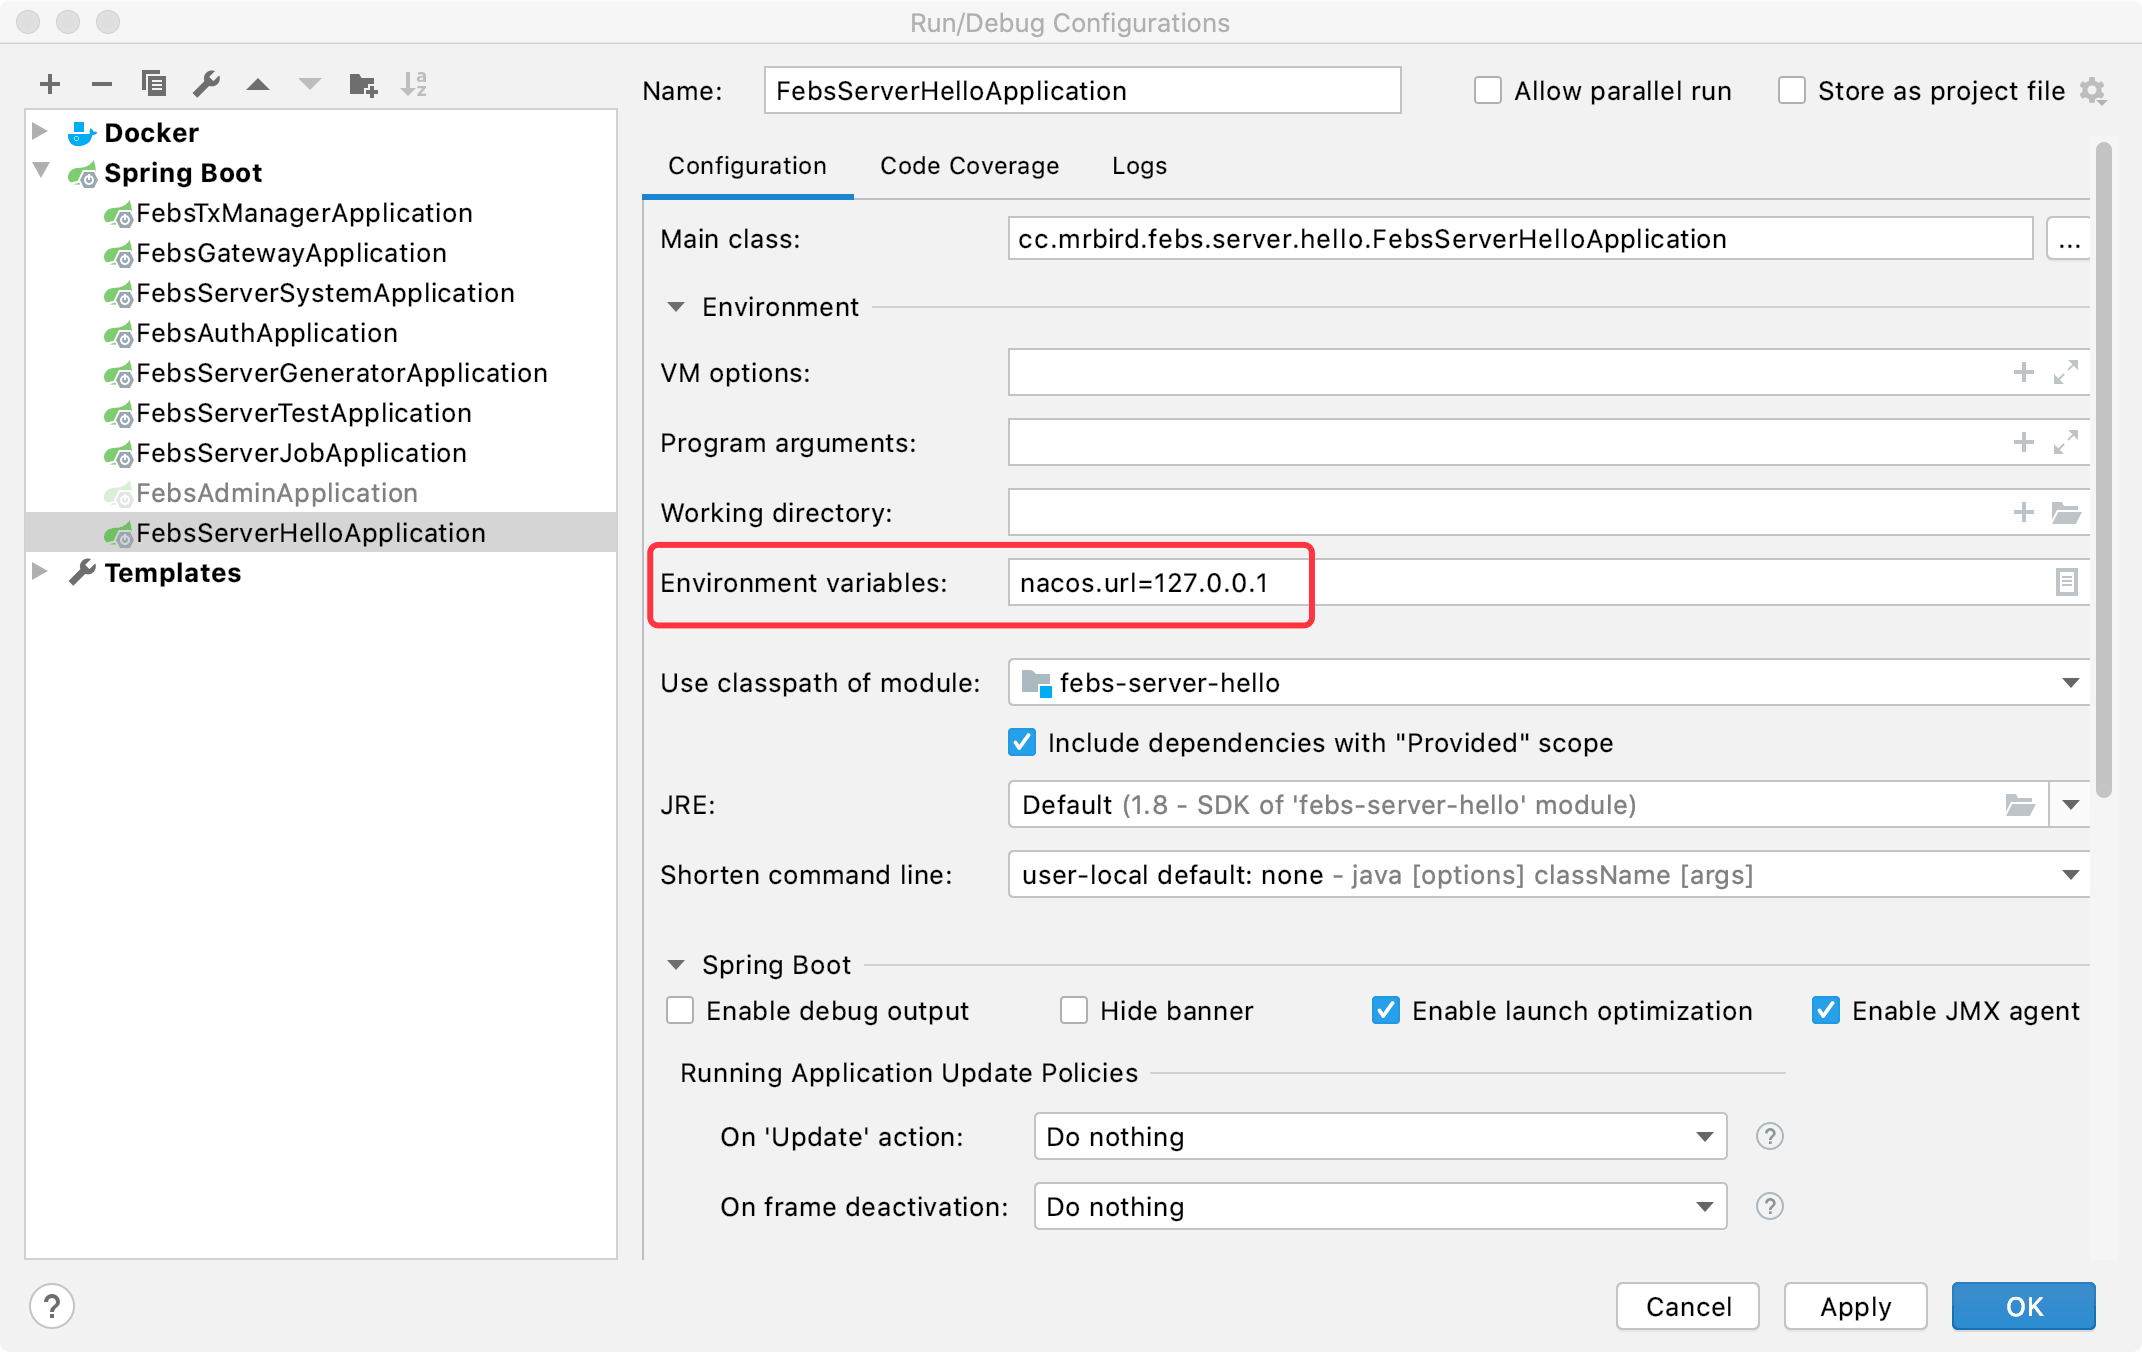
主要配置了服务名称为FEBS-Server-Hello,指定了Nacos配置中心和注册中心的地址。因为Nacos地址使用${nacos.url}变量表示,所以我们需要在IDEA环境变量中添加该配置:
接着在Nacos控制台中新建febs-server-hello.yaml配置:

配置添加好后,我们添加一个controller,对外暴露一个服务。在cc.mrbird.febs.server.hello目录下新建controller包,然后在该包下新建TestController:
1 |
|
为了让项目成功启动后,控制台打印的日志更有仪式感,我们新增一个runner。在cc.mrbird.febs.server.hello目录下新建runner包,然后在该包下新建StartedUpRunner:
1 |
|
引入安全配置
为了让刚刚添加的hello接口受febs-auth的保护,我们需要添加一些安全配置。在pom文件中引入febs-common-security-starter依赖:
1 | <dependencies> |
因为febs-common-security-starter依赖已经包含了febs-common-core,所以上面我们只需引入febs-common-security-starter即可。
接着在bootstrap.yml中添加如下配置(你也可以在Nacos控制台的febs-server-hello.yaml中添加,为了方便我就直接在bootstrap.yml中添加了),用于开启接口保护:
1 | febs: |
febs.cloud.security.enable设置为true开启接口保护(添加该配置后,系统的所有对外暴露的接口都需要令牌才能访问,如果希望添加免认证接口,可以通过febs.cloud.security.anon-uris配置指定。),security.oauth2.resource.user-info-uri用于指定febs-auth的/user地址(原因参考搭建教程)。
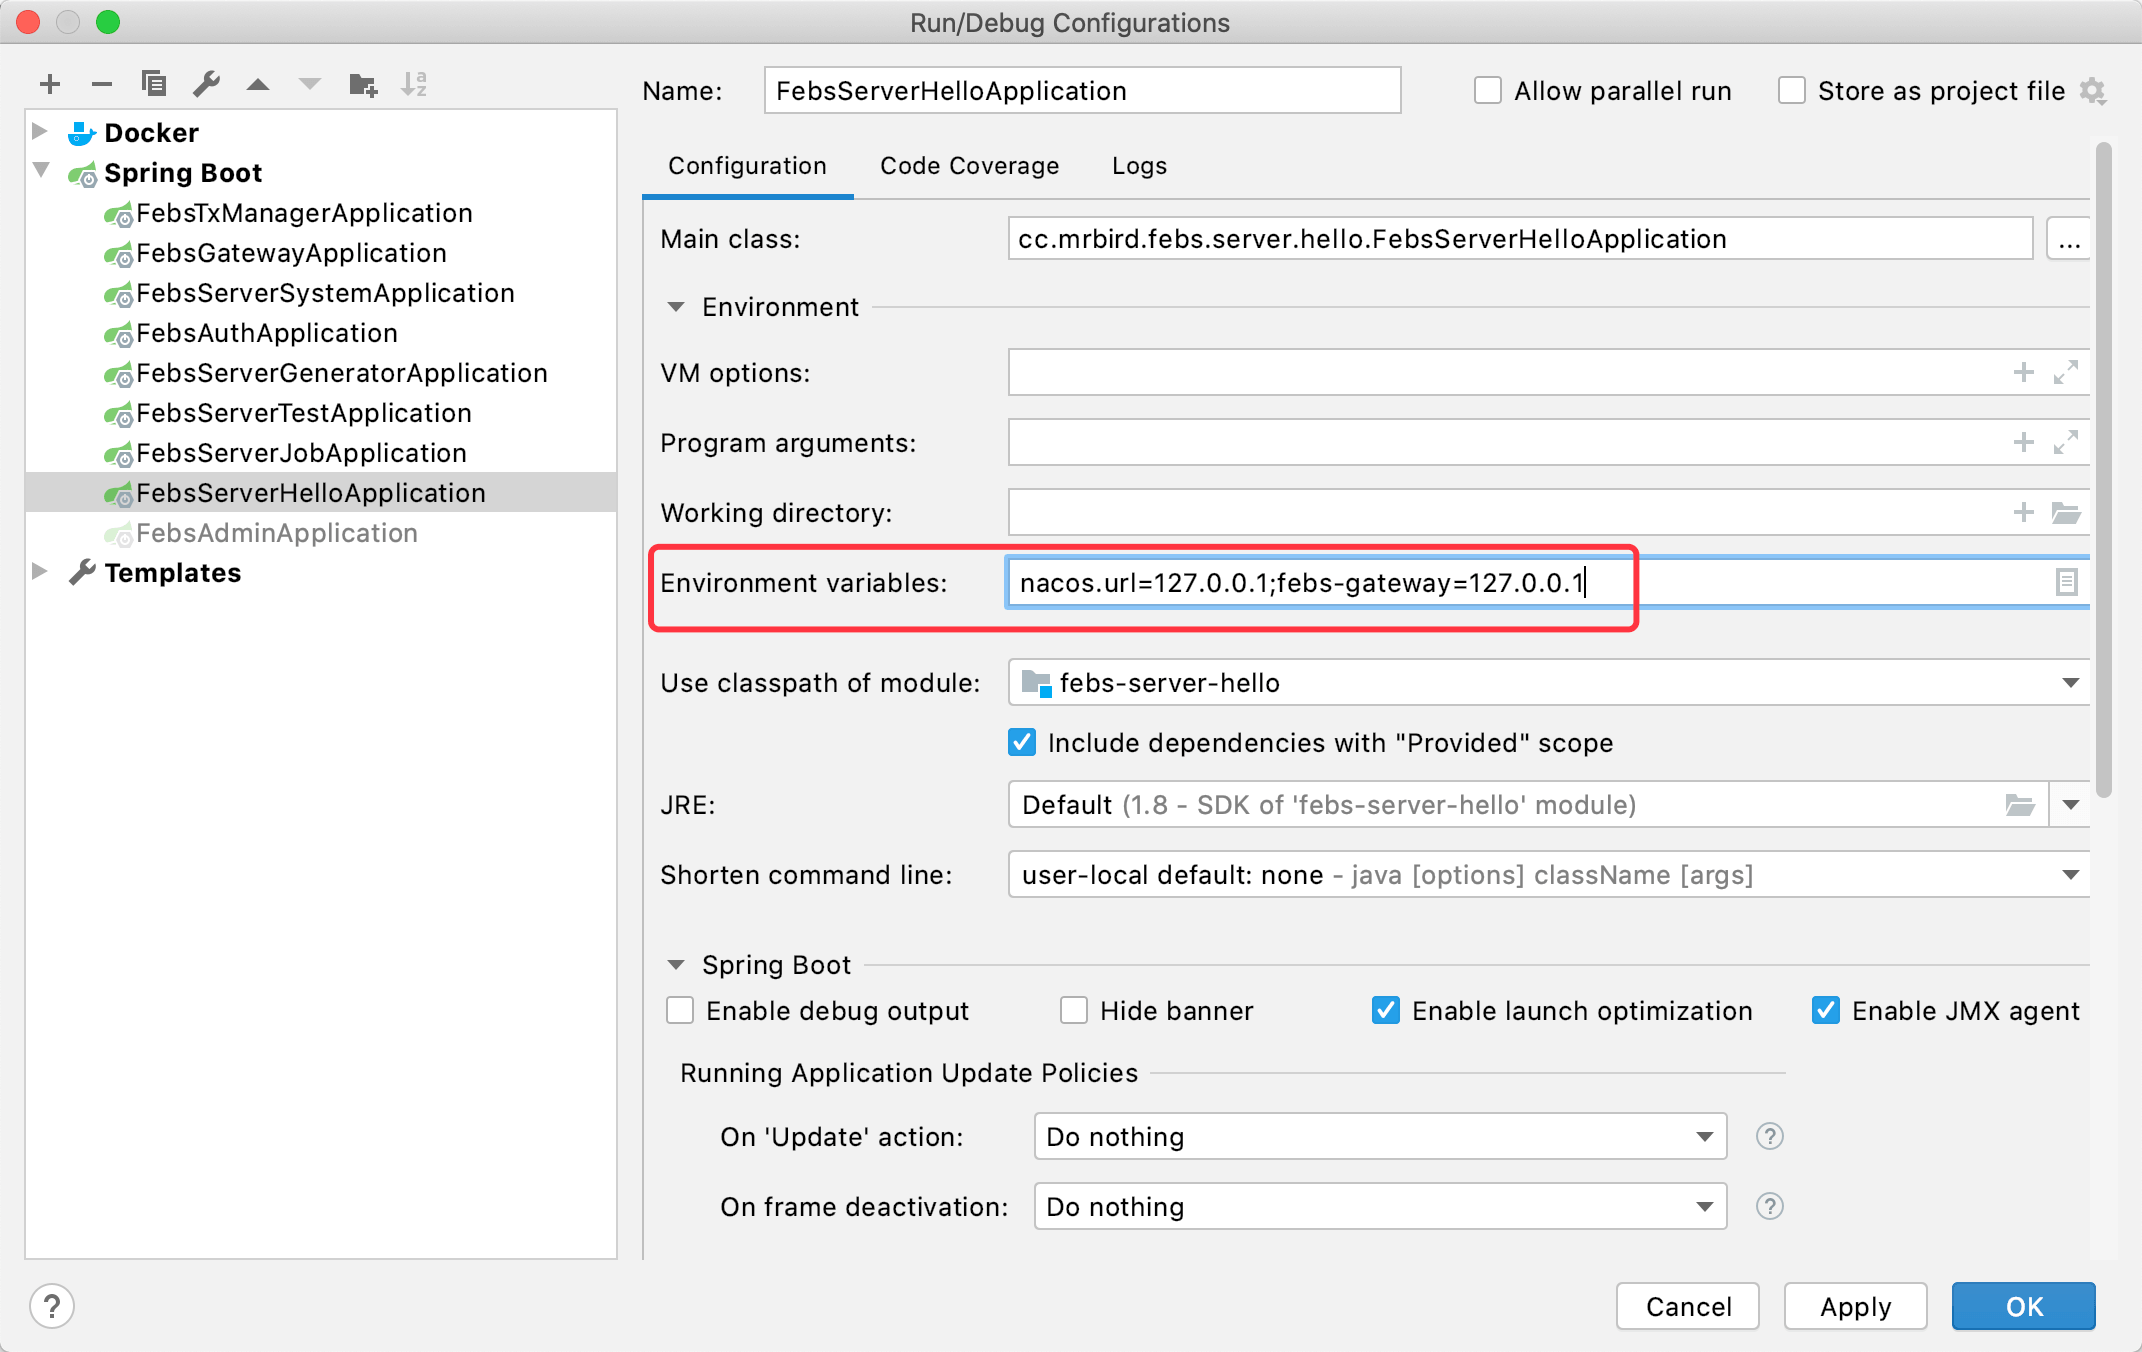
因为我们在配置中使用${febs-gateway}变量代表febs-gateway地址,所以我们需要在IDEA环境变量中添加该配置:
添加好配置后,在系统入口类上添加@EnableFebsCloudResourceServer注解,开启资源服务器配置:
1 |
|
接口测试
为了能够通过网关访问FEBS-Server-Hello,我们需要在网关配置中添加一些配置。修改Nacos控制台中febs-gateway.yaml配置: 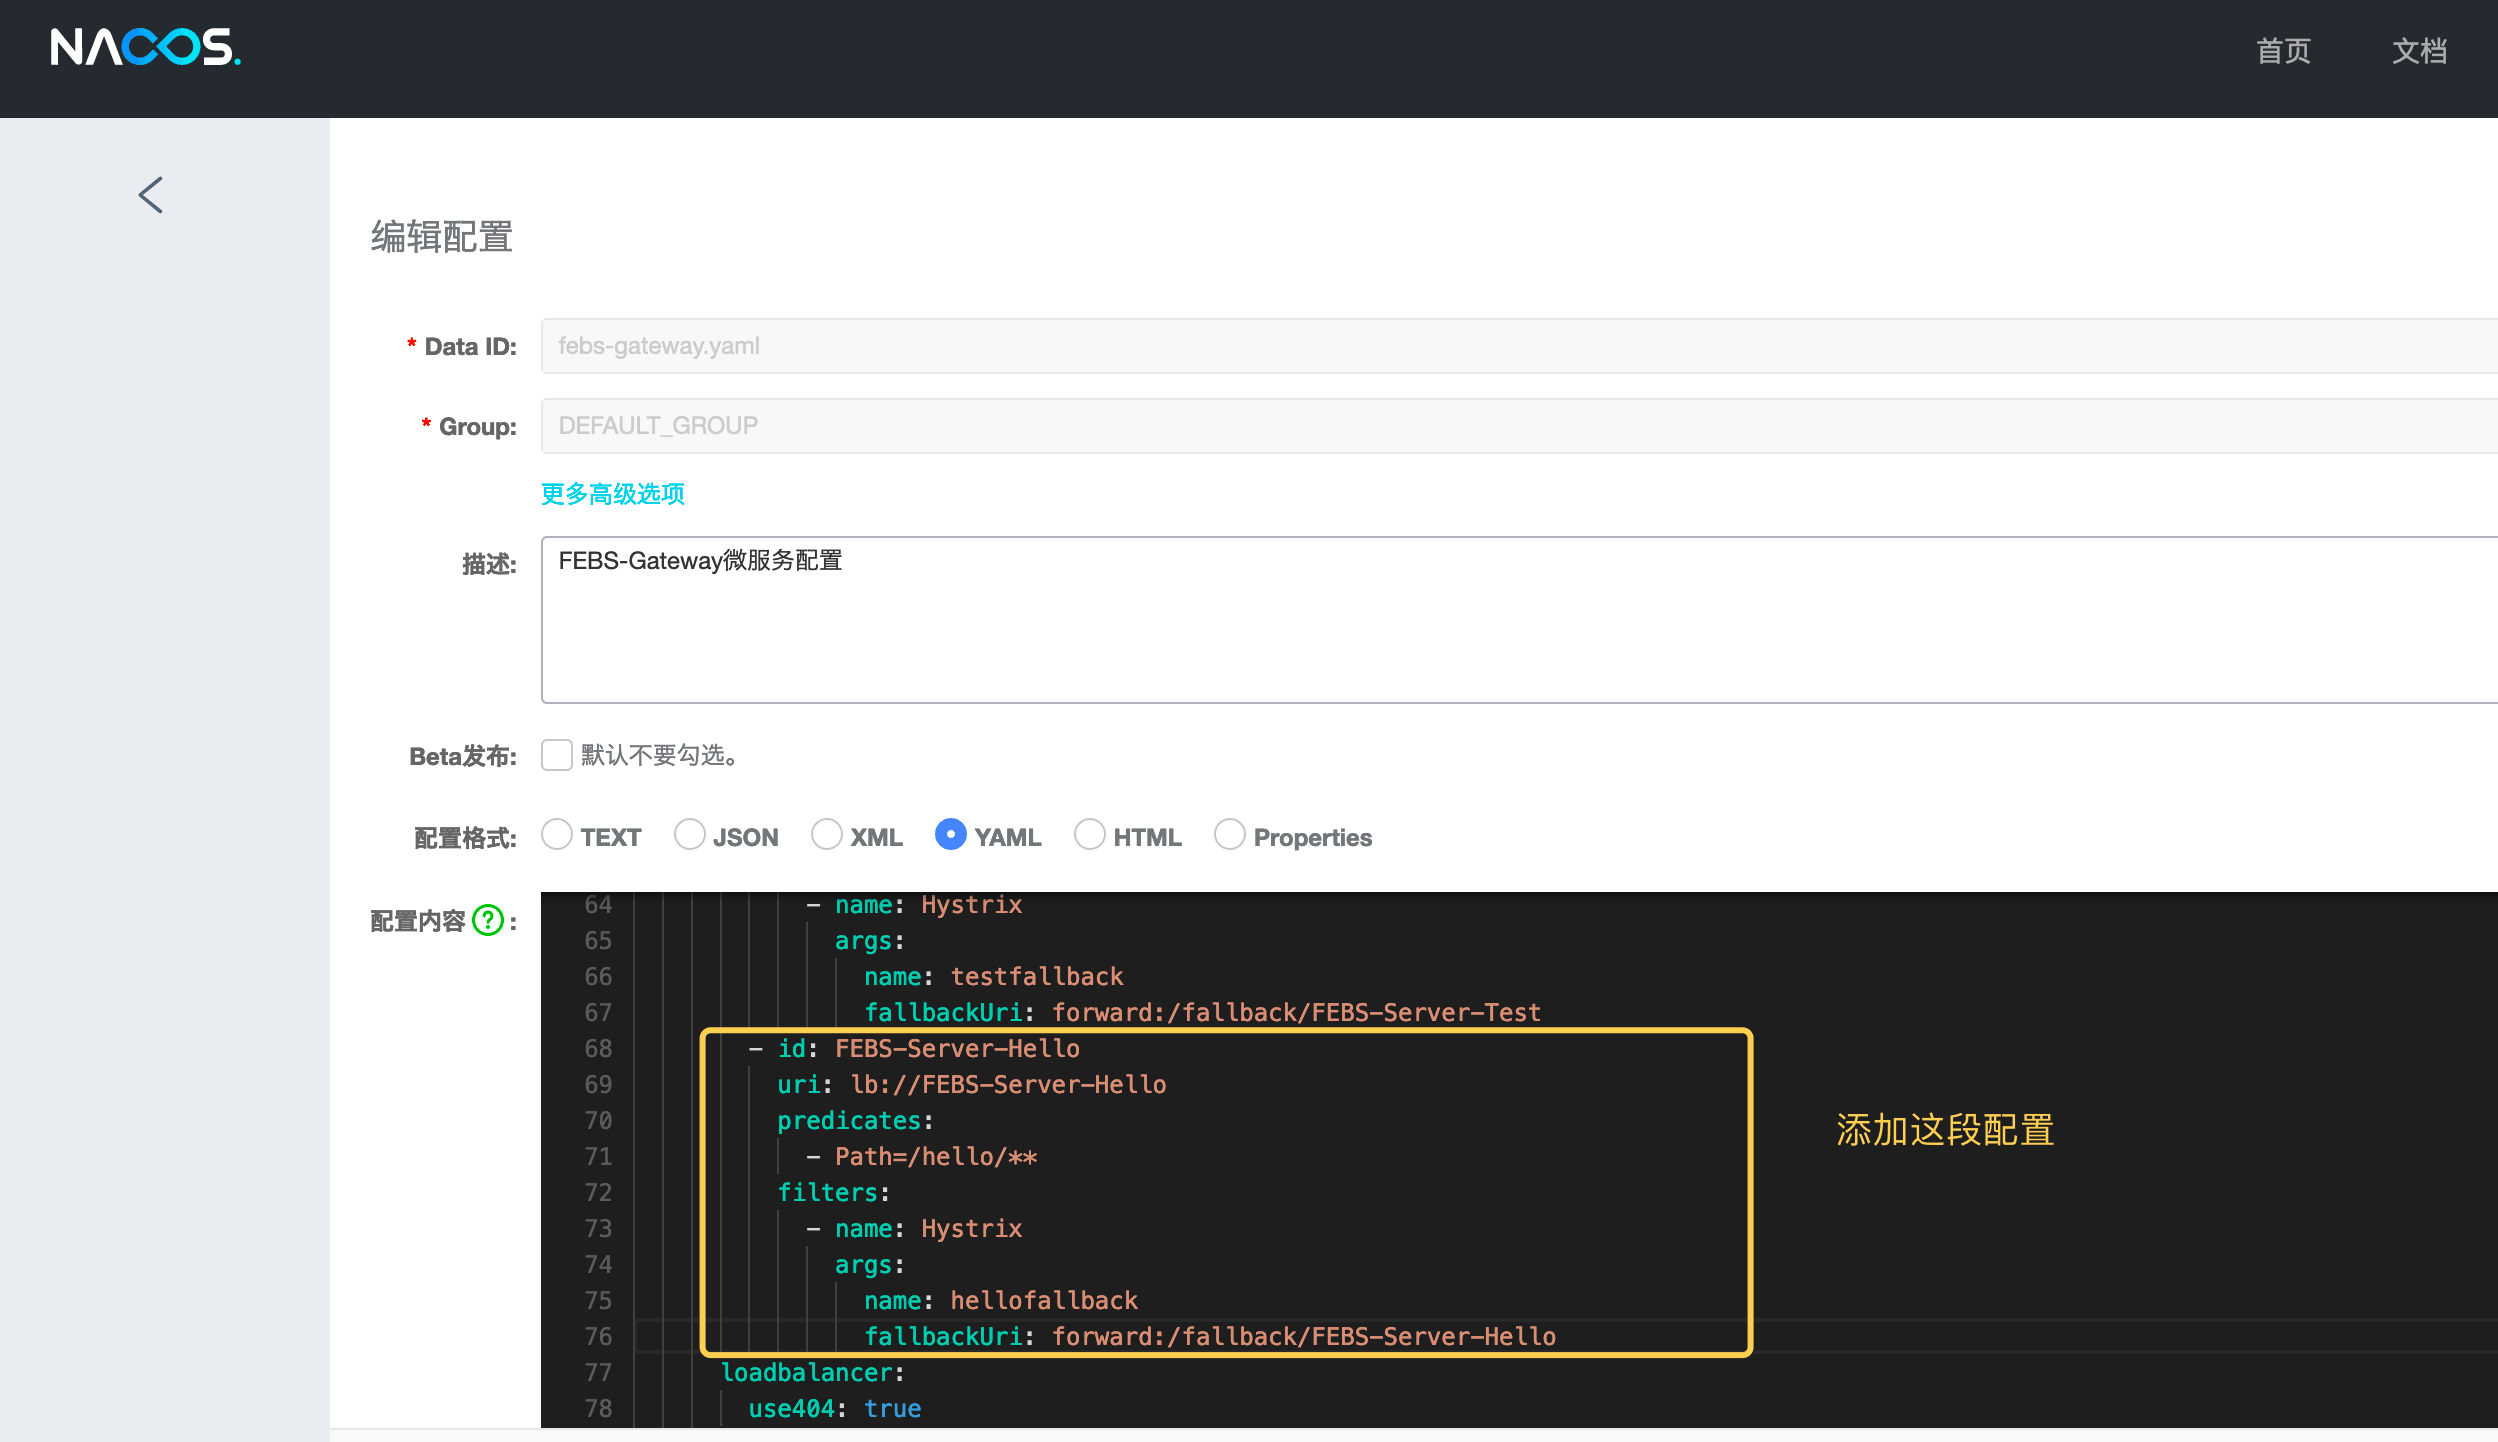
1 | spring: |
添加好后,启动febs-server-hello:
1 | ----------------------------------------- |
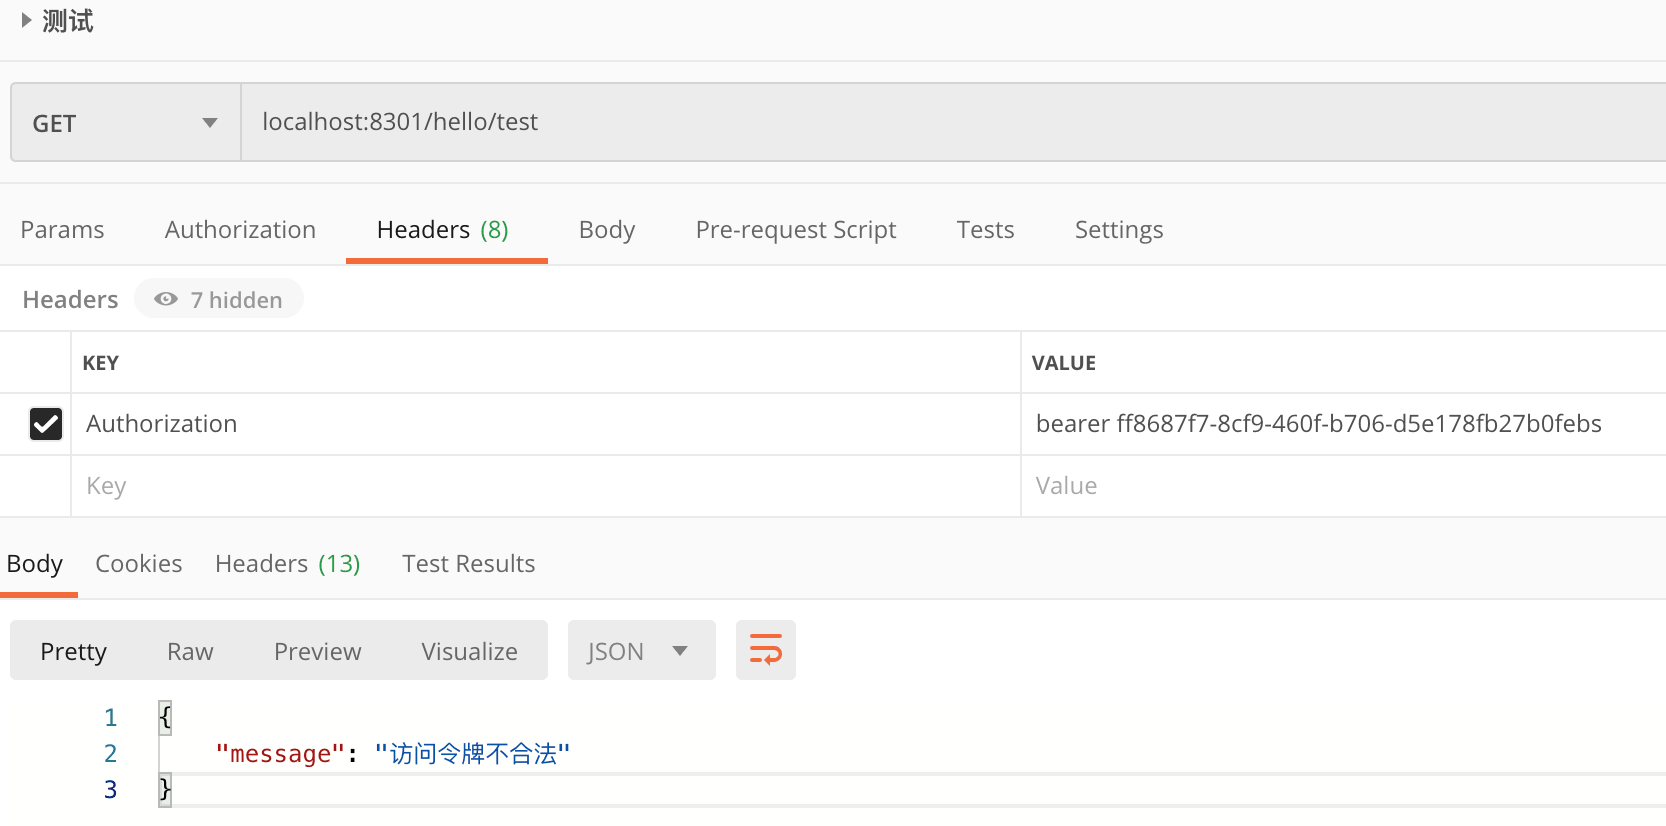
使用postman测试/hello接口(令牌的获取方式参考postman测试):
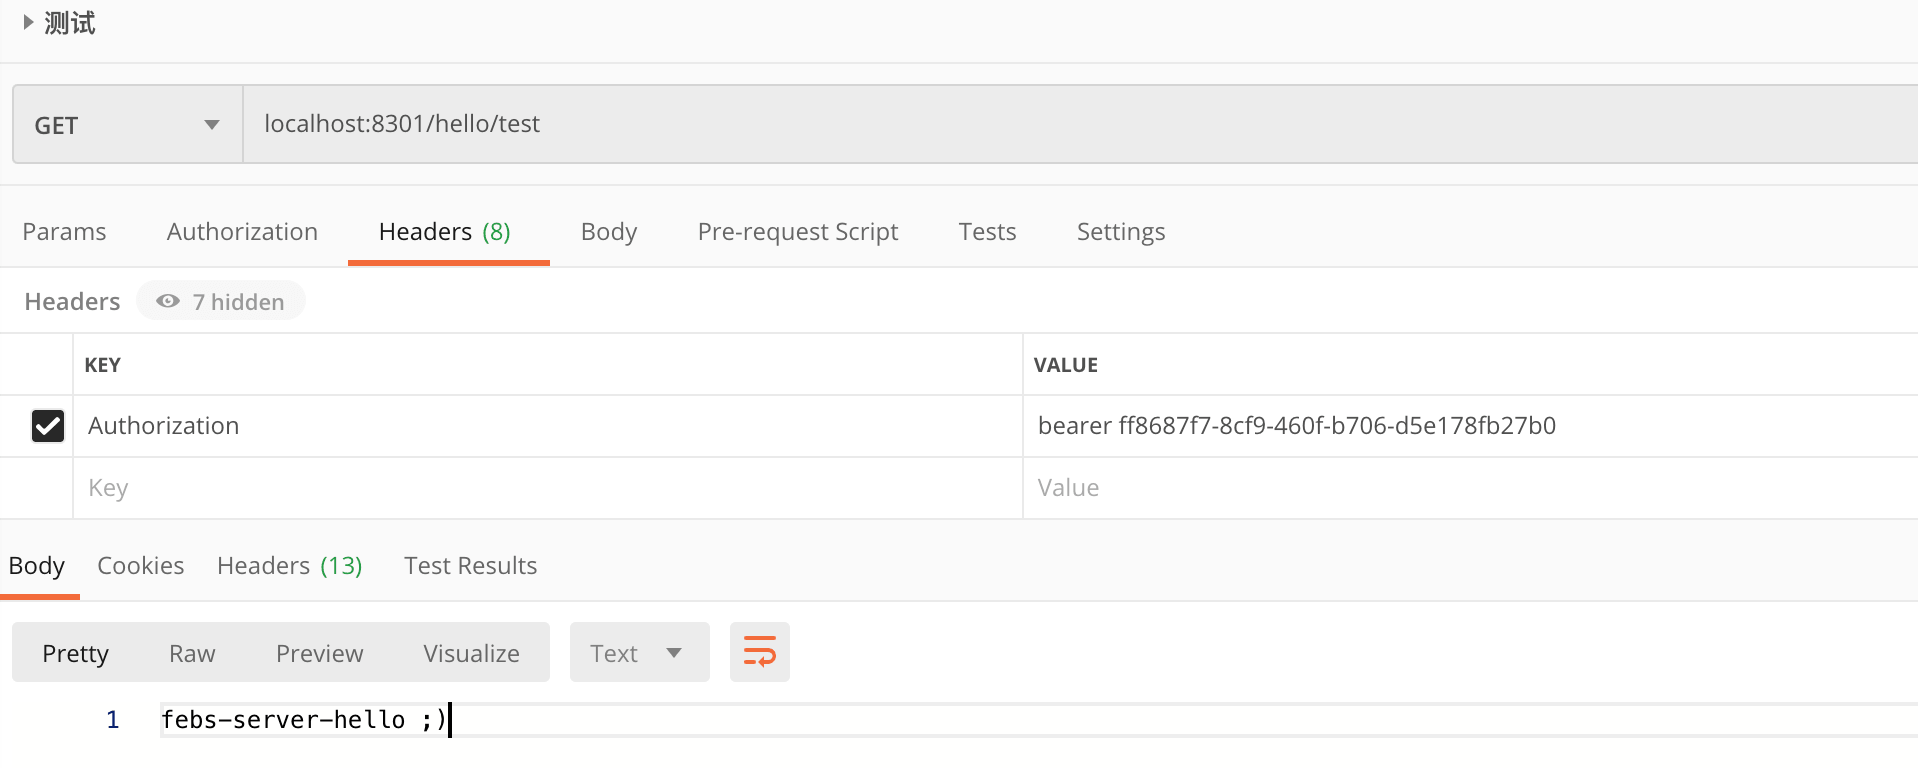
接口访问成功。不添加令牌时候:

结果返回401,访问令牌不合法时:
不通过网关,直接访问微服务接口时: 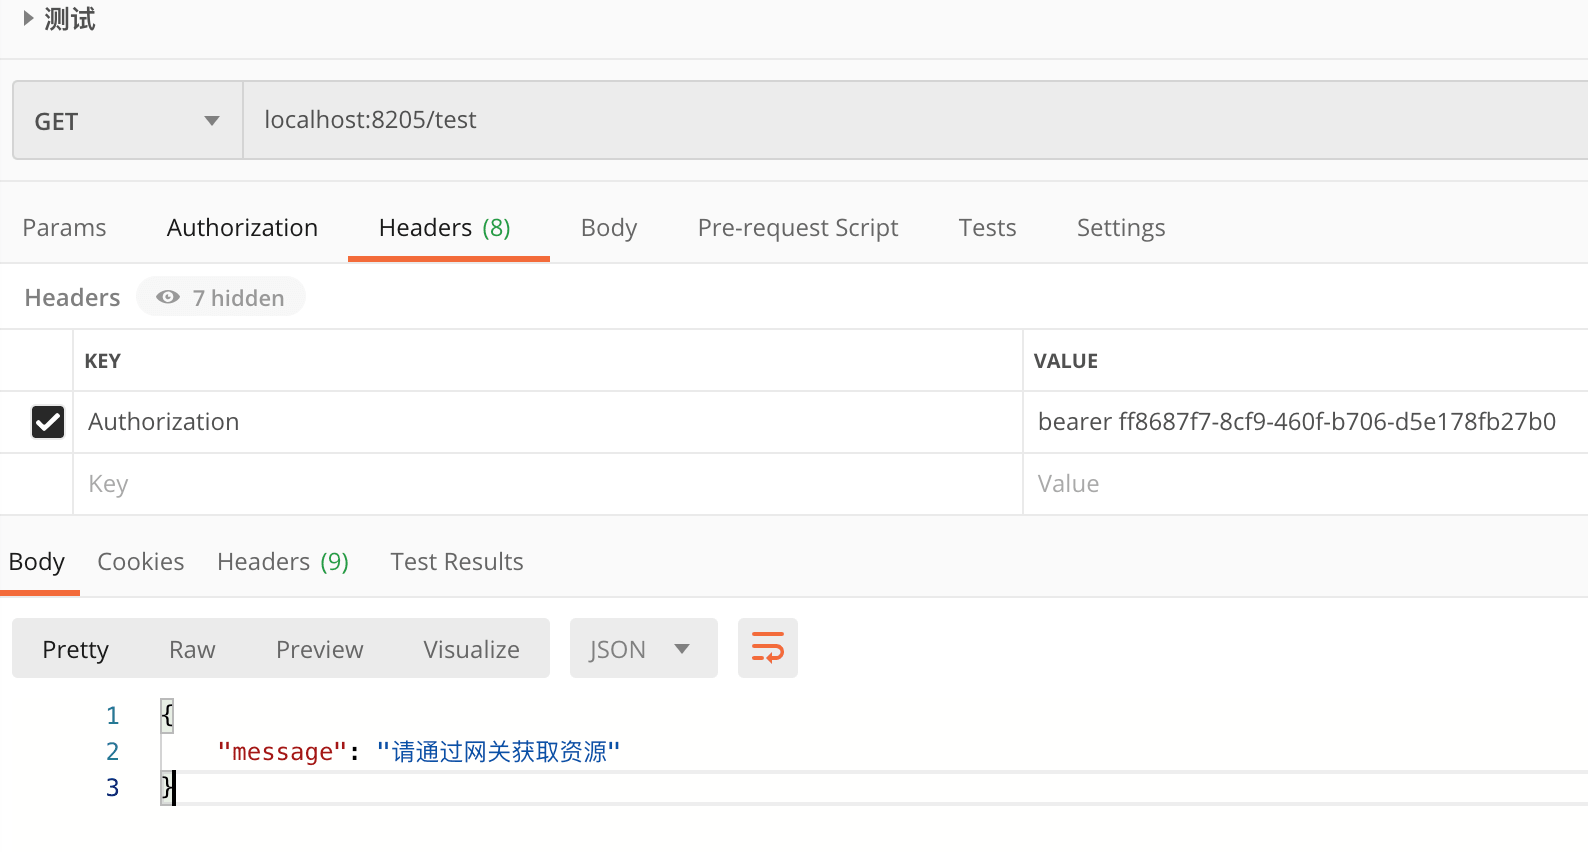
至此,我们已经成功将febs-server-hello整合到FEBS-Cloud中了。
如何控制权限
后端控制
后端资源权限控制使用Spring Cloud Security权限注解控制,比如下面这个资源只有拥有”user:add”权限的用户可以访问:
1 |
|
如果用户没有这个权限的话,访问该资源会返回403状态码。
更多注解可以参考:更多可用注解。
前端控制
前端系统中提供了Vue权限指令,比如只有拥有”user:add”权限的用户才能看到下面这个按钮:
1 | <button v-has-permission="['user:add']">新增用户</button> |
前端系统中,可用的Vue权限指令有:
| 指令 | 含义 | 示例 |
|---|---|---|
| v-hasPermission | 当用户拥有列出的权限的时候,渲染该元素 | <template v-hasPermission="'user:add','user:update'"><span>hello</span></template> |
| v-hasAnyPermission | 当用户拥有列出的任意一项权限的时候,渲染该元素 | <template v-hasAnyPermission="'user:add','user:update'"><span>hello</span></template> |
| v-hasNoPermission | 当用户不包含列出的的任意一项权限的时候,渲染该元素 | <template v-hasNoPermission ="'user:add','user:update'"><span>hello</span></template> |
记住一点,前端的权限控制只是为了提升用户体验,即使前端按钮隐藏了,但如果心怀叵测者知道了后端资源地址的话,还是可以直接访问该资源,所以后端资源的权限控制才是“真正的权限控制”。
权限分配
那么,如何才能让用户拥有“user:add”权限?
后端权限模块采用RBAC(Role-Based Access Control,基于角色的访问控制)的架构,简单地说,一个用户拥有若干角色,每一个角色拥有若干权限。这样,就构造成“用户-角色-权限”的授权模型。在这种模型中,用户与角色之间,角色与权限之间,一般者是多对多的关系。系统中的数据表也是基于该模型设计的。
比如,想要让MrBird这个用户拥有“user:add”权限,数据表就要存在如下关联数据:
- t_menu表中存在一个
menu_name为“新增用户”按钮,perms的值为user:add,假设这条数据的menu_id为1; - t_role表中存在一个角色,该角色的
role_id为2; - t_role_menu表中存在一条数据,用于关联
menu_id为1按钮和role_id为2的角色; - t_user表中存在一条
user_name为MrBird的用户,user_id为3; - t_user_role表中存在一条数据,用于关联
user_id为3的用户和role_id为2的角色。
通过上面的步骤,用户MrBird就拥有了”user:add”权限。所以后端系统模块接口无非就是围绕着这点实现的增删改查罢了。
项目打包
后端项目打包
后端项目打包很简单,只需要在febs-cloud模块下执行mvn clean和mvn package命令即可:
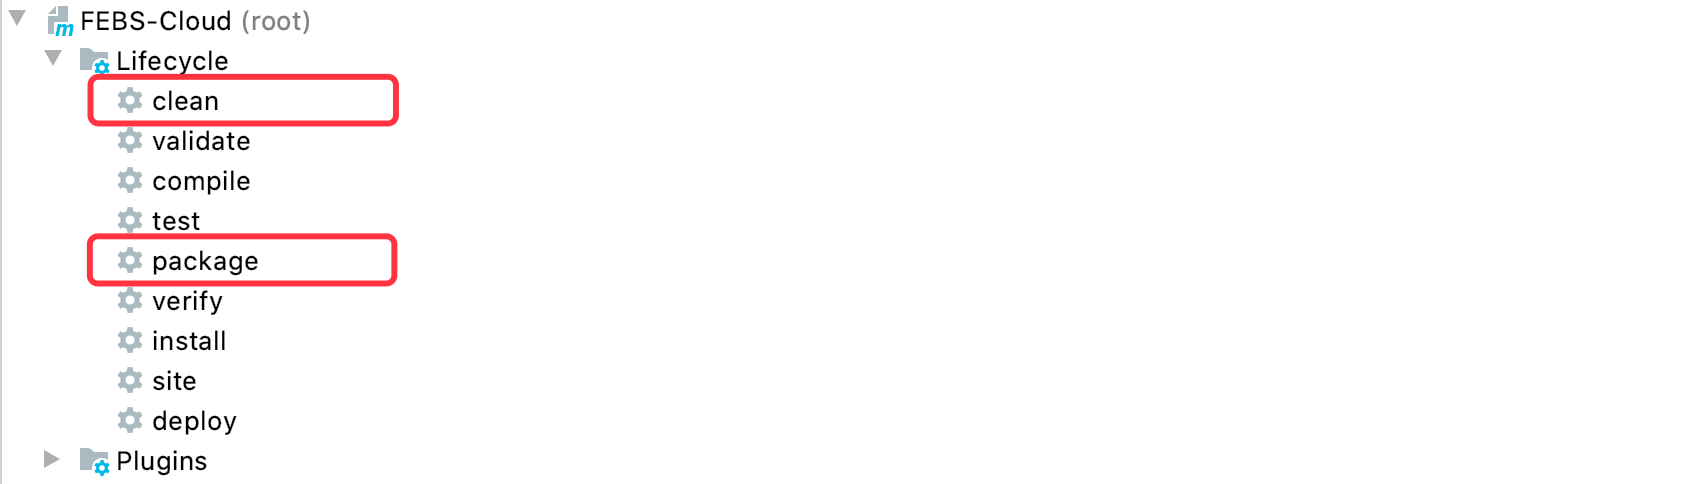
打包后,每个微服务子系统的target目录下会有个可执行fat jar。
前端项目打包
前端项目在打包前需要修改两个地方:
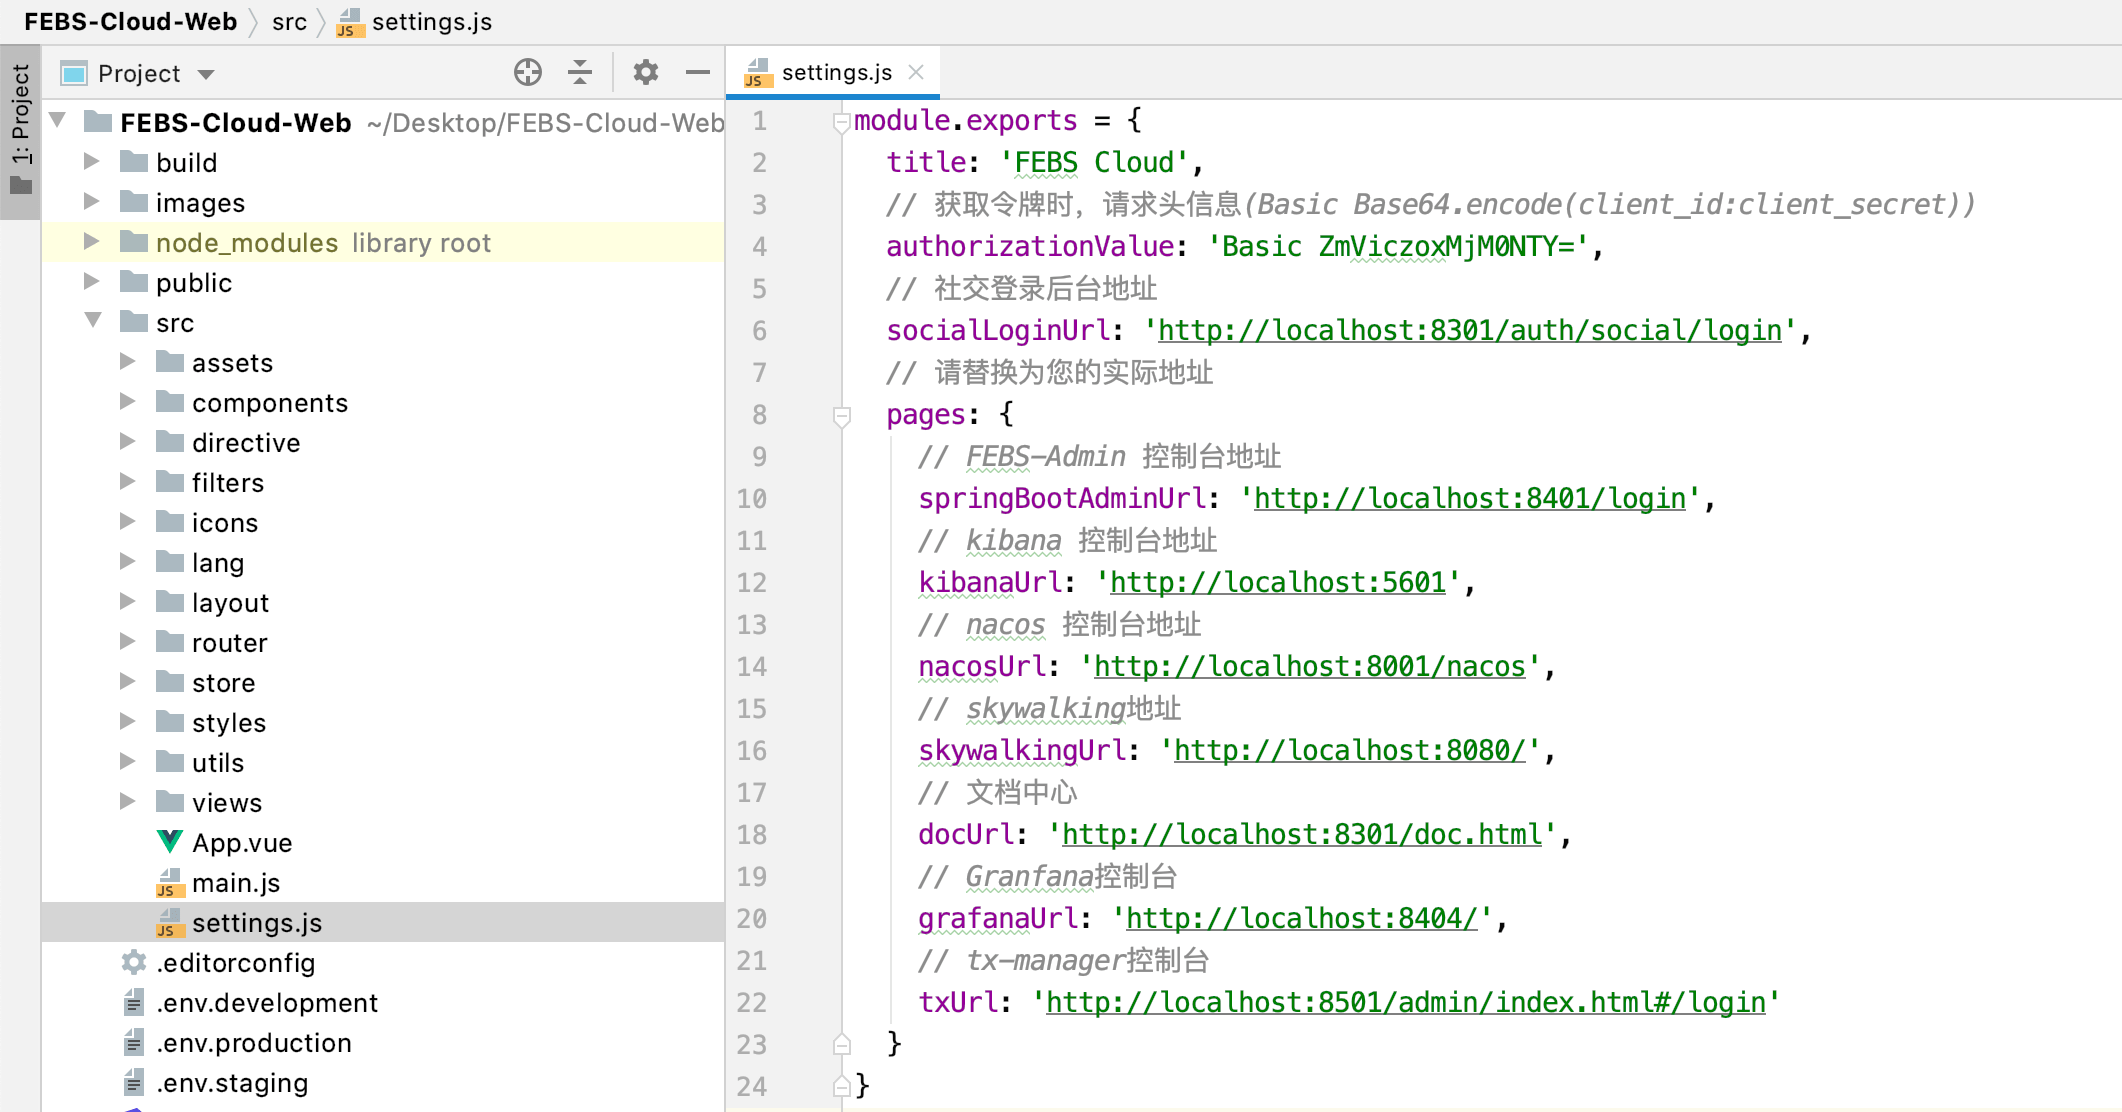
修改后端网关路径(.env.production):

修改监控面板中的第三方页面地址:
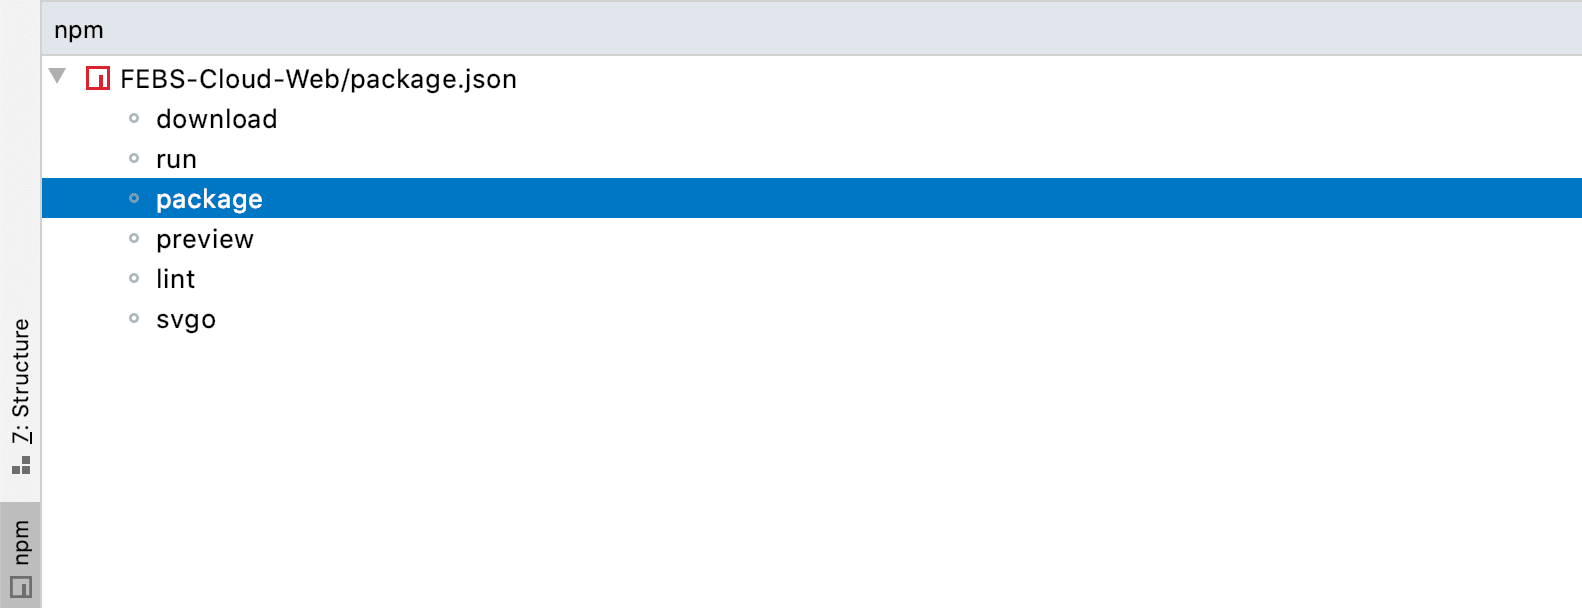
修改完后,双击npm窗口的package按钮进行打包:
执行完毕后,前端项目下会多出个dist目录,将该目录下的内容拷贝到Nginx html目录下部署即可:

PostMan测试
系统提供了几个关键接口的PostMan测试数据:FEBS-Cloud.postman_collection.json,直接使用PostMan导入即可。
后端项目的接口绝大部分都是受资源服务器保护的,所以在使用PostMan接口测试之前,需要先获取令牌。
使用PostMan发送 localhost:8301/auth/oauth/token POST请求,请求头内容如下所示:

Basic后面的值为认证服务器分配的client_id和client_secret经过如下格式后,Base64编码的值:

请求参数如下所示:

其中,key用于获取验证码,这里随便填即可,code为图形验证码的值。图像验证码的获取可以 通过浏览器访问:http://localhost:8301/auth/captcha?key=77774396:

发送请求后,PostMan返回如下格式响应,其中access_token就是访问令牌:
1 | { |
携带该令牌访问 localhost:8301/system/user?pageSize=10&pageNum=1&username=mrbird GET请求,请求头如下所示:

请求头中Authorization的值为token_type access_token组合值。发送该请求后,PostMan接受响应如下:

如果携带不正确的令牌,响应如下:

第三方登录使用指南
本教程以GitHub登录为例,其他社交登录以此类推即可。
1.添加hosts解析
修改本地hosts,添加如下解析: 
2.到GitHub申请client
打开:https://github.com/settings/developers,点击new OAuth app: 
 填写好后,点击Register application即可。申请好后,可以看到client id和client secret:
3.到Nacos中添加配置:
修改febs-auth-dev.yaml配置:  填写Client id 、client secret和redirect-url(就是前面申请填写的回调地址),填写好后,点击发布即可,然后重启febs-auth服务。
4.修改febs-cloud-web
 修改好后启动febs-cloud-web。
5.测试效果
打开登录页,点击其他登录方式,选择第三方登录:  点击GitHub图标,会弹出GitHub登录页面:
  点击授权后:
  因为当前GitHub账号并没有关联系统用户,所以会弹出这个提示框,你有两个选择: 1.绑定现有的系统用户; 2.如果你没有系统用户账号,那么可以选择“注册并登录”。 这里我们选择“绑定并登录”:
  输入mrbird,123456,然后点击“绑定并登录”按钮就可,如果你输入的用户名和密码正确的话,系统会完成绑定并登录:
  下次再用该github账号登录的话,系统就可以直接进去了,不用再绑定了。
6.解绑与重新绑定
切换到个人中心:  因为当前账号已经绑定了GitHub,随意GitHub会是彩色的(因为github本身是黑色的,所以几乎没什么区别⊙﹏⊙∥)。其他社交账号没有绑定,所以是灰色的。
点击github图标,可以直接进行解绑操作: 
 解绑后,再次点击GitHub图标,可以进行重新绑定:
  规则: 1.一个社交帐户只能绑定一个系统用户; 2.一个系统账户可以绑定多个同类型的社交账号。
7.其他社交账client id、client secret申请地址:
QQ:https://connect.qq.com/manage.html,比较麻烦,需要有已经备案的服务器和域名。 Gitee:https://gitee.com/oauth/applications,简单,申请过程和github类似。 钉钉:https://open-dev.dingtalk.com/#/loginMan 腾讯云:https://dev.tencent.com/user/account/setting/applications,实际上就是coding,过程也较简单; 微软:https://portal.azure.com/#blade/Microsoft_AAD_RegisteredApps/ApplicationsListBlade,回调地址必须是https的,所以本地没办法模拟。
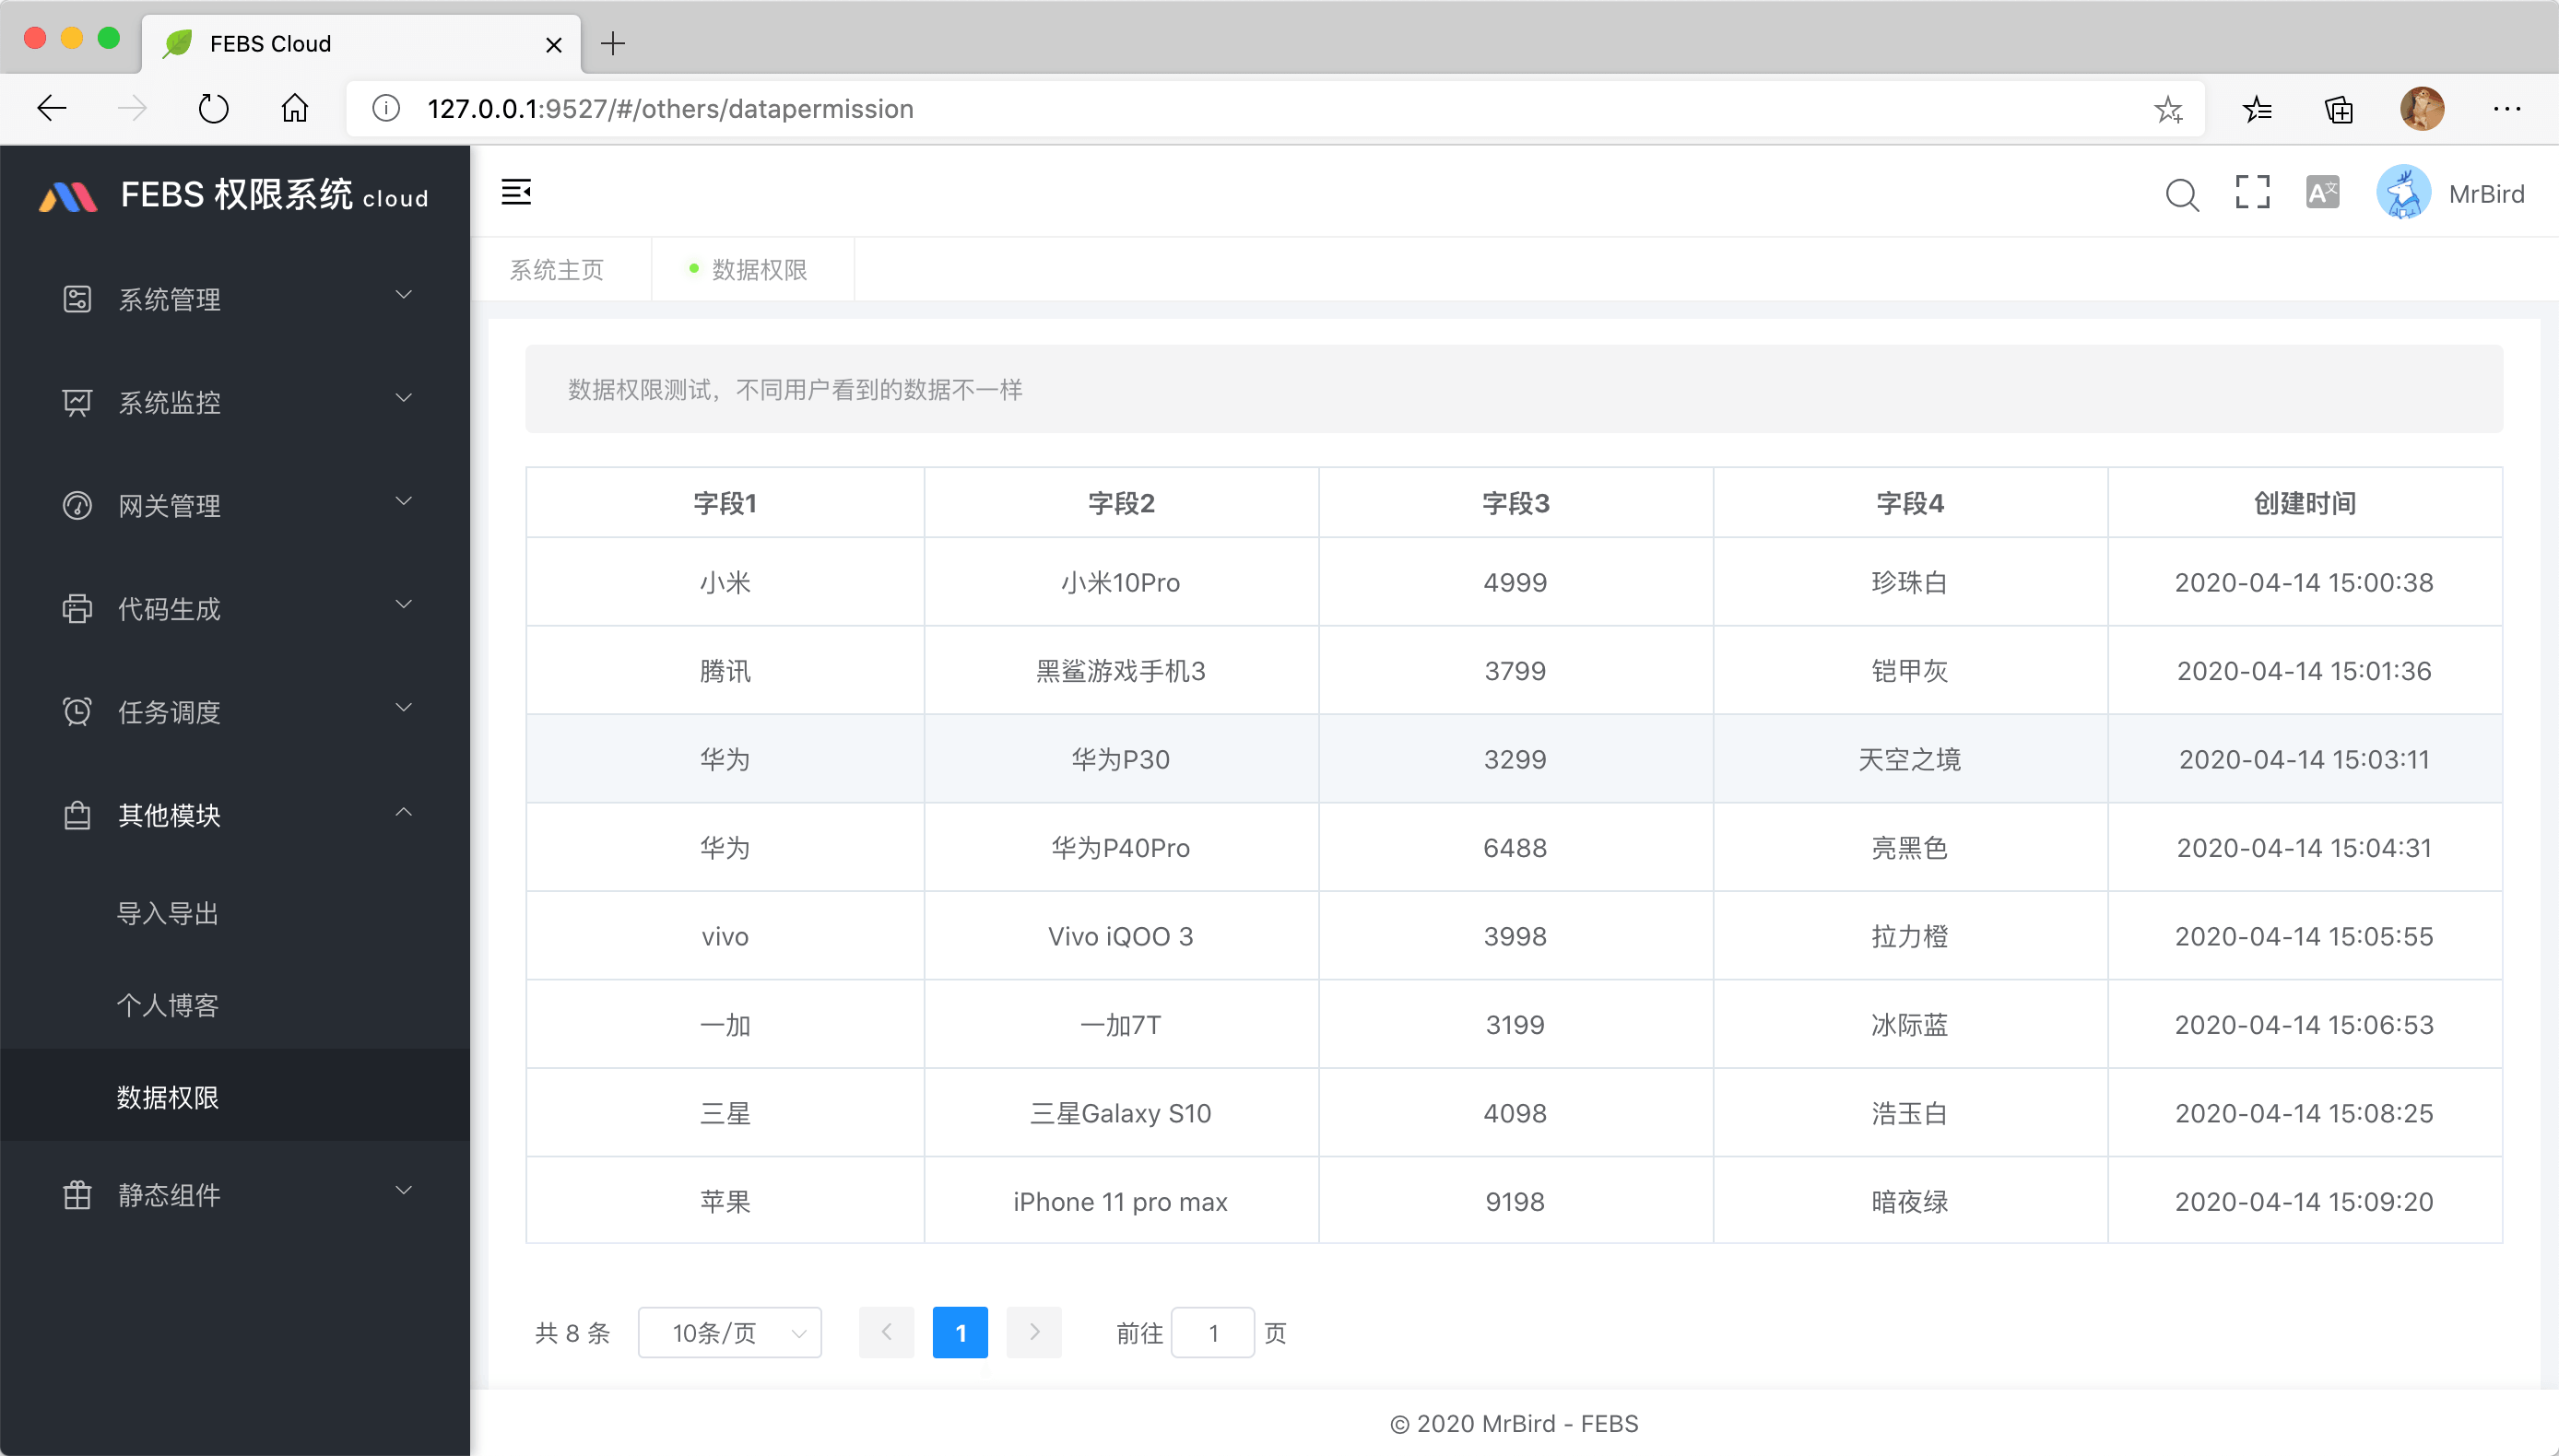
数据权限
所谓数据权限就是希望不同的用户登录系统看到的数据不一样。数据权限通常是通过部门或者组织架构来绑定的,目前系统没有组织架构,只有部门数据,所以在FEBS Cloud中,数据权限通过部门ID绑定。
数据权限的使用还有一个前提就是,目标数据必须包含部门信息,比如febs_cloud_base数据库中的t_data_permission_test数据表:
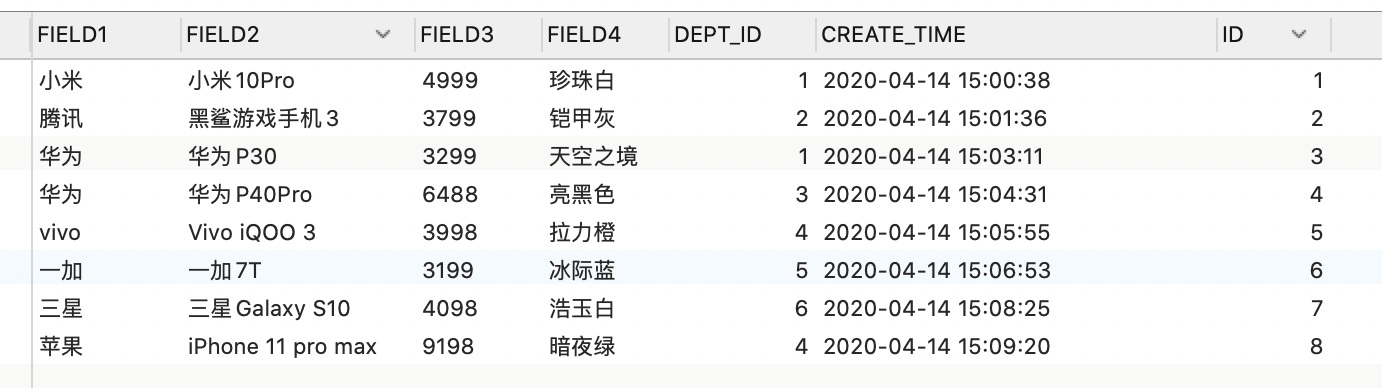
其中有一列为DEPT_ID。前端页面数据权限就是查询这张表数据:
下面演示下数据权限如何使用。
首先,找到目标数据查询的Dao层,t_data_permission_test数据查询的Dao层为febs-server-system下的DataPermissionTestMapper:
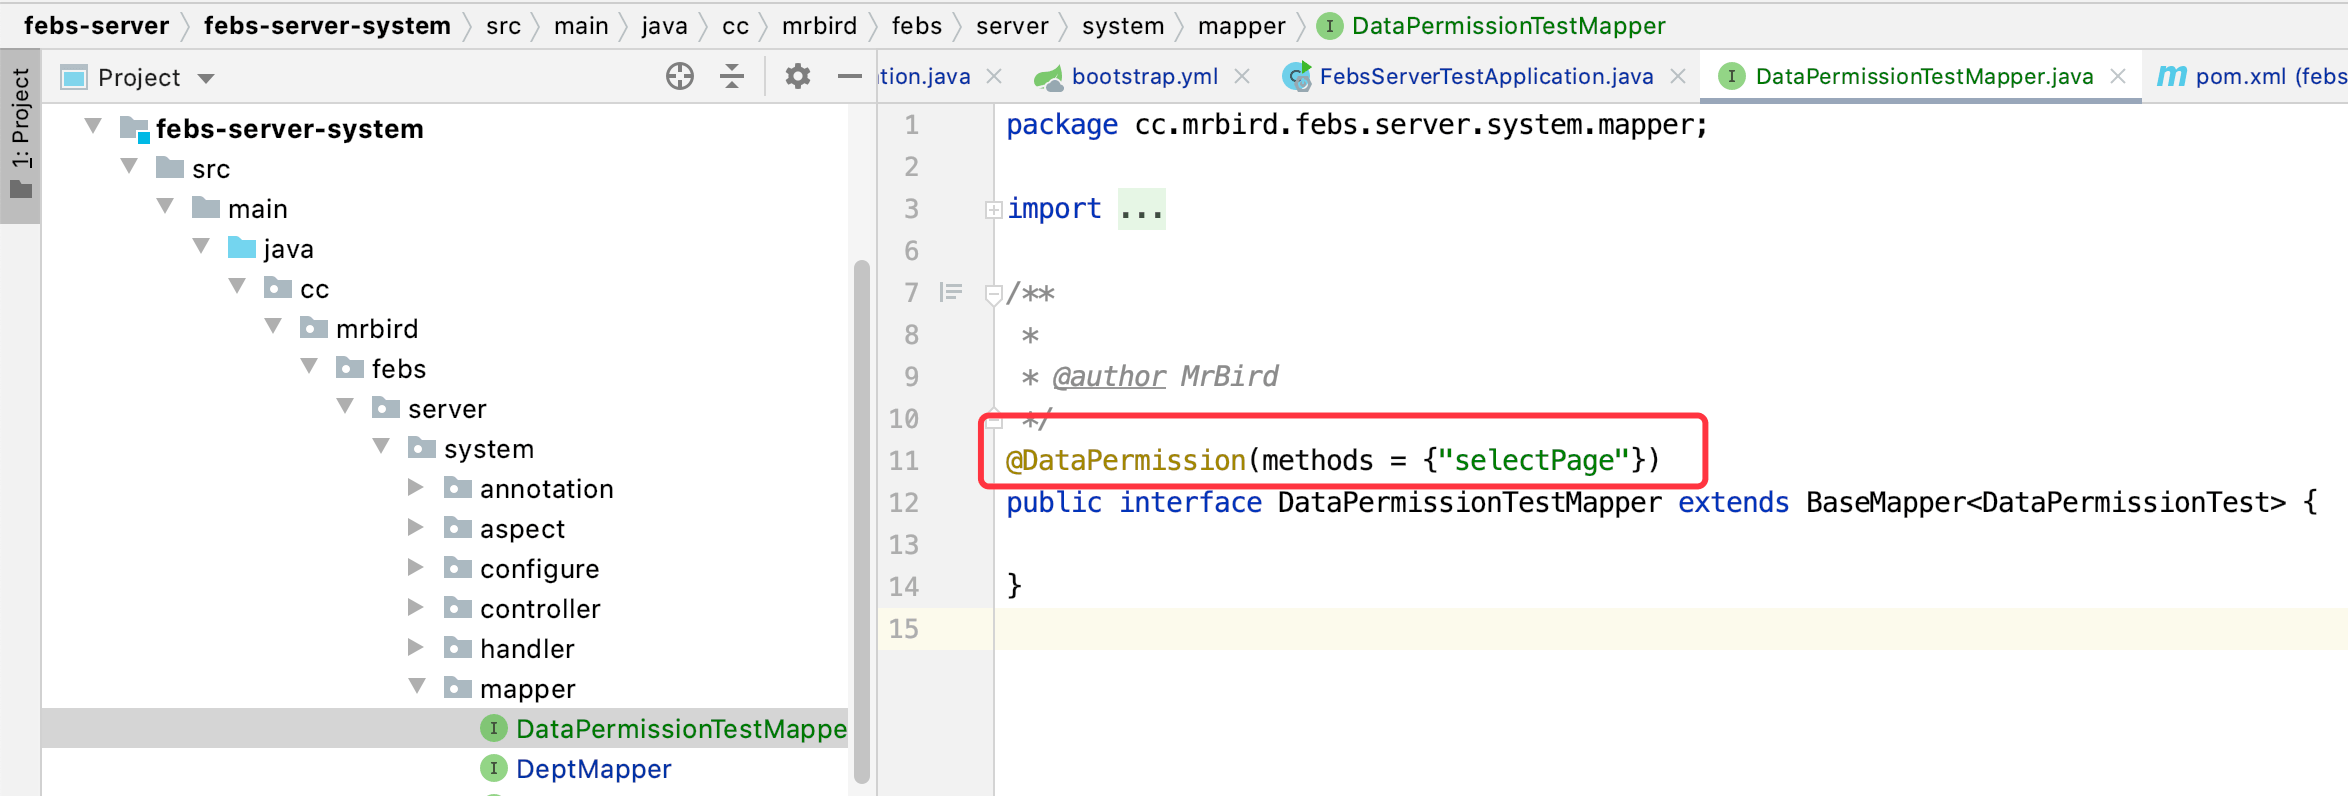
@DataPermission(methods = {"selectPage"})注解用于控制数据权限,含义是:DataPermissionTestMapper的selectPage方法开启数据权限。
开启后,数据查询前系统会在原始查询SQL中拼接xx.dept_id in (xxx)语句:

其中(1,2,3,4,5,6)说明当前用户具有部门ID为1,2,3,4,5,6的数据权限。那么用户拥有哪些数据权限在哪配置呢?点击用户管理中的用户修改按钮:

可以看到,当前用户拥有所有部门的数据权限。
微服务子系统要使用数据权限的功能,必须先引入
febs-common-datasource-starter依赖。
Feign的使用
Feign用于一个微服务子系统调用另一个微服务子系统的接口,本质就是http请求。但是我们的微服务都是受保护的,没有合法的令牌是无法获取到数据的,并且Fein默认并不会帮我们传递令牌。
综于上述原因,这里有必要提及下当前系统中Feign的使用方式。
假如现在需要在febs-server-test系统中调用febs-server-system系统中的/user/list接口数据,我们需要在febs-server-test系统中进行如下操作(前提是已经引入了febs-common-security-starter依赖):
- 系统入口类上添加
@EnableFeignClients注解; 系统配置文件中添加如下配置:
1
2
3
4
5feign:
hystrix:
enabled: true
hystrix:
shareSecurityContext: true编写FeignClient:
1
2
3
4
5
6
7
8
9
10
11
12
13(value = FebsServerConstant.FEBS_SERVER_SYSTEM, contextId = "userServiceClient", fallbackFactory = RemoteUserServiceFallback.class)
public interface IRemoteUserService {
/**
* remote /user endpoint
*
* @param queryRequest queryRequest
* @param user user
* @return FebsResponse
*/
("user")
FebsResponse userList(@RequestParam("queryRequest") QueryRequest queryRequest, @RequestParam("user") SystemUser user);
}
通过这个FeignClient调用即可。
获取当前用户信息
febs-common-core包下的FebsUtil工具类中包含如下方法:

全局异常控制
所谓的全局异常捕获指的是系统的最外层Controller层的异常捕获。febs-common-core包中的BaseExceptionHandler类中定义了系统中几种常见的异常处理:
1 | 4j |
微服务子系统只需要继承该类即可:
1 |
|
后续微服务子系统中有新的异常需要单独捕获处理的话,只需要在GlobalExceptionHandler中定义即可。
开启系统API文档
目前较为流行的自动api生成框架为swagger,不过UI界面并不怎么适合国人的使用习惯,FEBS Cloud集成的是Knife4J,下面演示下如何开启微服务API文档生成。
以前面“如何添加自己的子系统”中搭建的febs-server-hello微服务子系统为例,需要开启API自动生成需要如下步骤:
pom中引入febs-common-doc-starter依赖:
1
2
3
4
5<dependency>
<groupId>cc.mrbird</groupId>
<artifactId>febs-common-doc-starter</artifactId>
<version>${febs-cloud.version}</version>
</dependency>系统配置文件bootstrap.yml中添加如下配置:
1
2
3
4
5
6
7
8
9
10
11
12
13
14febs:
doc:
enable: true
title: ${spring.application.name}文档
base-package: cc.mrbird.febs.server.hello.controller
description: ${febs.doc.title}
name: MrBird
email: 852252810@qq.com
url: https://mrbird.cc
version: 2.0-RELEASE
cloud:
security:
enable: true
anon-uris: /v2/api-docs,/v2/api-docs-ext
配置具体含义IDEA会提示(如果没有提示,只需要编译下项目即可):
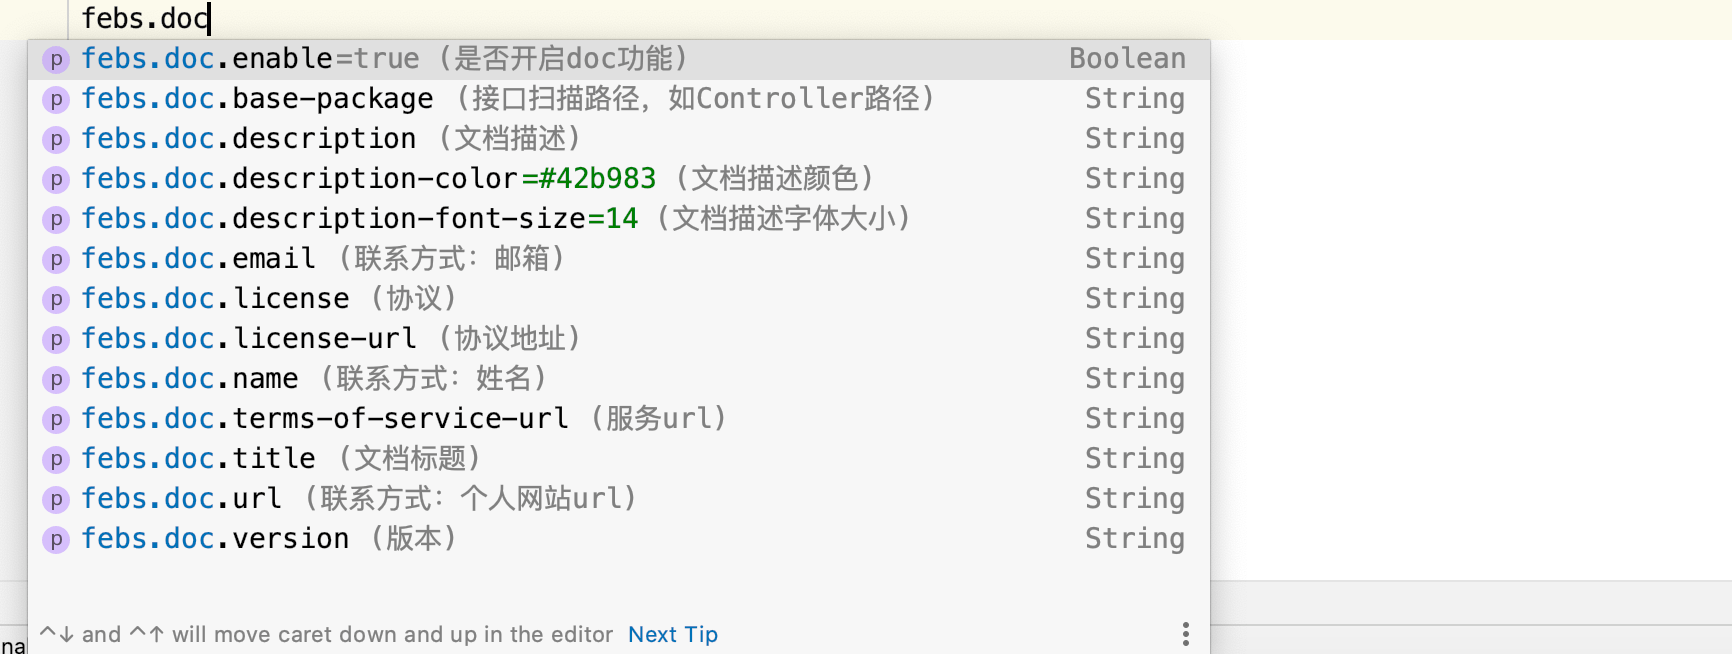
此外,必须通过febs.cloud.security.anno-uris配置指定/v2/api-docs,/v2/api-docs-ext免认证资源。
重启febs-server-hello系统,使用浏览器访问:http://localhost:8301/hello/v2/api-docs:
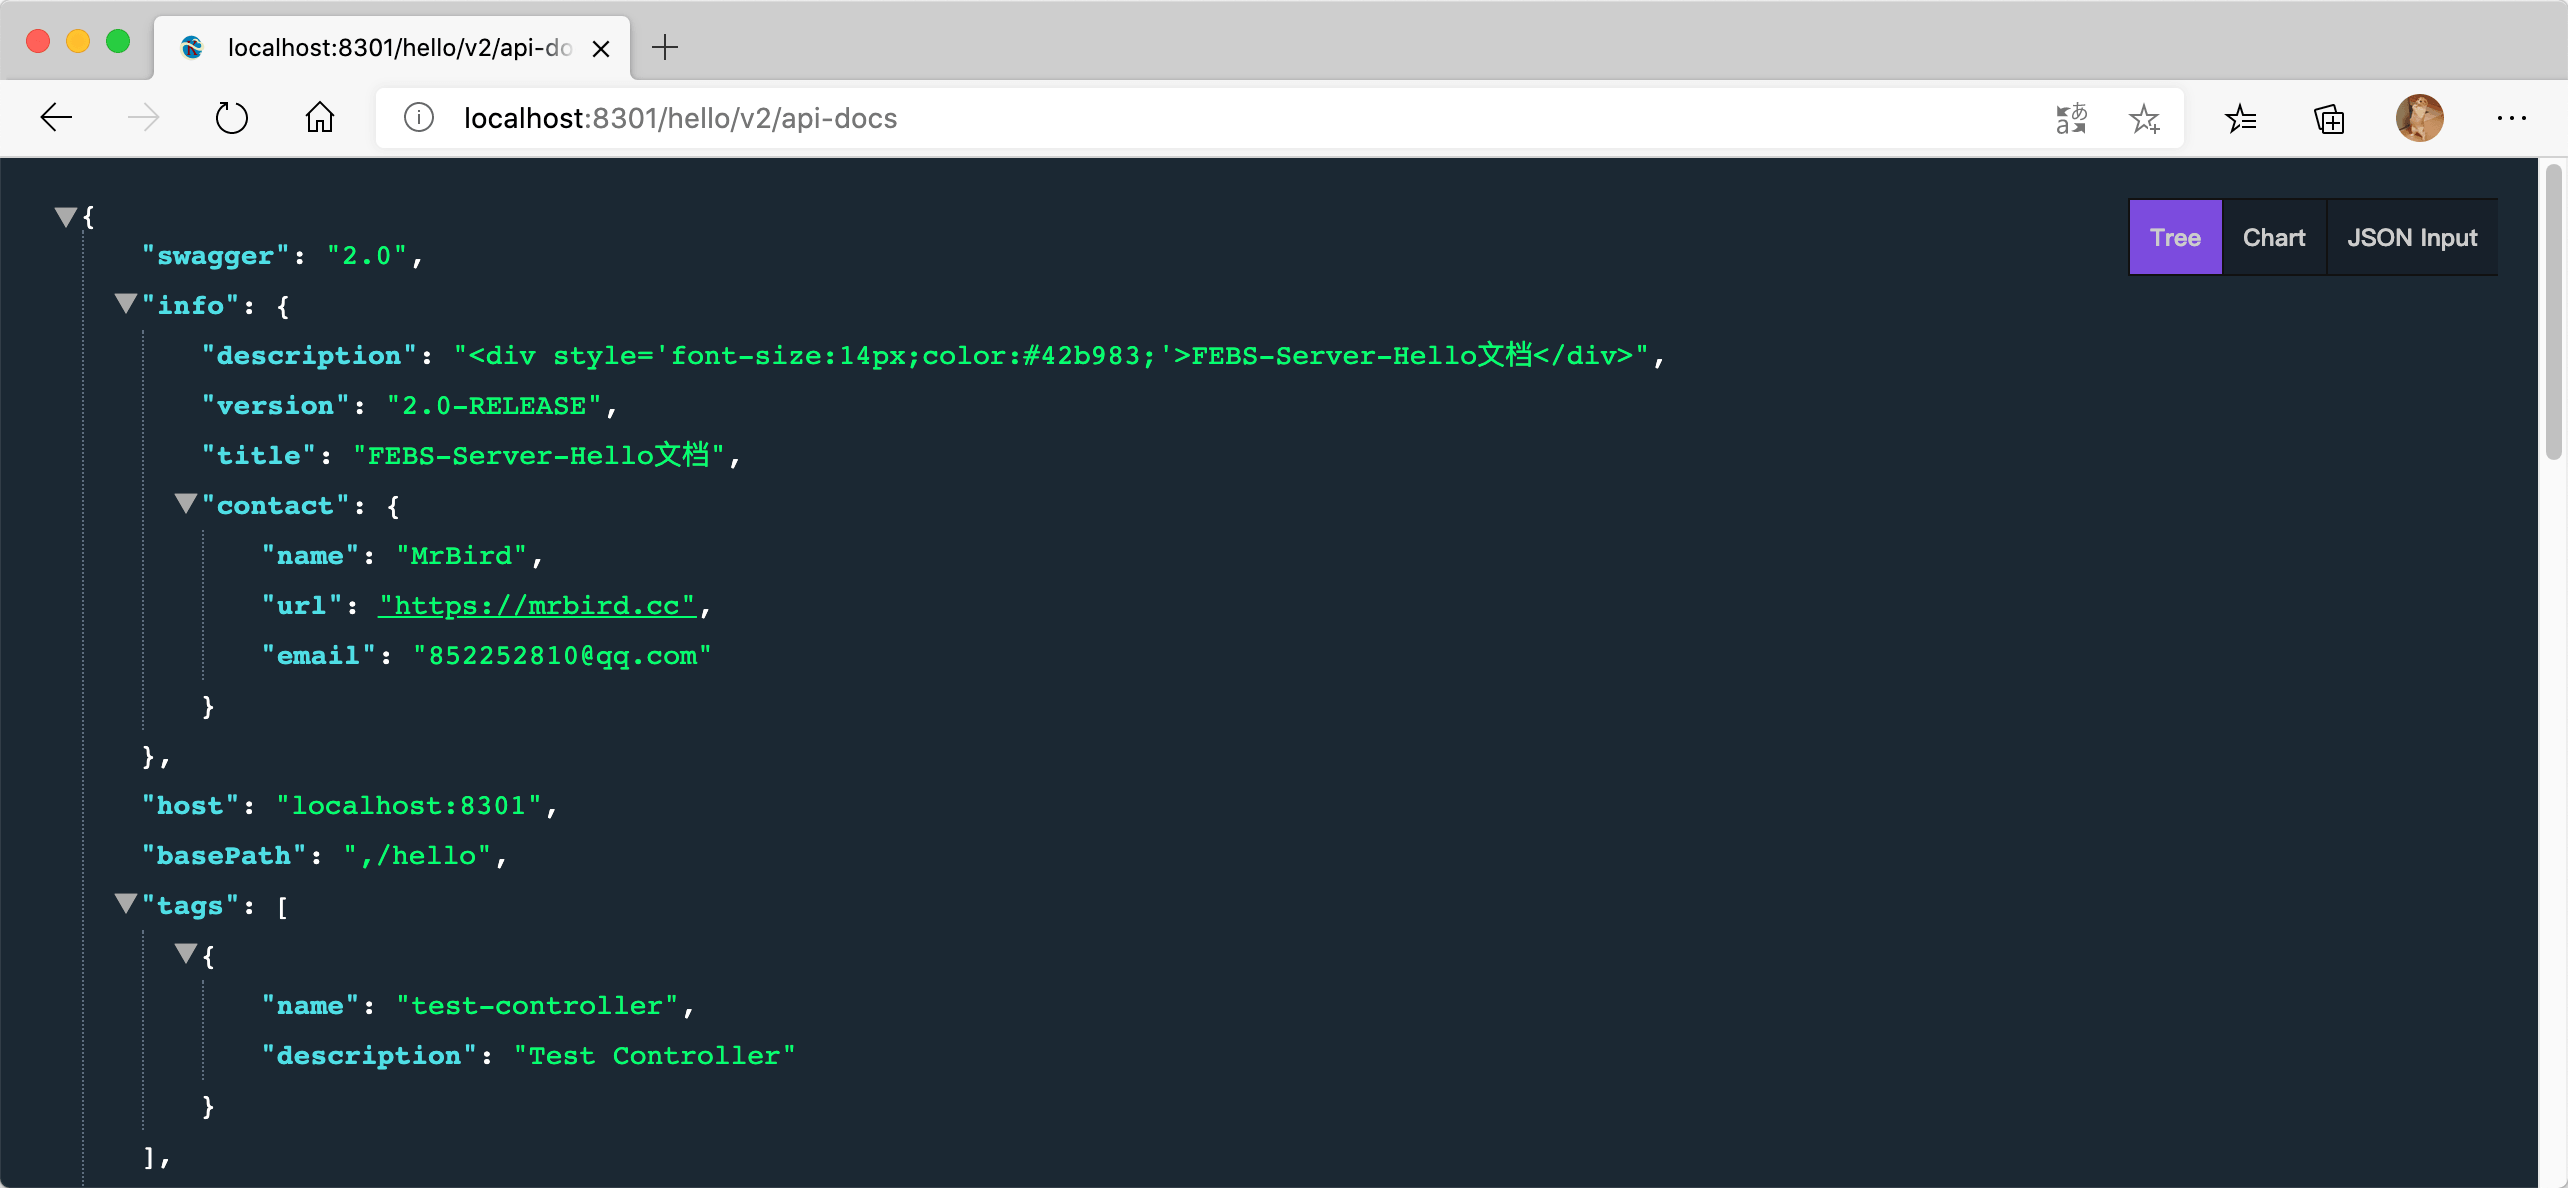
可以看到,API相关的JSON数据有了,接下来就是展示它了。在febs-gateway的配置类中(写在Nacos控制台的febs-gateway.yaml中了)添加:
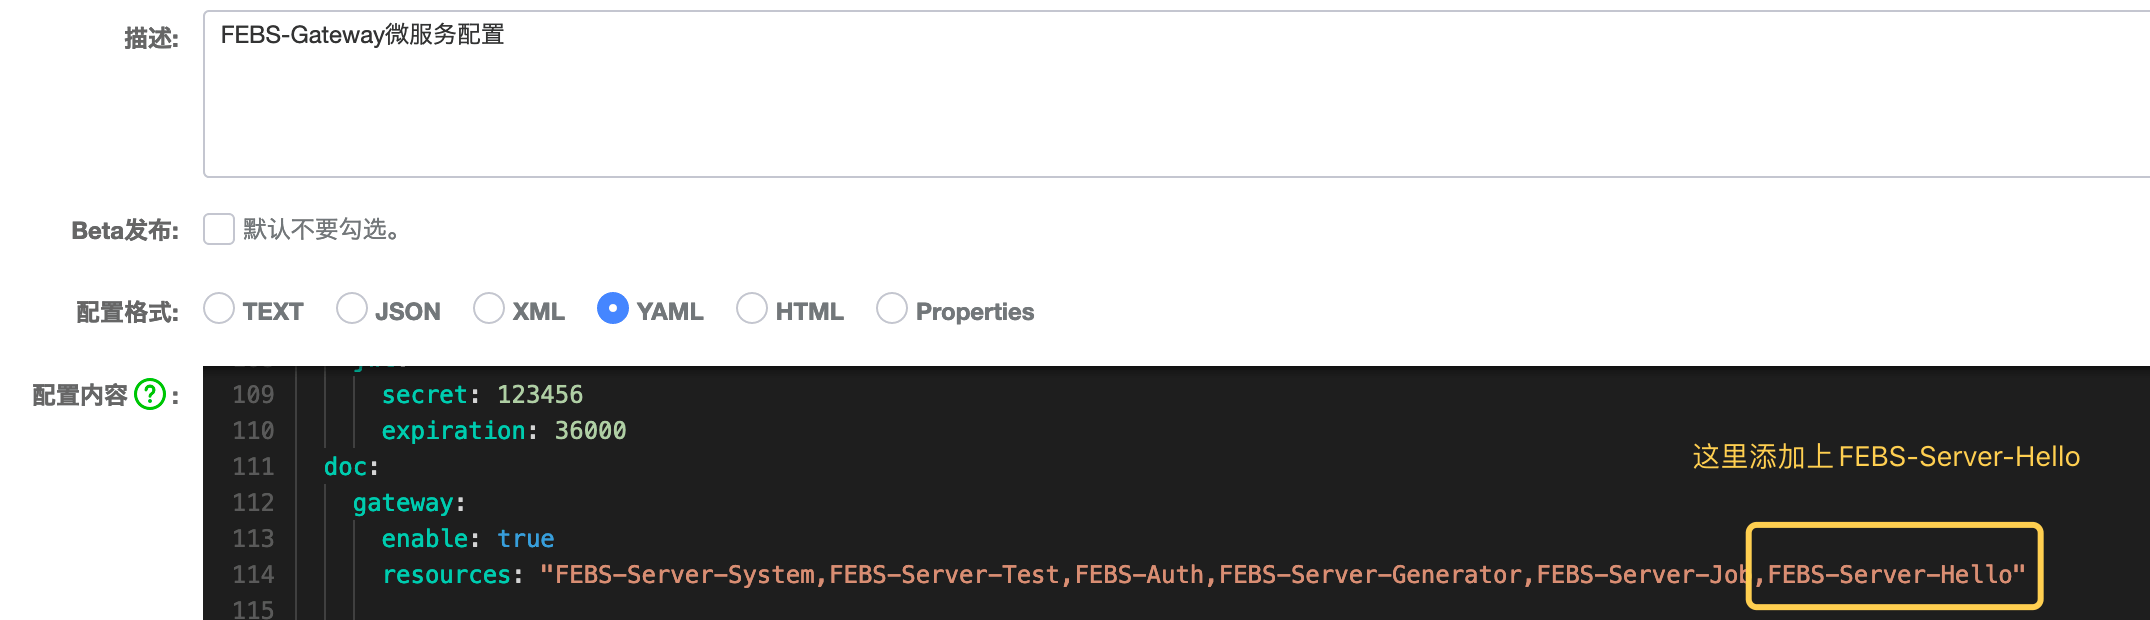
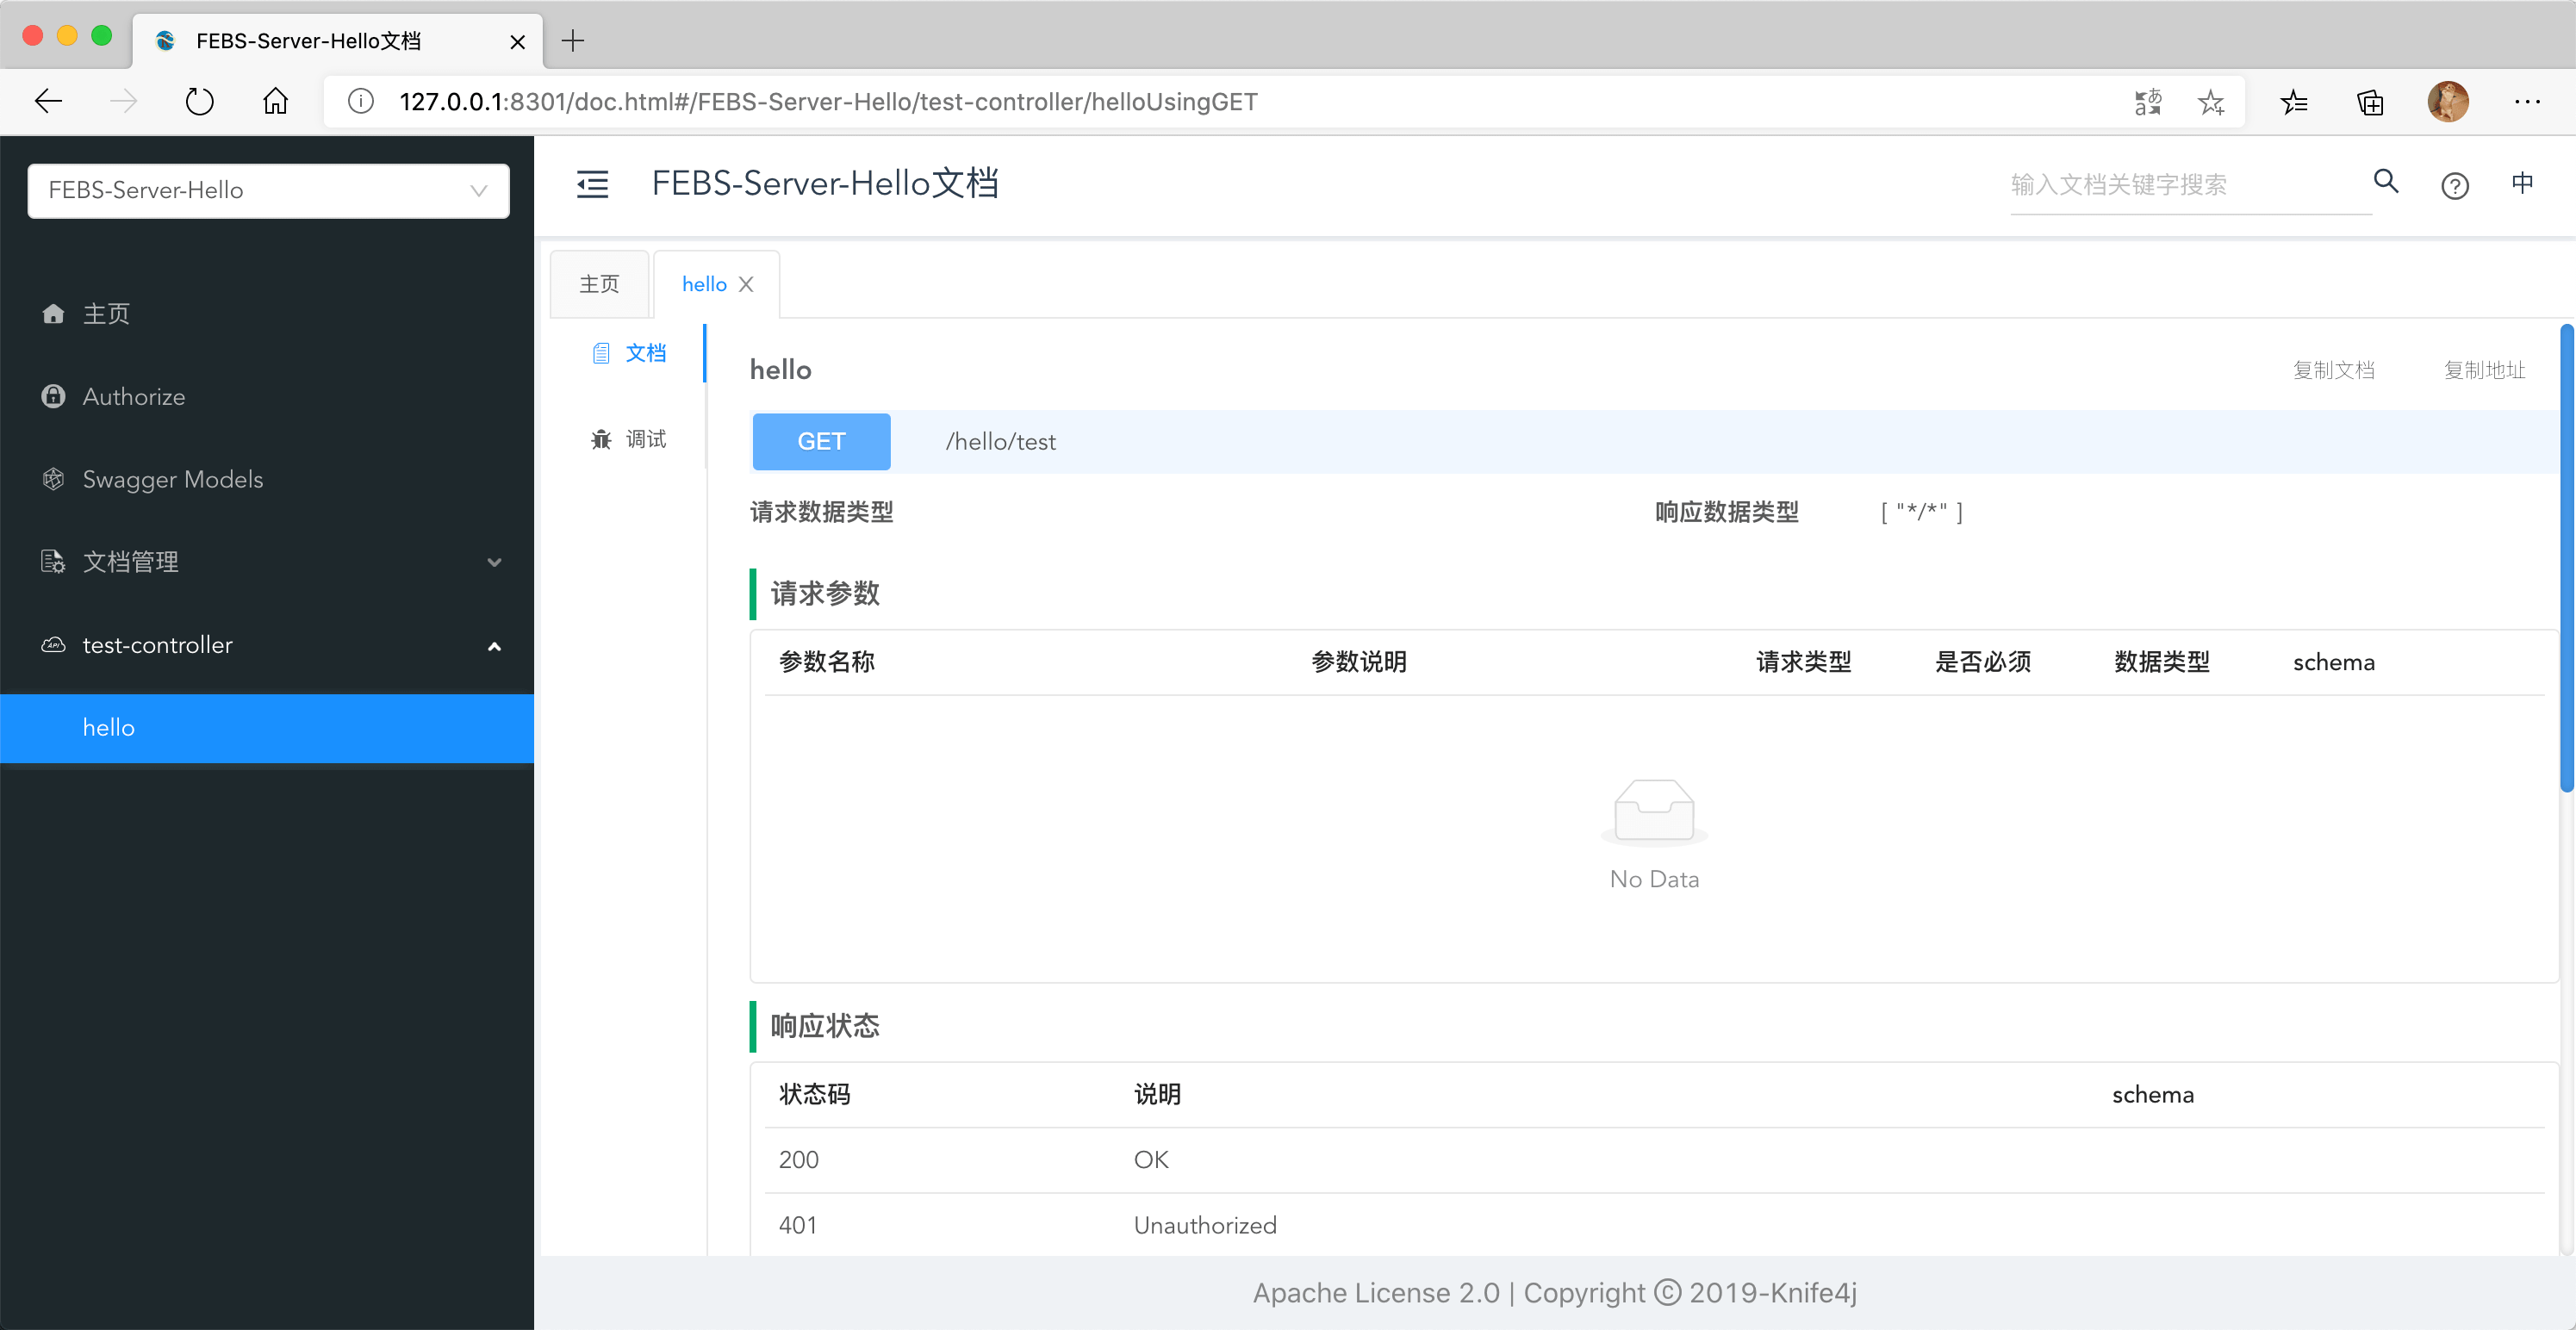
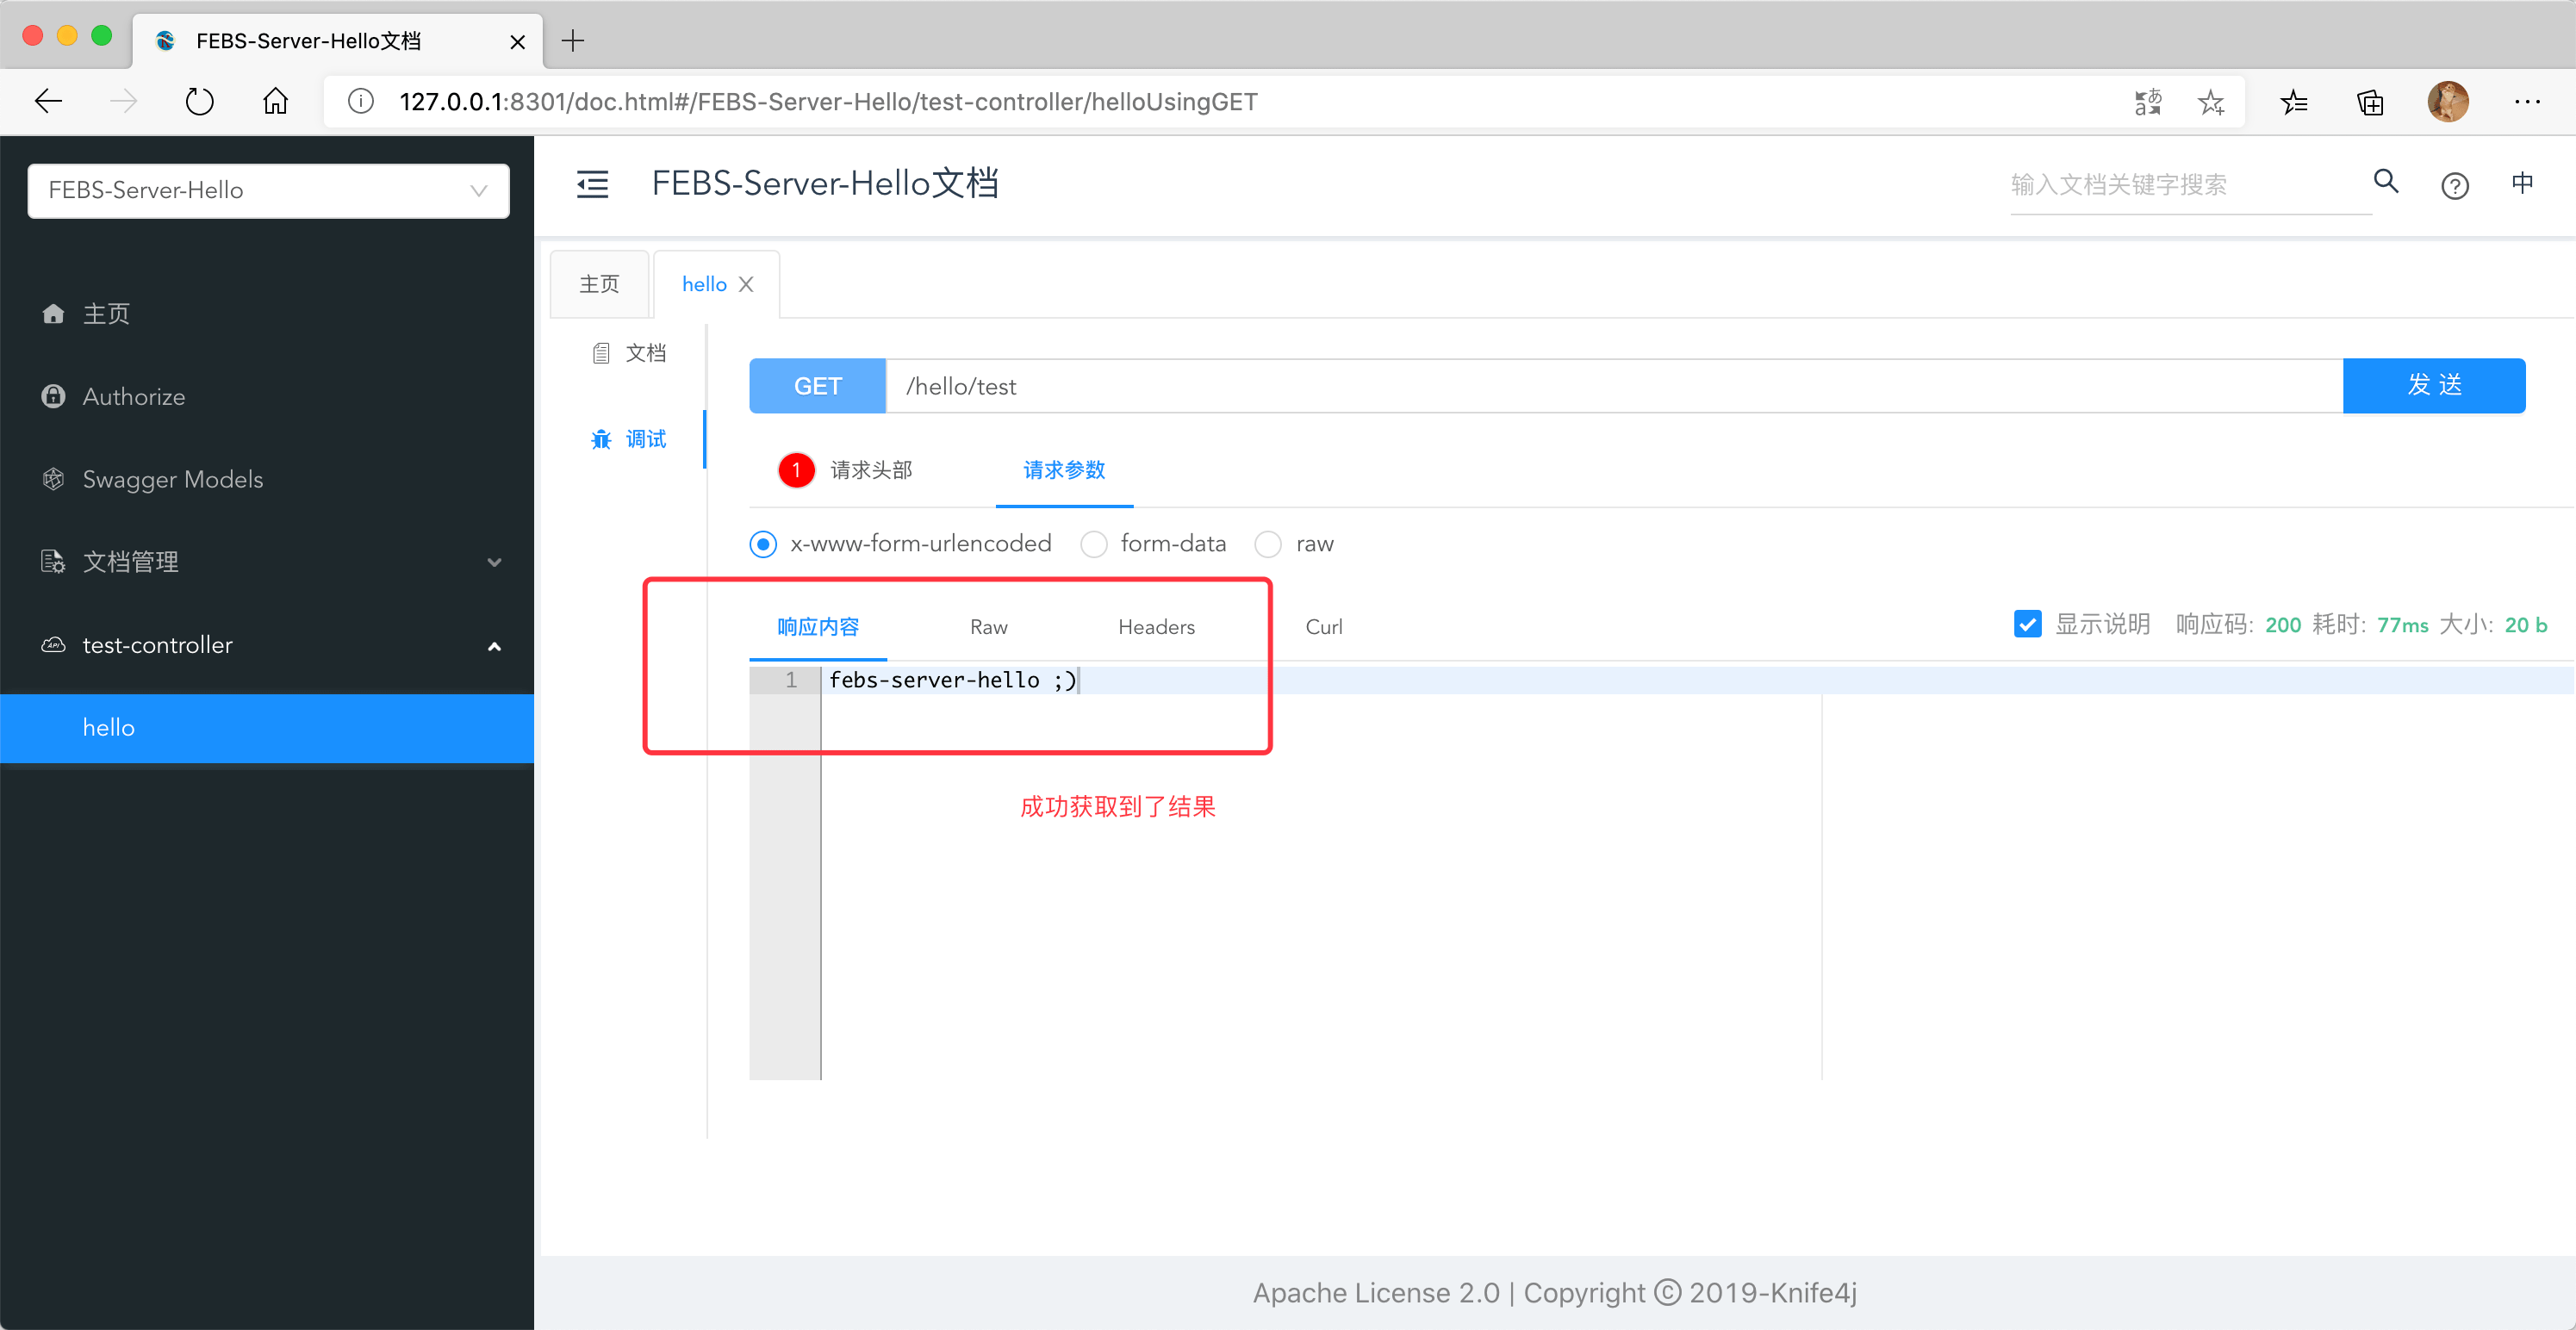
修改后,通过浏览器访问:http://127.0.0.1:8301/doc.html

starter使用介绍
在“如何添加自己的子系统”和“开启系统API文档”两节中,我们已经讲解了febs-common-security-starter和febs-common-doc-starter的使用了,所以这里简单介绍下剩下的febs-common-redis-starter和febs-common-datasource-starter的使用方式。
以在“如何添加自己的子系统”一节中创建的febs-server-hello为例,要在该微服务子系统中添加数据库配置需要进行如下操作:
pom中引入febs-common-datasource-starter依赖:
1
2
3
4
5<dependency>
<groupId>cc.mrbird</groupId>
<artifactId>febs-common-datasource-starter</artifactId>
<version>${febs-cloud.version}</version>
</dependency>项目配置文件bootstrap.yml中添加数据库配置和mybatis相关配置:
1
2
3
4
5
6
7
8
9
10
11
12
13
14
15
16
17
18
19
20
21
22
23
24
25spring:
datasource:
dynamic:
hikari:
connection-timeout: 30000
max-lifetime: 1800000
max-pool-size: 15
min-idle: 5
connection-test-query: select 1
pool-name: FebsHikariCP
primary: base
datasource:
base:
username: root
password: 123456
driver-class-name: com.mysql.cj.jdbc.Driver
url: jdbc:mysql://${mysql.url}:3306/febs_cloud_base?useUnicode=true&characterEncoding=UTF-8&useJDBCCompliantTimezoneShift=true&useLegacyDatetimeCode=false&serverTimezone=GMT%2b8
mybatis-plus:
type-aliases-package: cc.mrbird.febs.common.core.entity.system
mapper-locations: classpath:mapper/*.xml
configuration:
jdbc-type-for-null: null
global-config:
banner: false
如果需要添加多数据源只需在spring.datasource.dynamic.datasource下继续添加配置即可,然后Dao层或者Servcie层通过@DS注解切换(因为数据层框架采用mybatis-plus,所以它怎么玩,FEBS-Cloud里也怎么玩)。
- IDEA中添加mysql.url环境变量。
此外,需要在febs-service-hello中添加redis需要进行如下操作:
pom中添加febs-common-redis-starter依赖:
1
2
3
4
5<dependency>
<groupId>cc.mrbird</groupId>
<artifactId>febs-common-redis</artifactId>
<version>${febs-cloud.version}</version>
</dependency>项目配置文件bootstap.yml中添加如下配置:
1
2
3
4
5
6
7
8
9
10
11
12spring:
redis:
database: 0
host: ${redis.url}
port: 6379
lettuce:
pool:
min-idle: 8
max-idle: 500
max-active: 2000
max-wait: 10000
timeout: 5000IDEA环境变量中添加redis.url配置
- 在需要使用reids的地方注入RedisServcie:
1
2
private RedisService redisService;
RedisService包含了许多实用的方法:
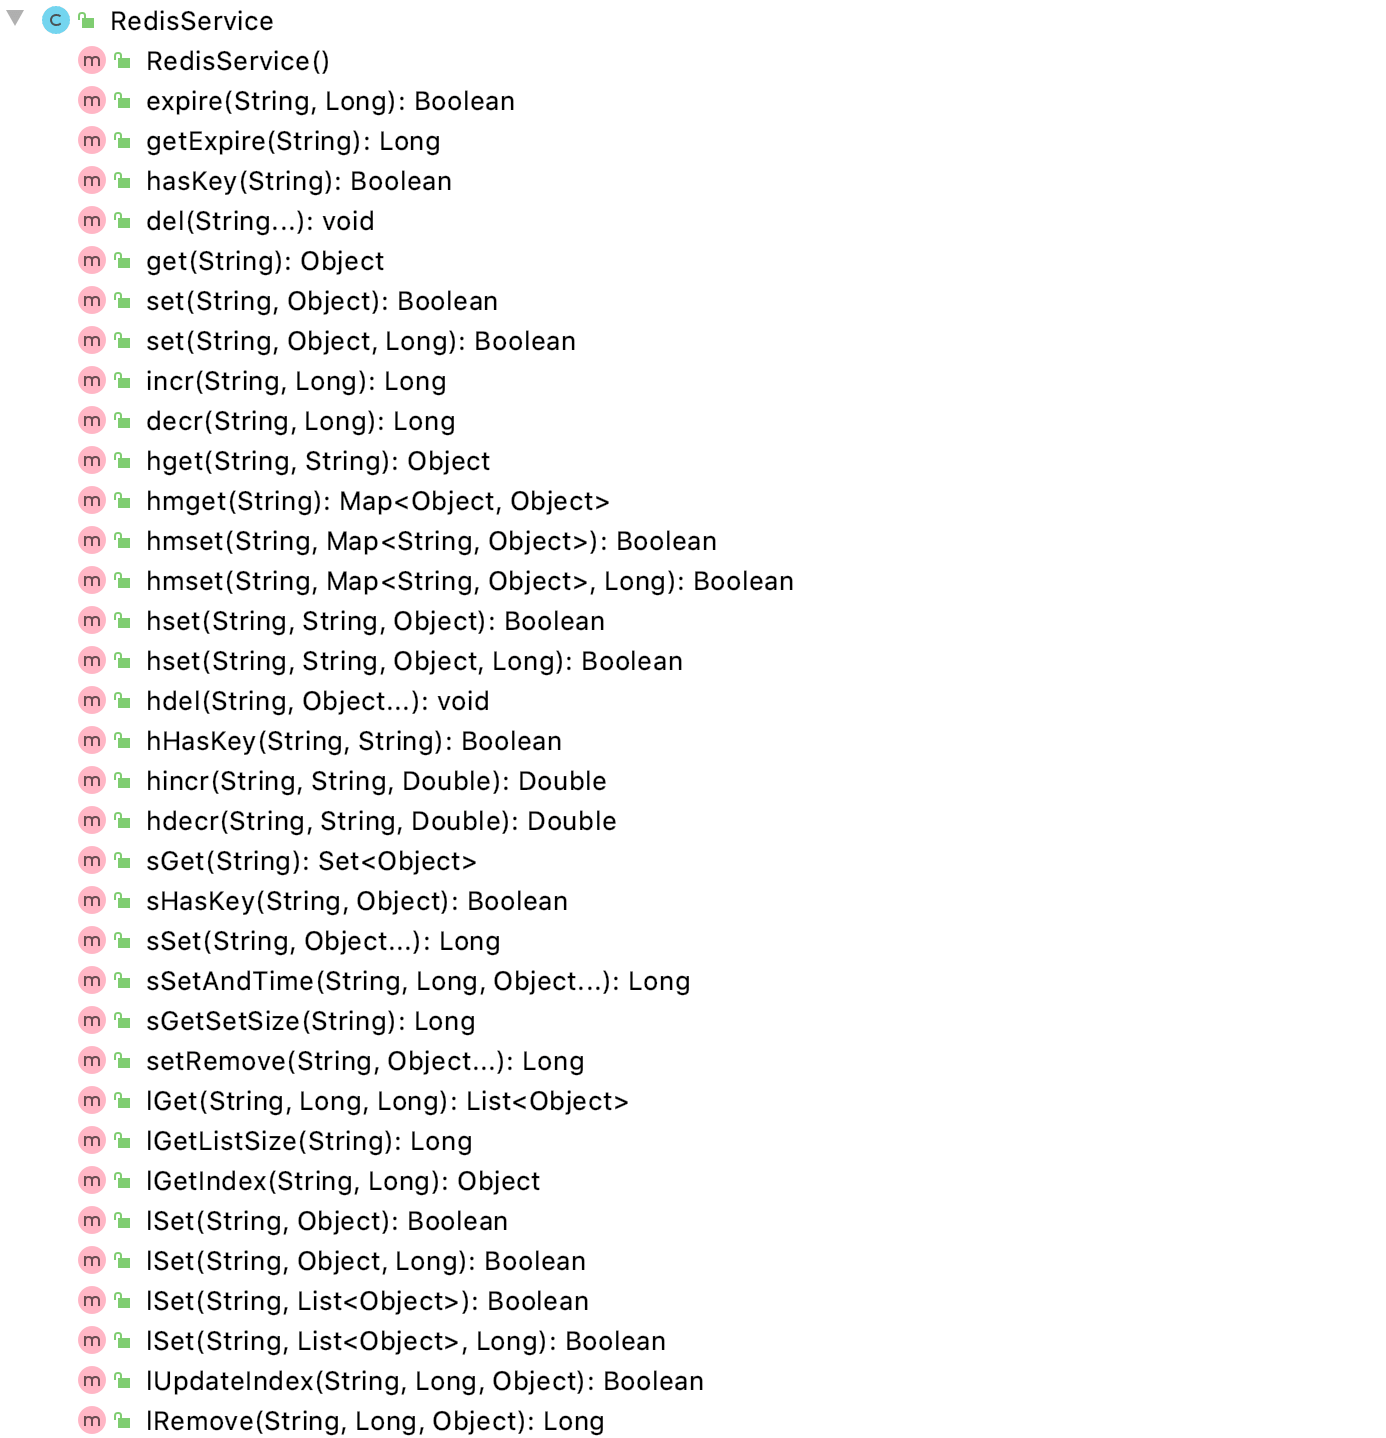
不够用的话自己加。
分布式事务演示
演示前,请确保已经启动了febs-tx-manager、febs-auth、febs-gateway、febs-server-system和febs-server-test。
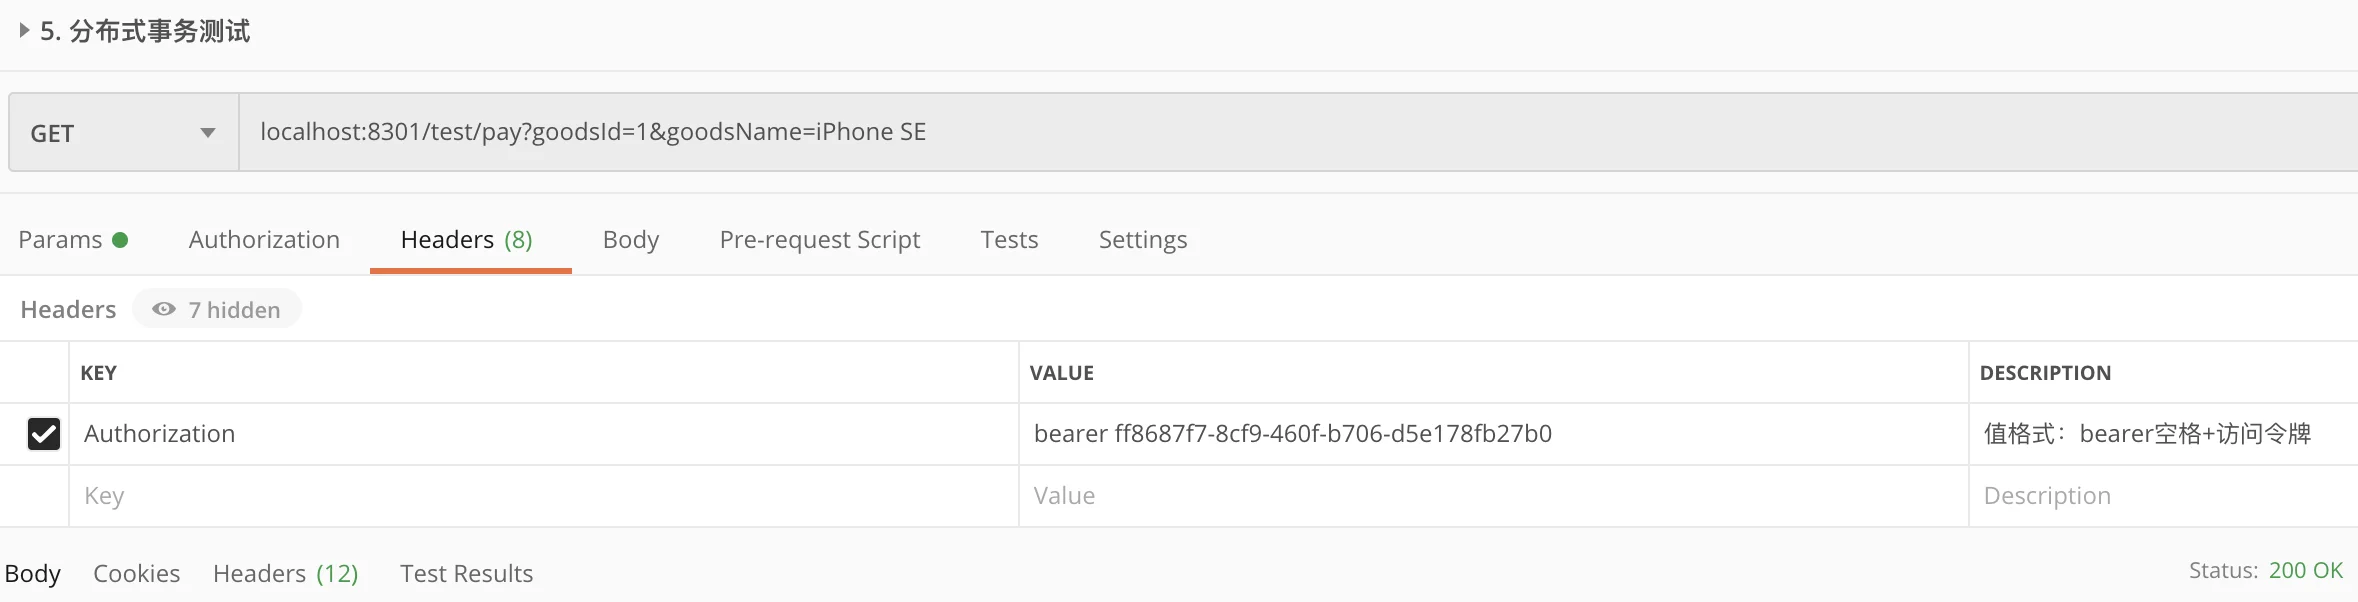
使用postman测试febs-server-test的/pay接口(localhost:8301/test/pay?goodsId=1&goodsName=iPhone SE),该接口调用流程:

返回状态码200,请求调用成功。查看febs-server-test控制台日志:

febs-server-system控制台日志:

数据库t_trade_log表记录:

在调用流程中不出异常的情况下肯定是没问题的,那么下面我们模拟一个异常,修改febs-server-test的相关方法:

重启febs-server-test,使用Postman发送同样的请求后,查看t_trade_log表数据:

可以看到,数据表中并没有脏数据,全局事务控制成功。更多关于分布式的讨论可以参考:https://www.kancloud.cn/mrbird/spring-cloud/1456142
演示5种获取令牌方法
OAuth2协议规范了4种获取令牌的方式:授权码模式、密码模式、客户端模式和简化模式,具体可以参考https://tools.ietf.org/html/rfc6749#section-4.1。Spring Cloud OAuth2在此基础上添加了刷新令牌方式,所以这里将演示下这5种获取令牌的方式。
准备工作
为了方便,我们先在管理界面的“客户端管理”中,新建一个支持这五种模式的client:
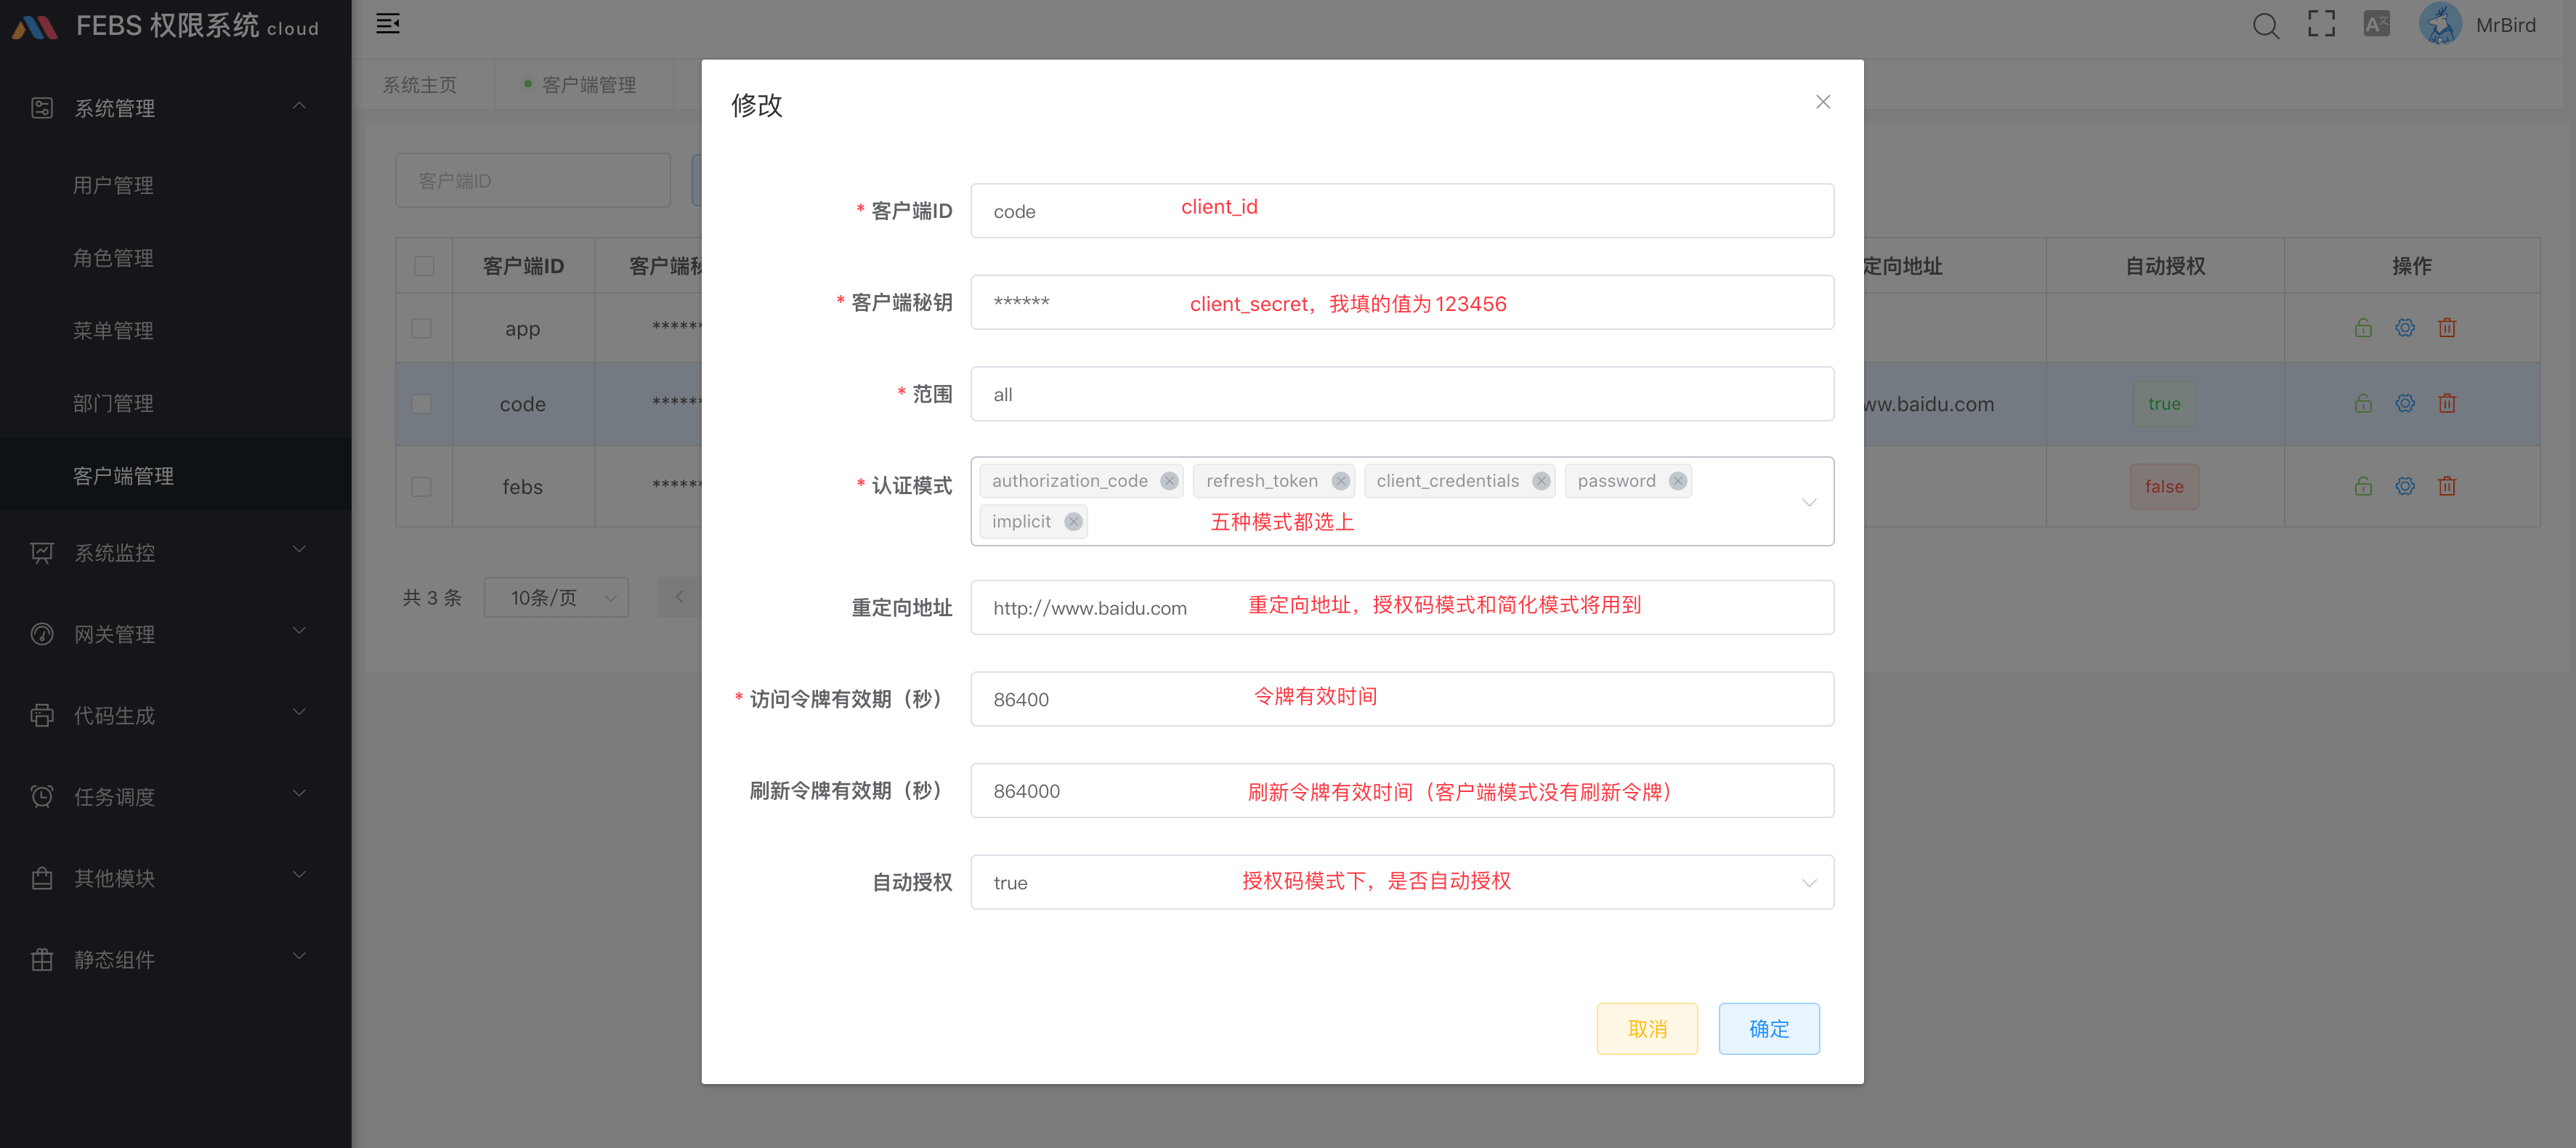
上面我们新建了一个支持这5种模式的client,client_id为code,client_secret为123456。
授权码模式
授权码模式演示需要有个前提,那就是网关和认证服务器的域名(或者ip地址)一致,这样通过网关跳转到认证服务器的登录页面后,session才不会丢失(不同域session不会传递)。要保持一致,只需要使用本机局域网ip地址即可(不要用localhost或者127.0.0.1),查看本机局域网IP:
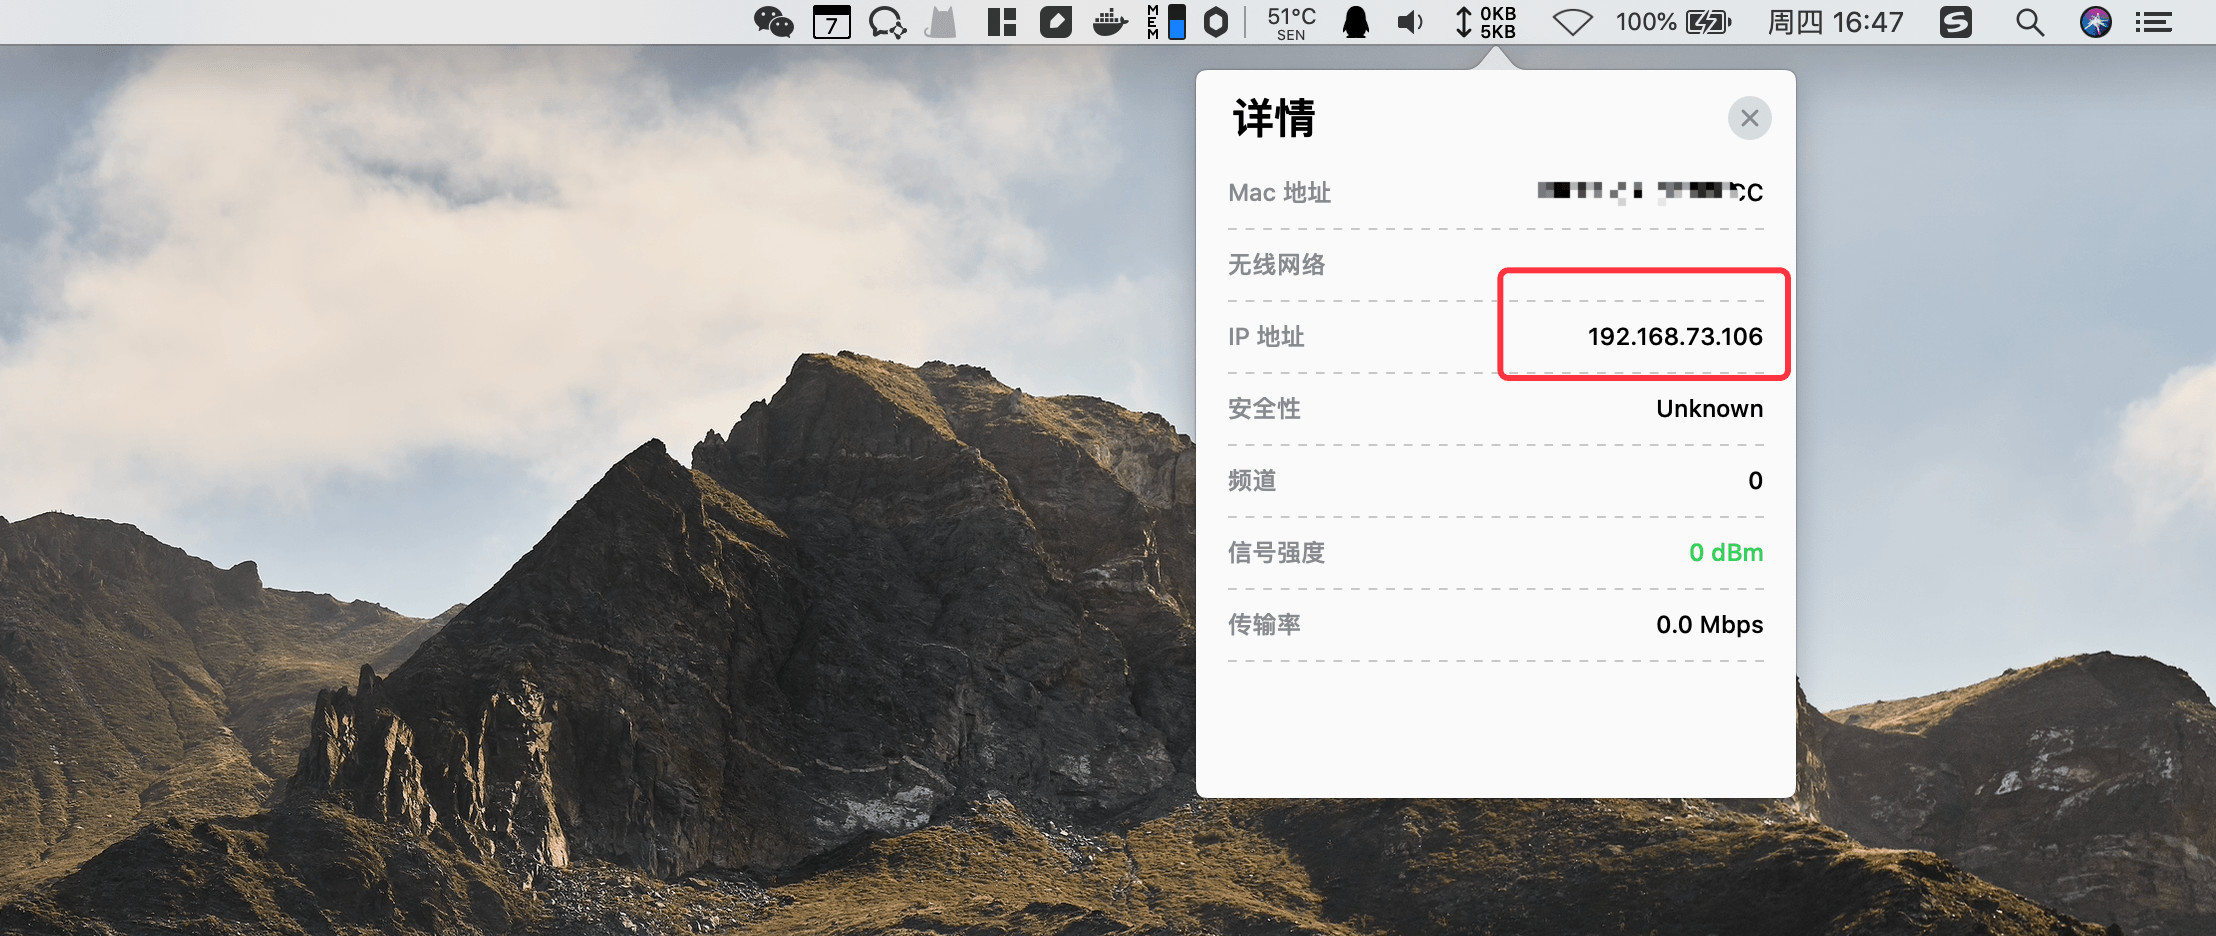
我的IP为192.168.73.106。不知道自己IP的可以通过下面这段Java代码获取:
1 | InetAddress address = InetAddress.getLocalHost(); |
- response_type=code,表示授权码模式;
- client_id=code,为准备工作中创建的client_Id;
- redirect_uri=http://www.baidu.com,为准备工作中创建的client_id为code对应的重定向地址。
访问后,页面跳转到认证服务器提供的登录页:
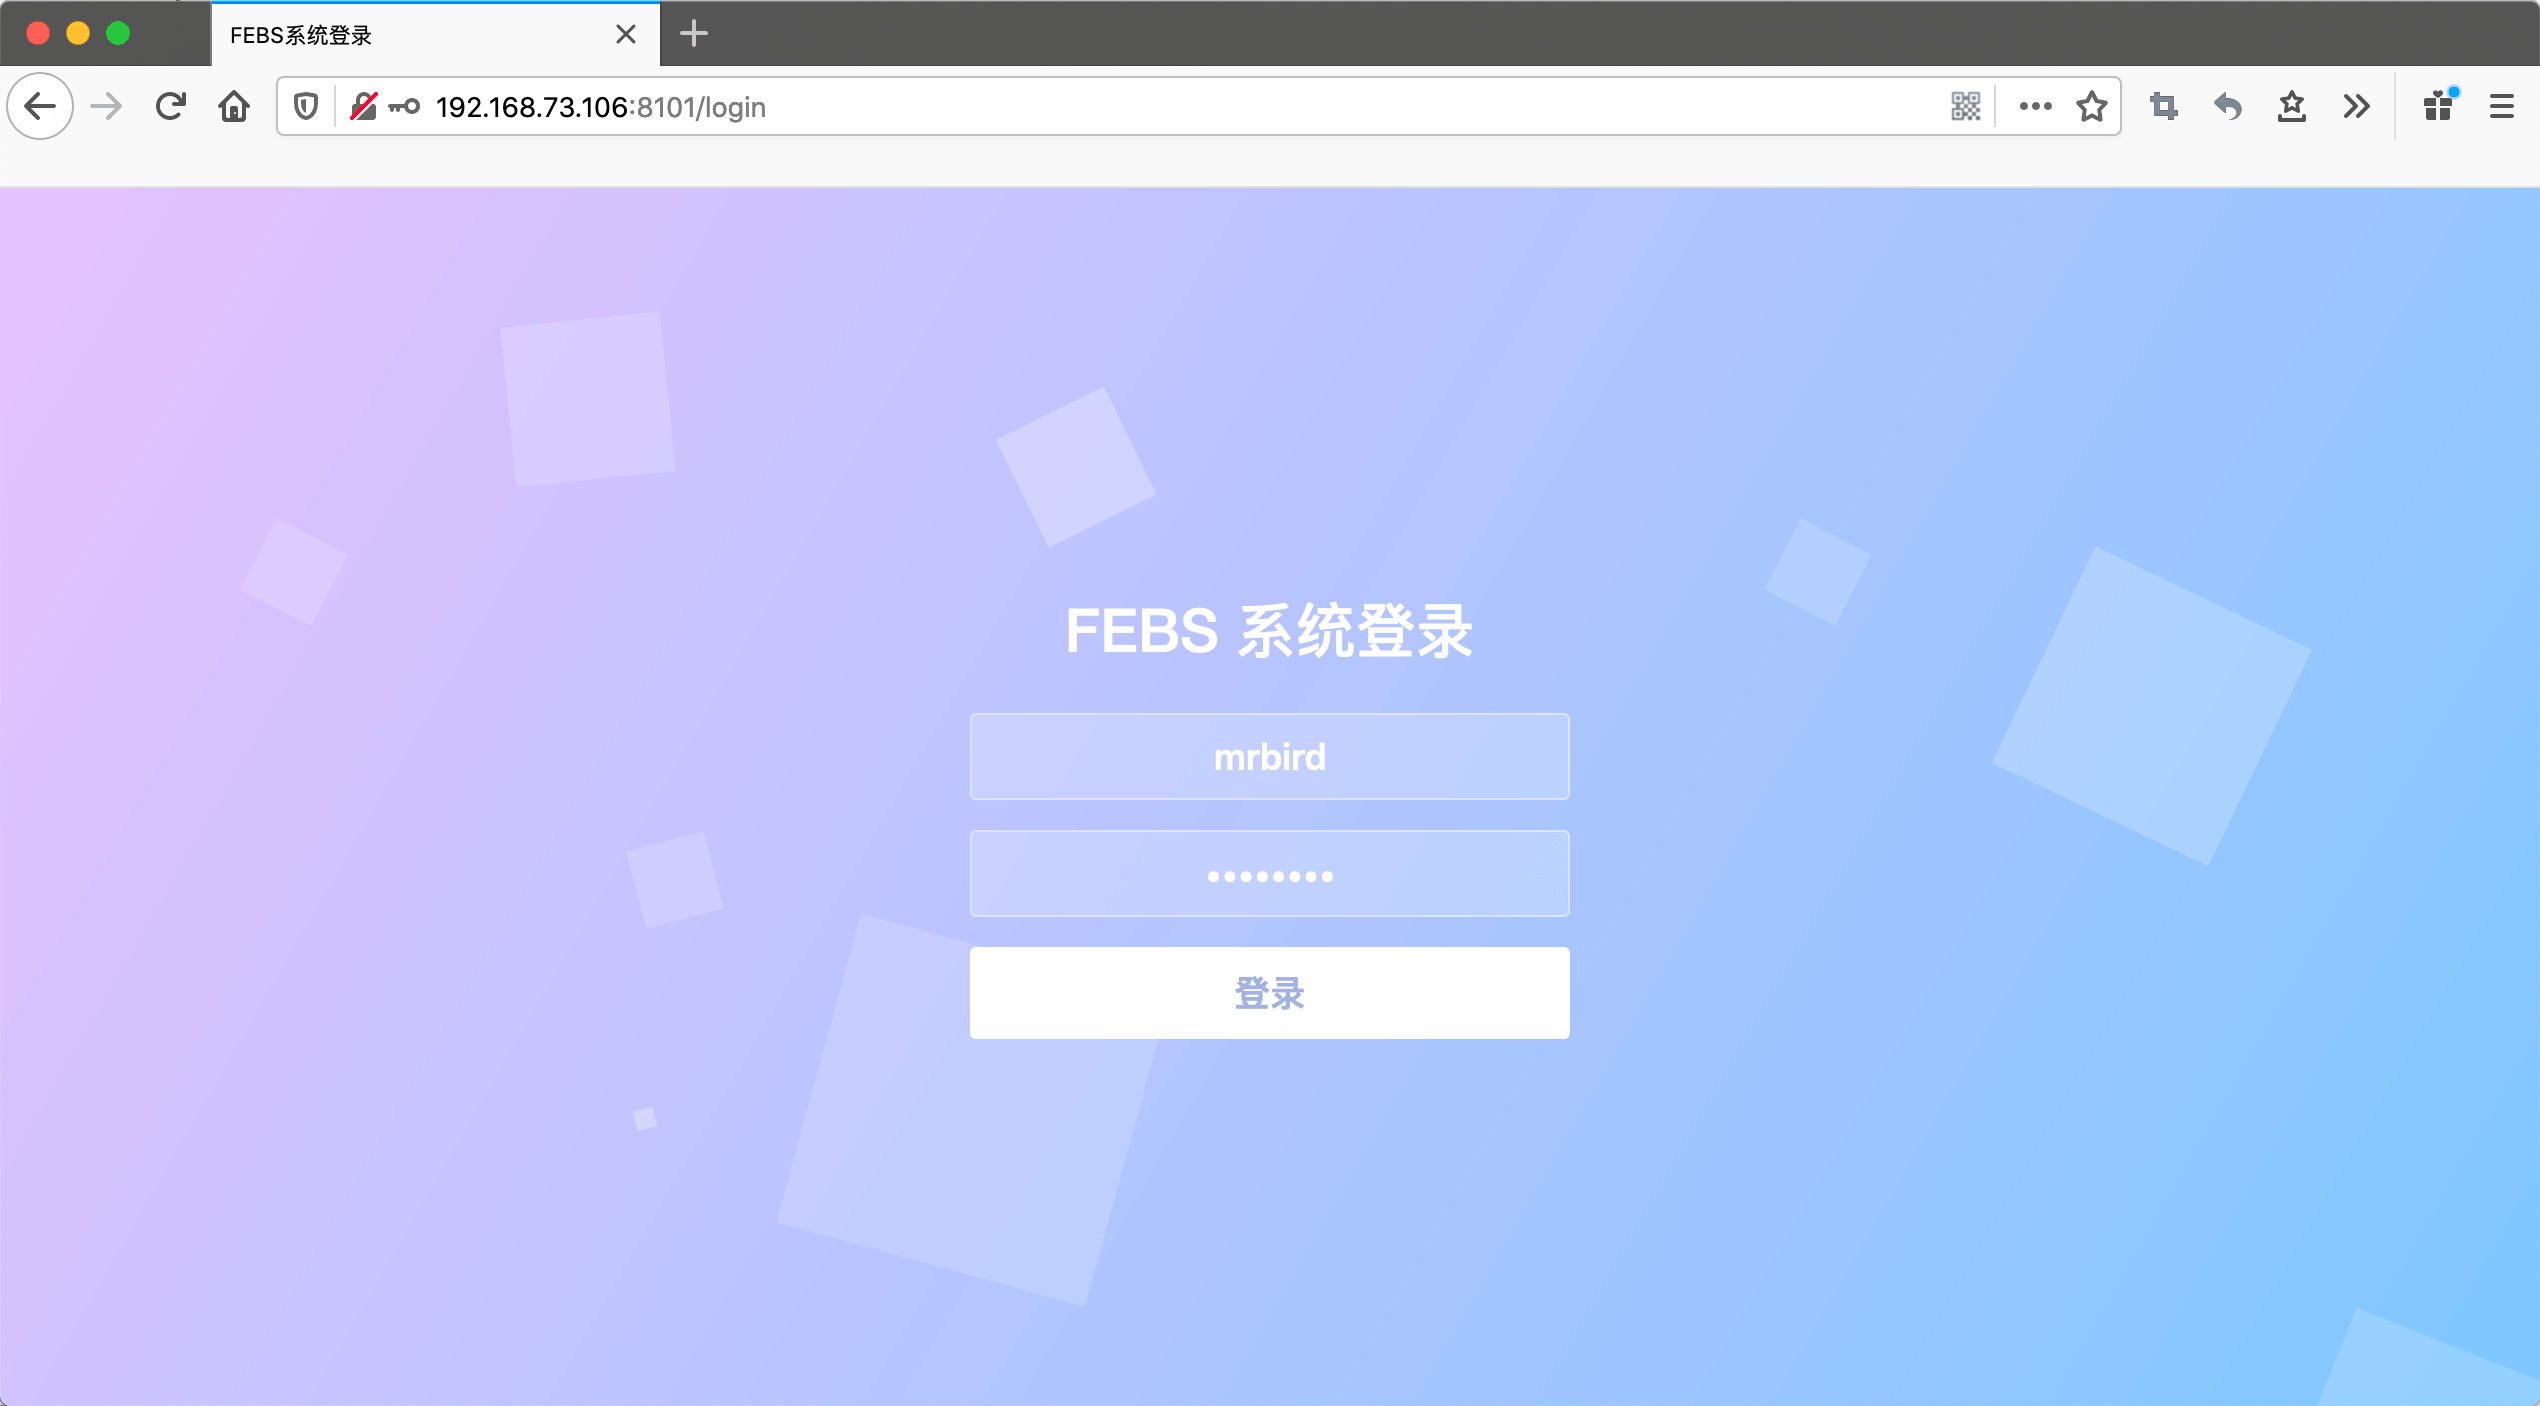
输入用户名和密码,点击登录,页面将重定向到上面指定的重定向地址,并且会携带相应的授权码:
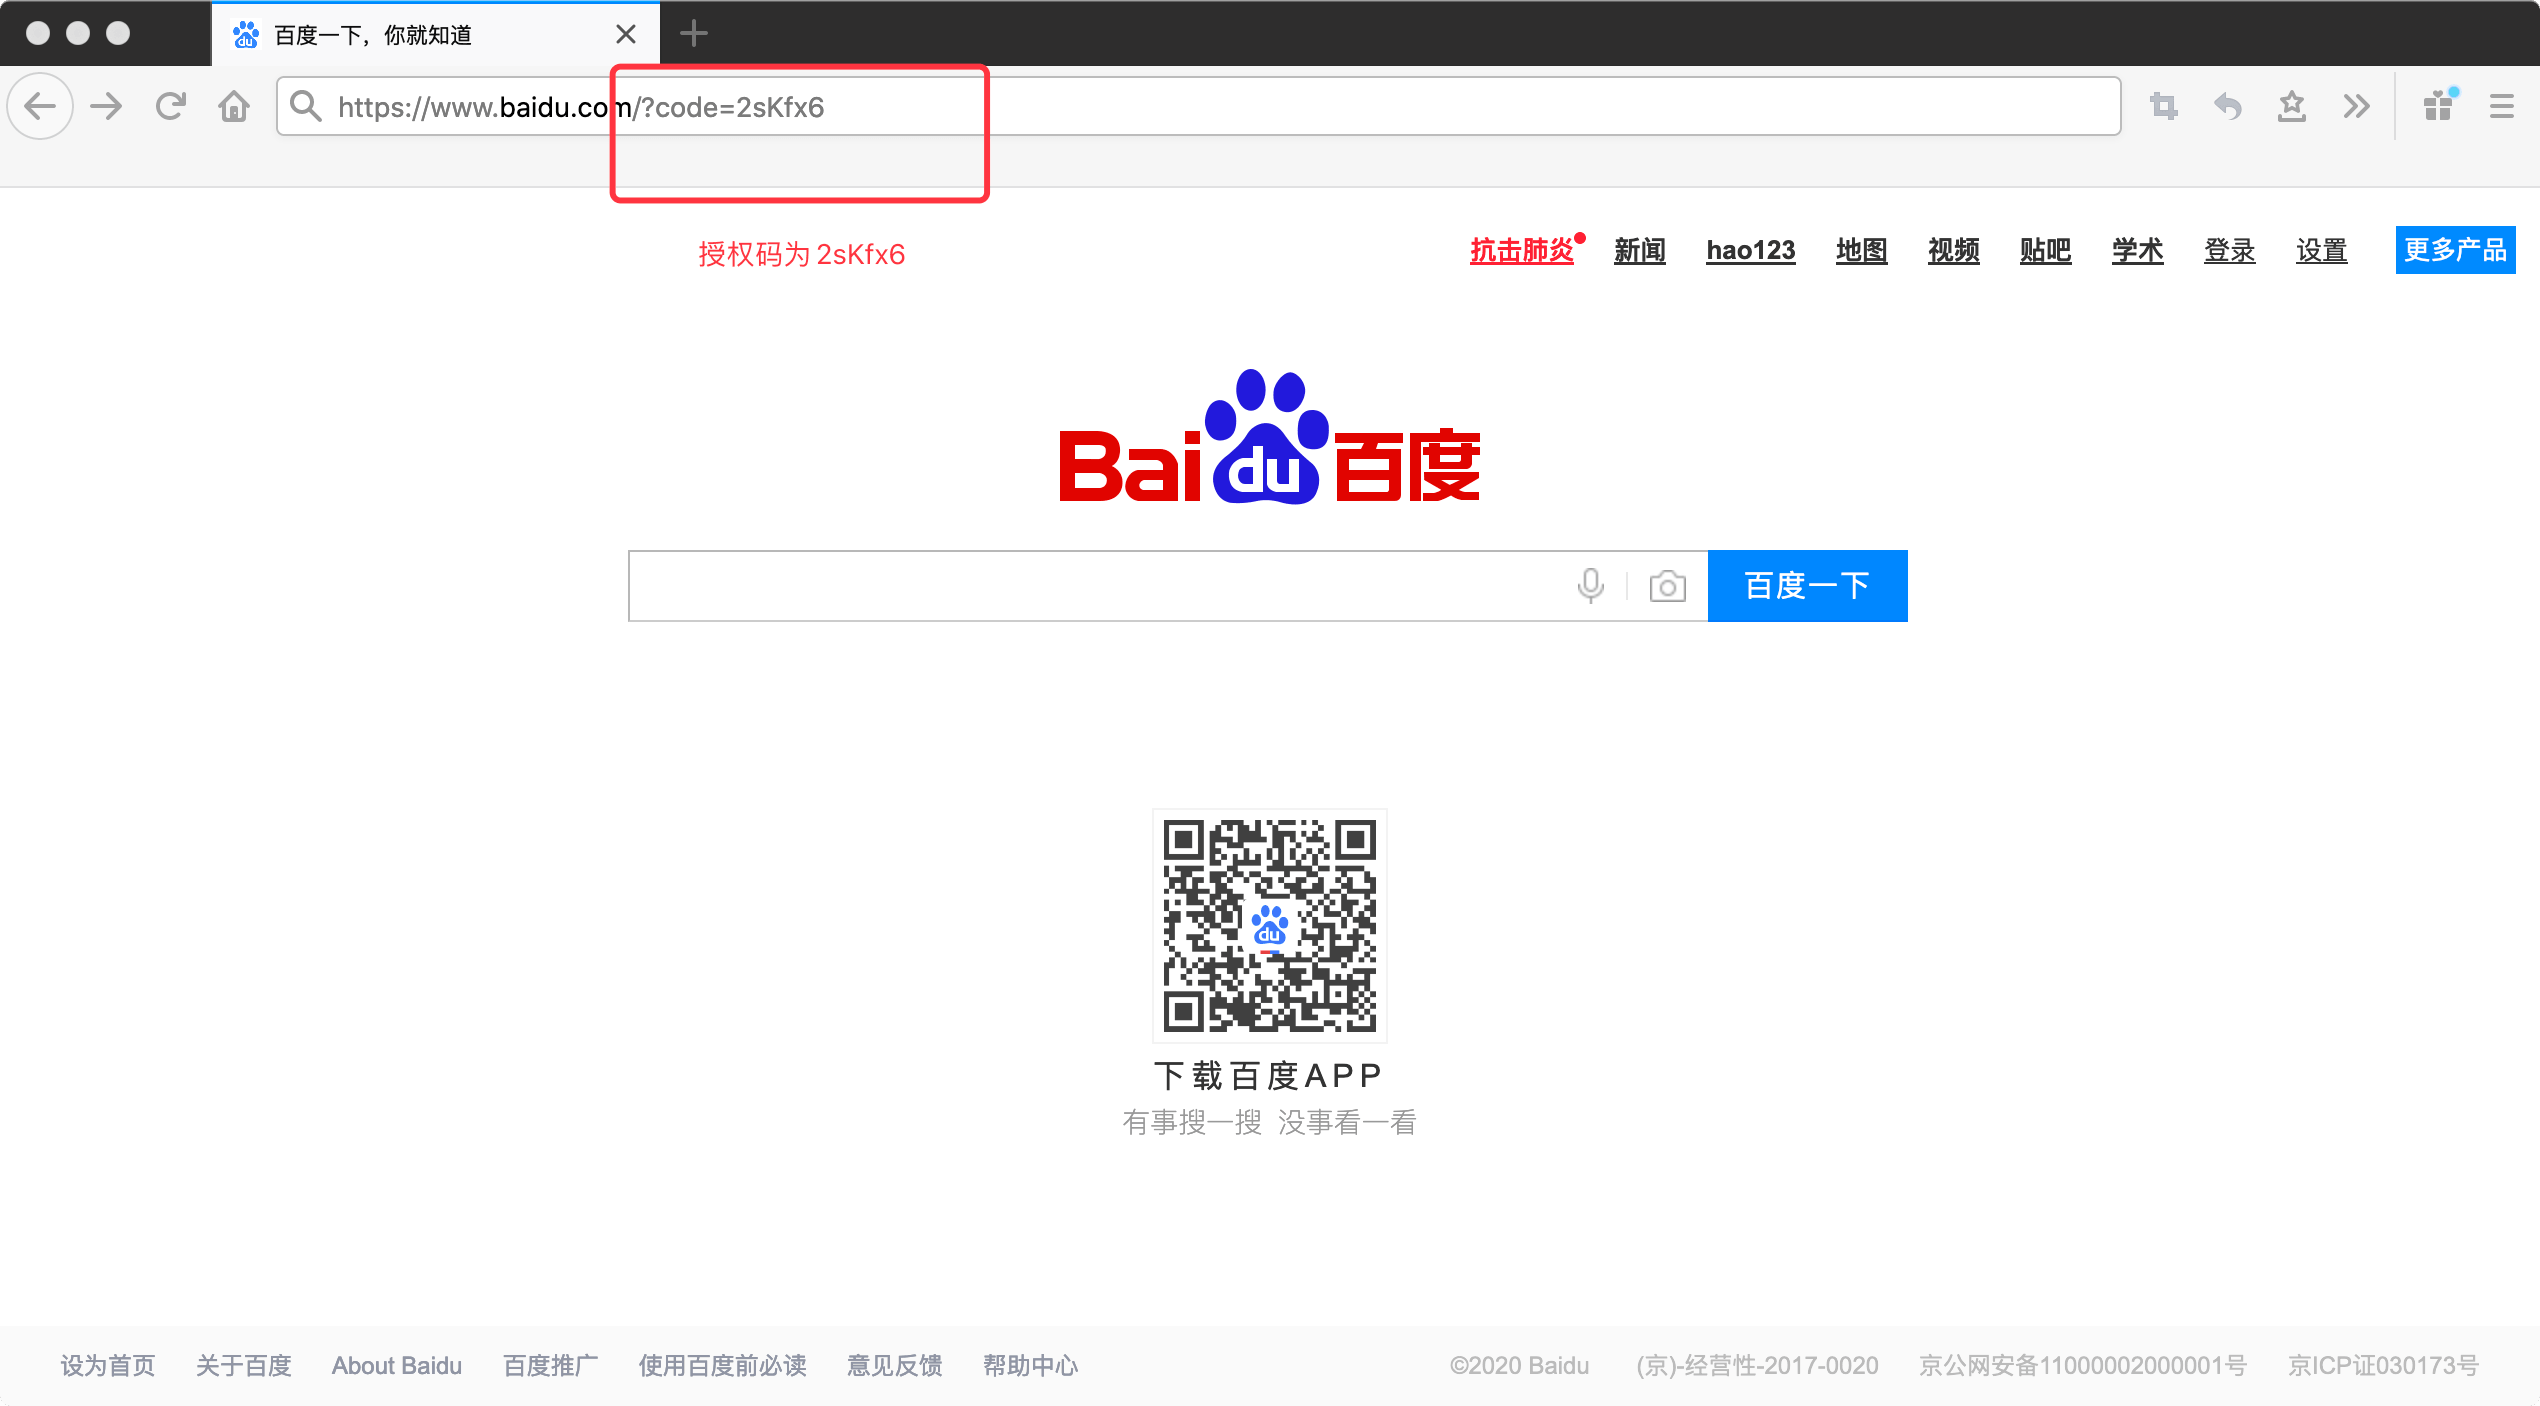
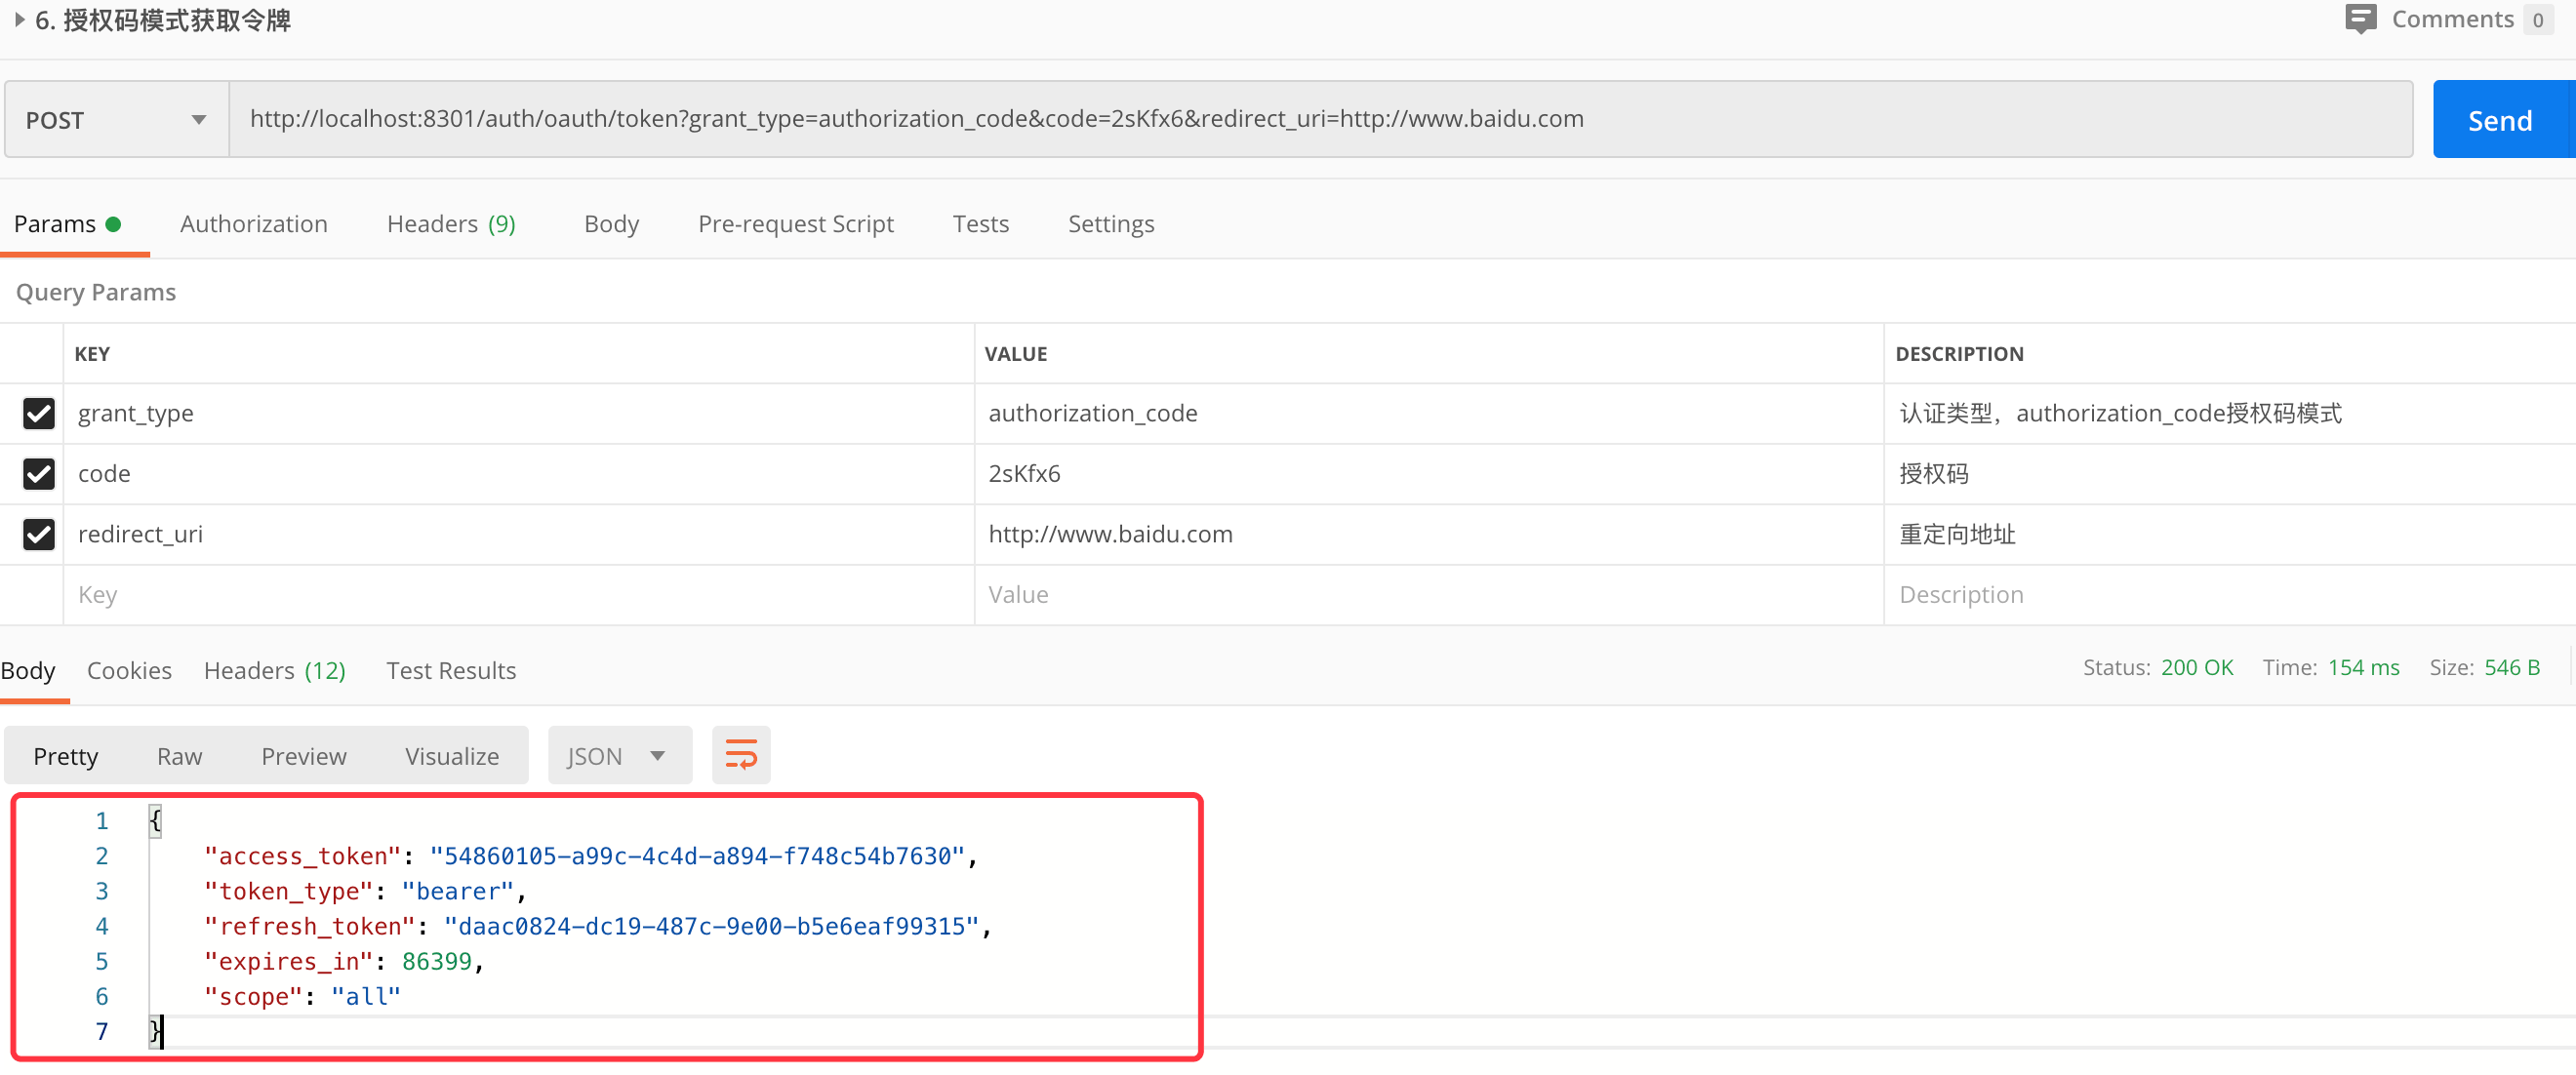
复制这个授权码,使用postman发送如下请求:
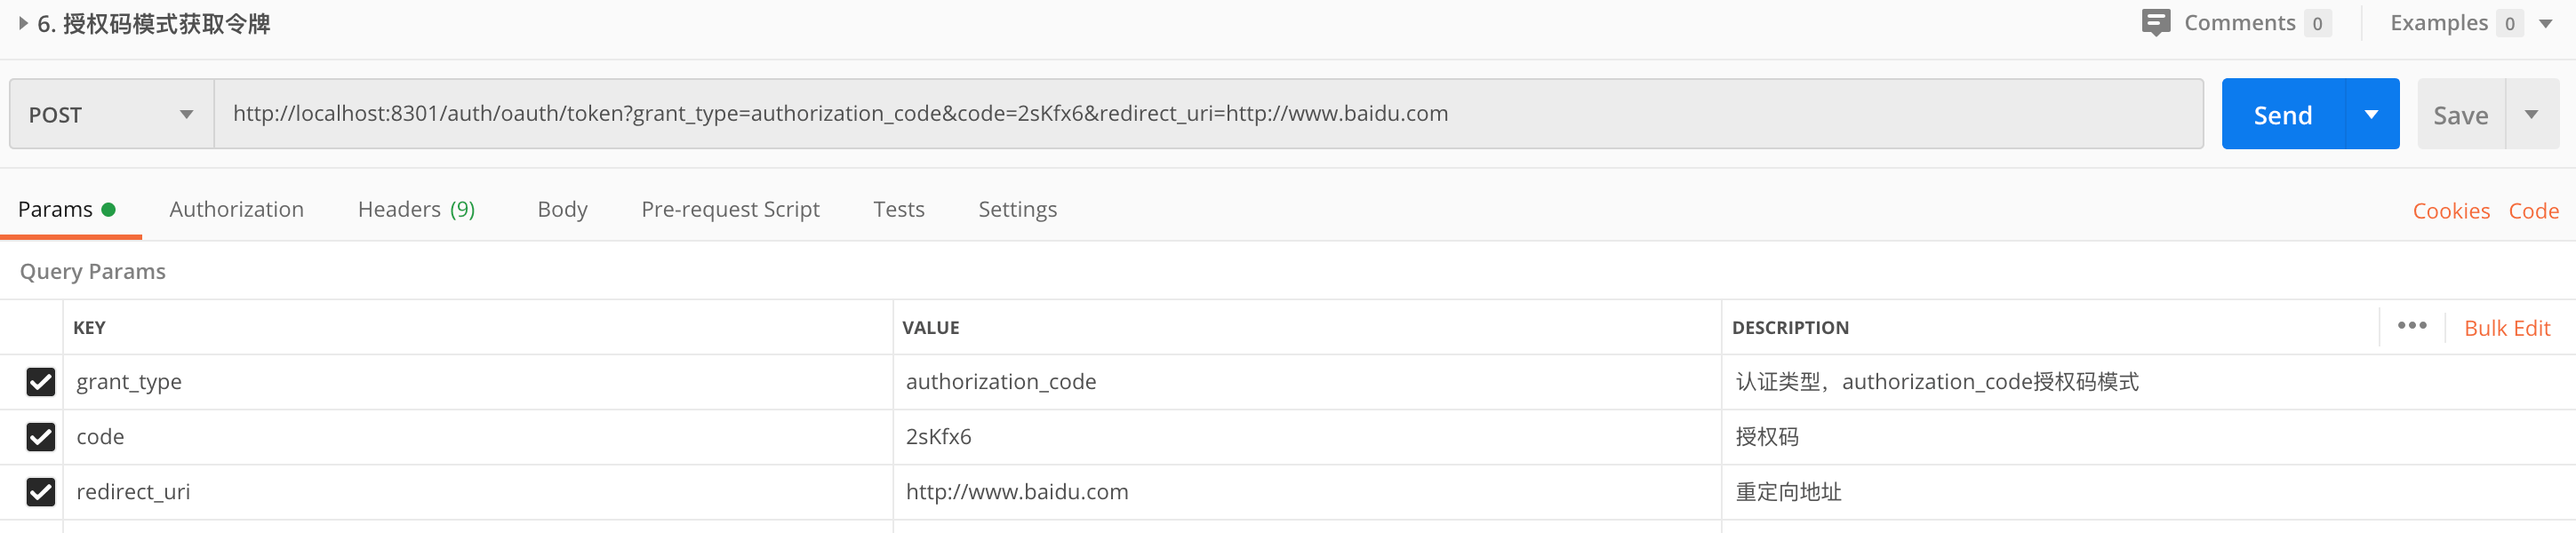

点击send,成功获取了令牌:
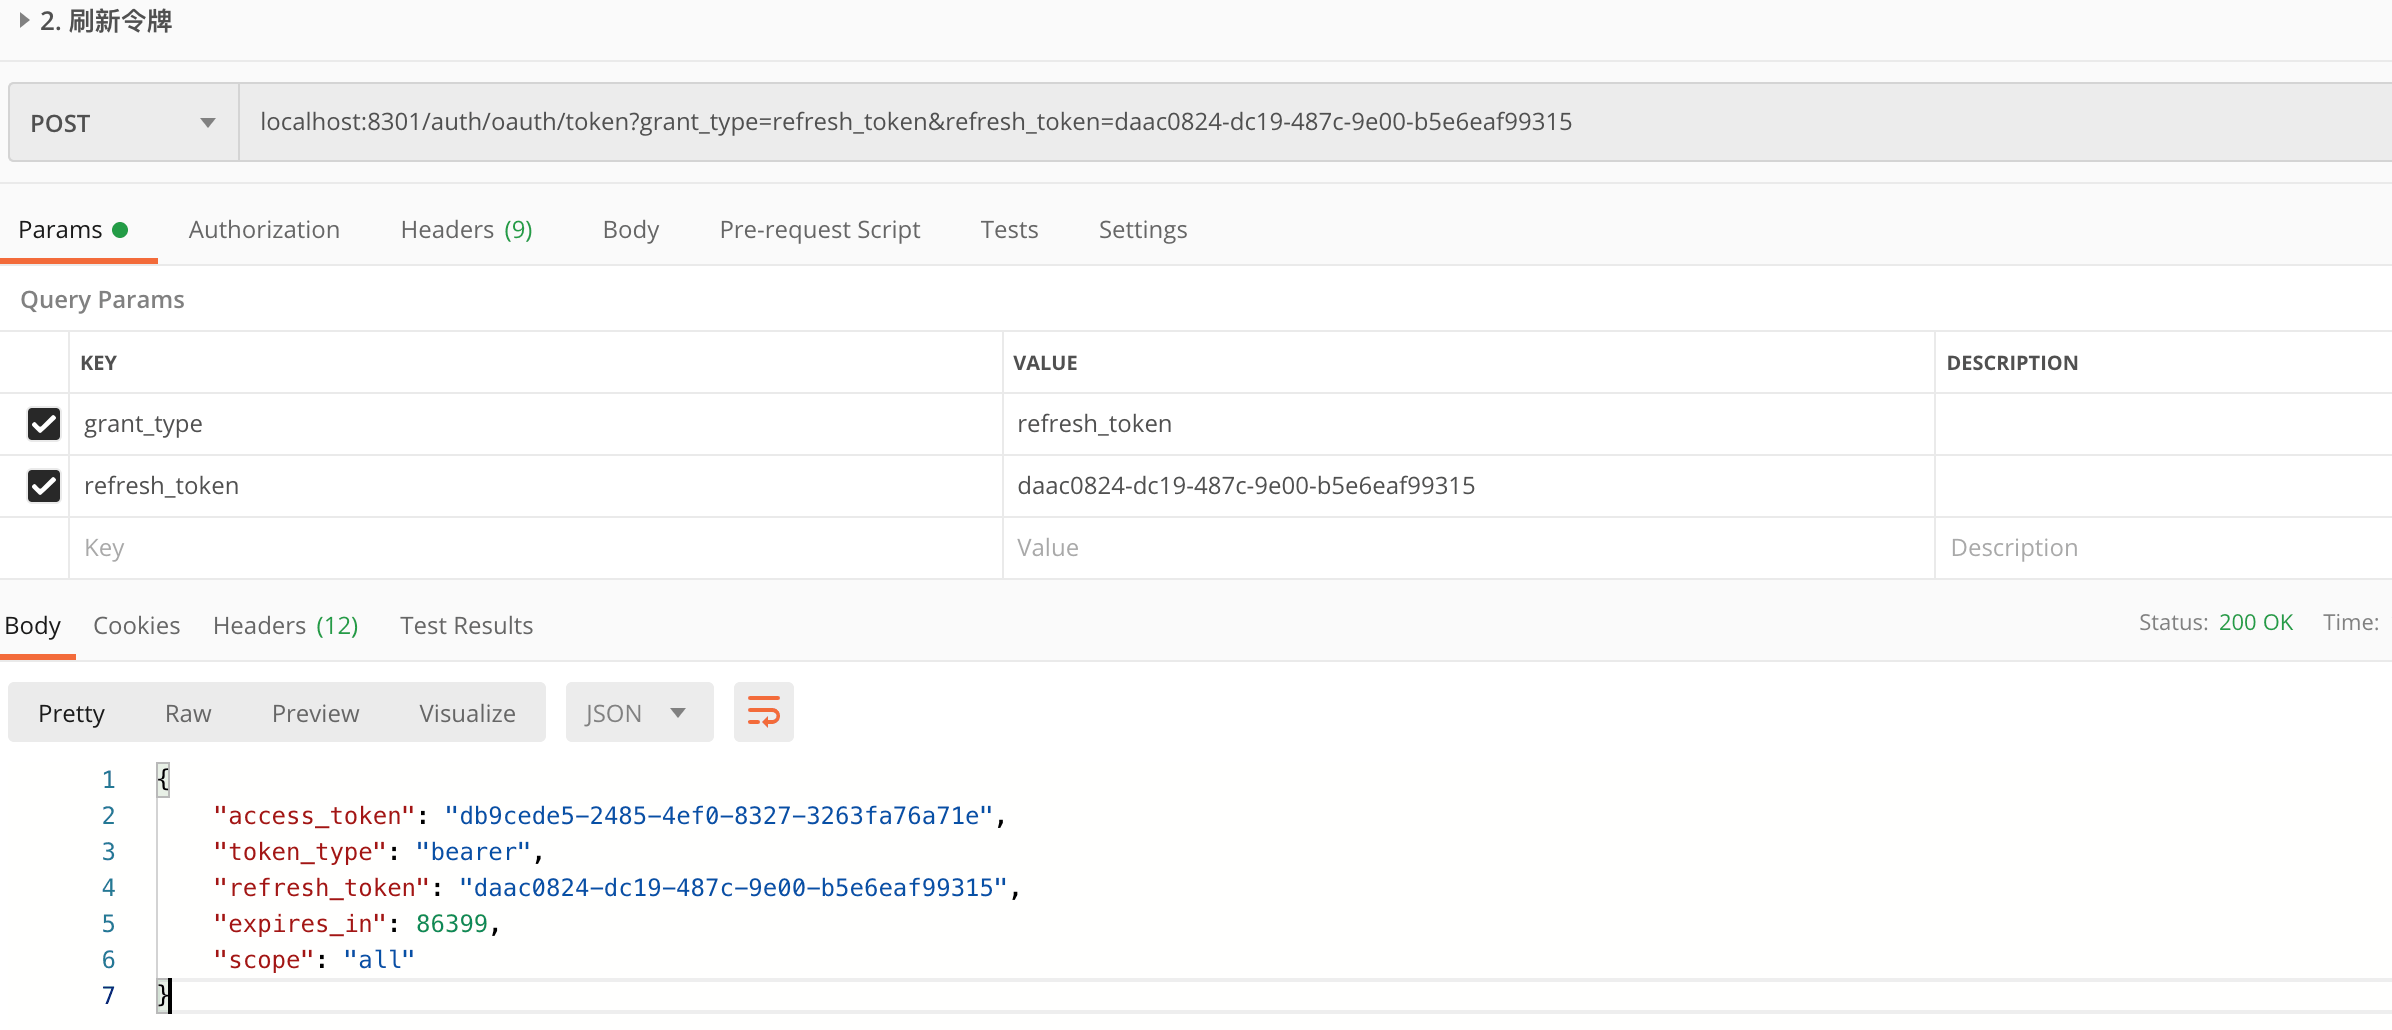
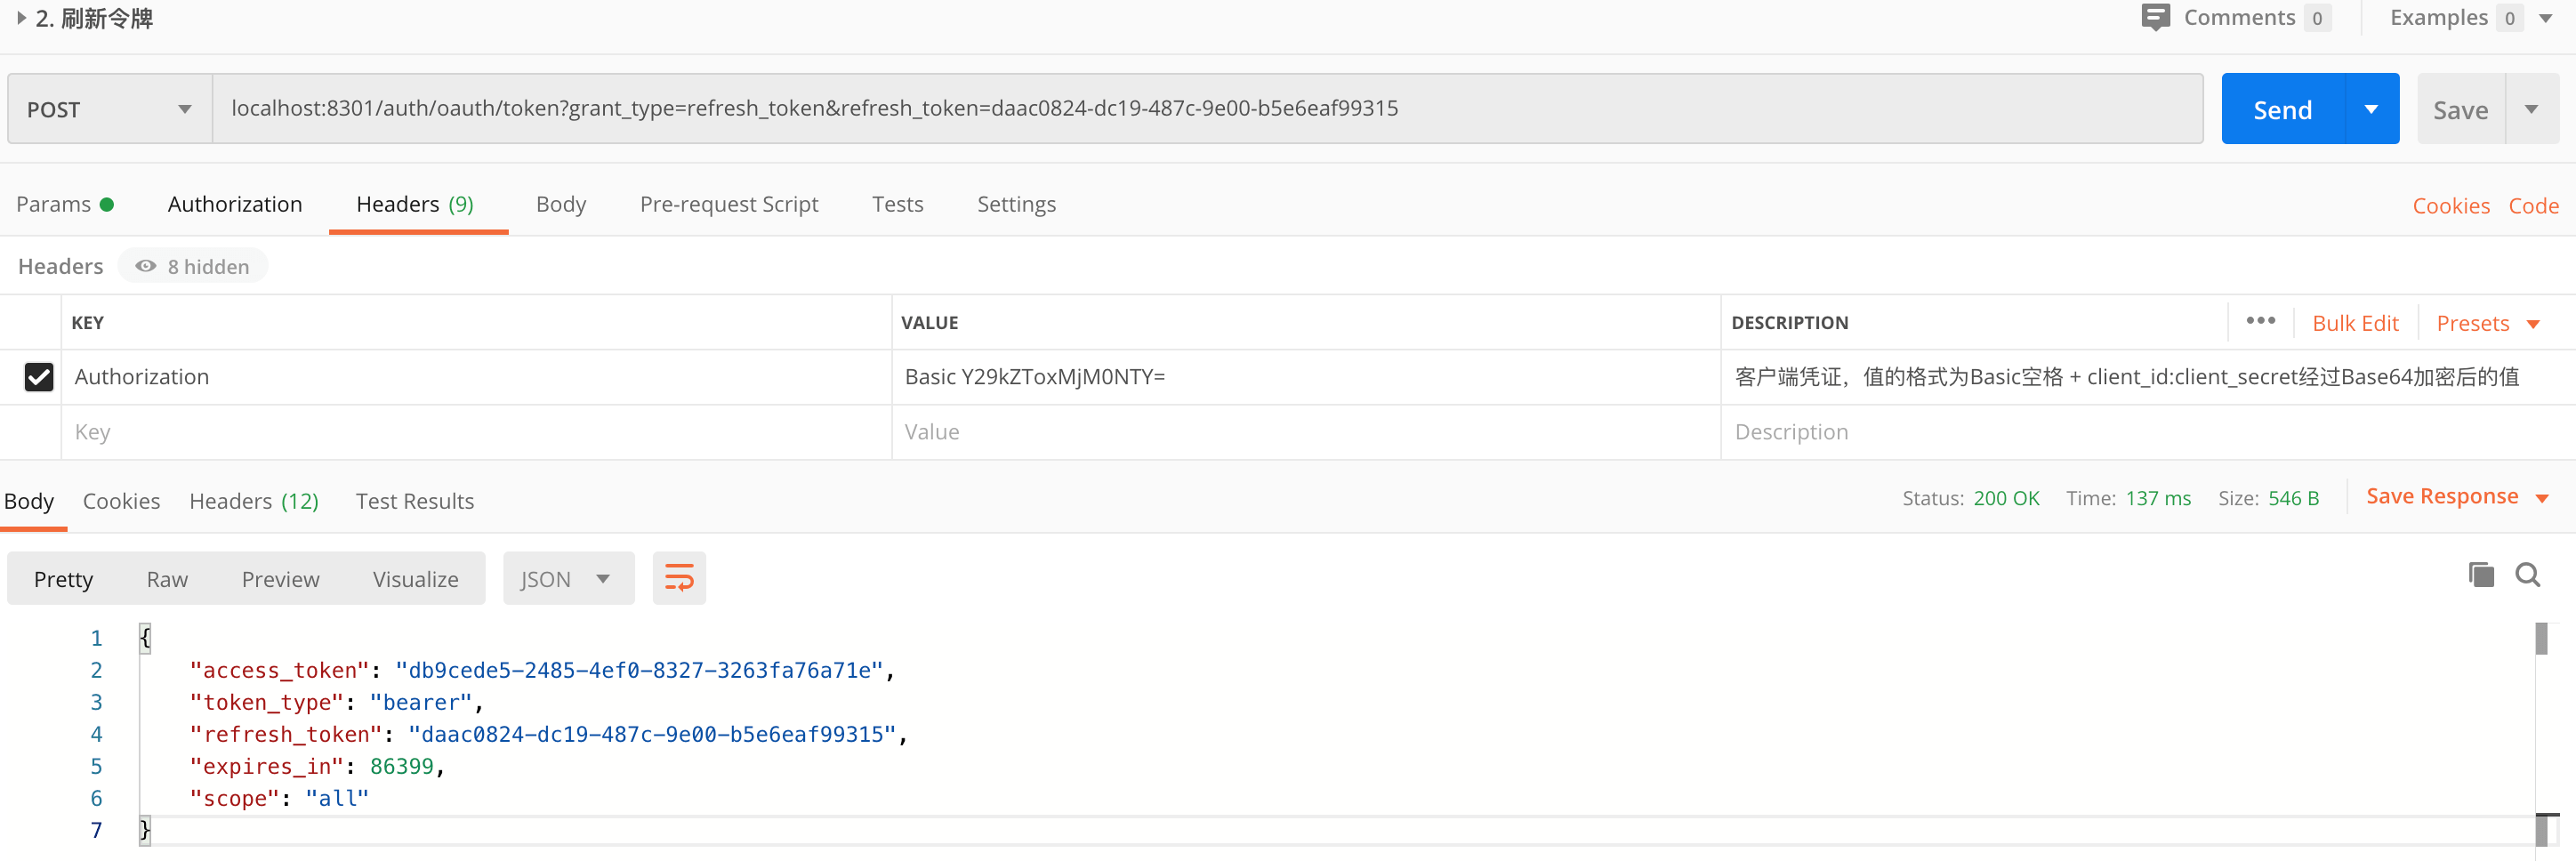
刷新令牌模式
我们使用授权码模式获取的refresh_token来演示如何刷新令牌:
密码模式
密码模式在https://www.kancloud.cn/mrbird/spring-cloud/1268278一节中已经介绍过了,不再重复赘述。
客户端模式
客户端模式最为简单,只需要提供client就可以获取到令牌:
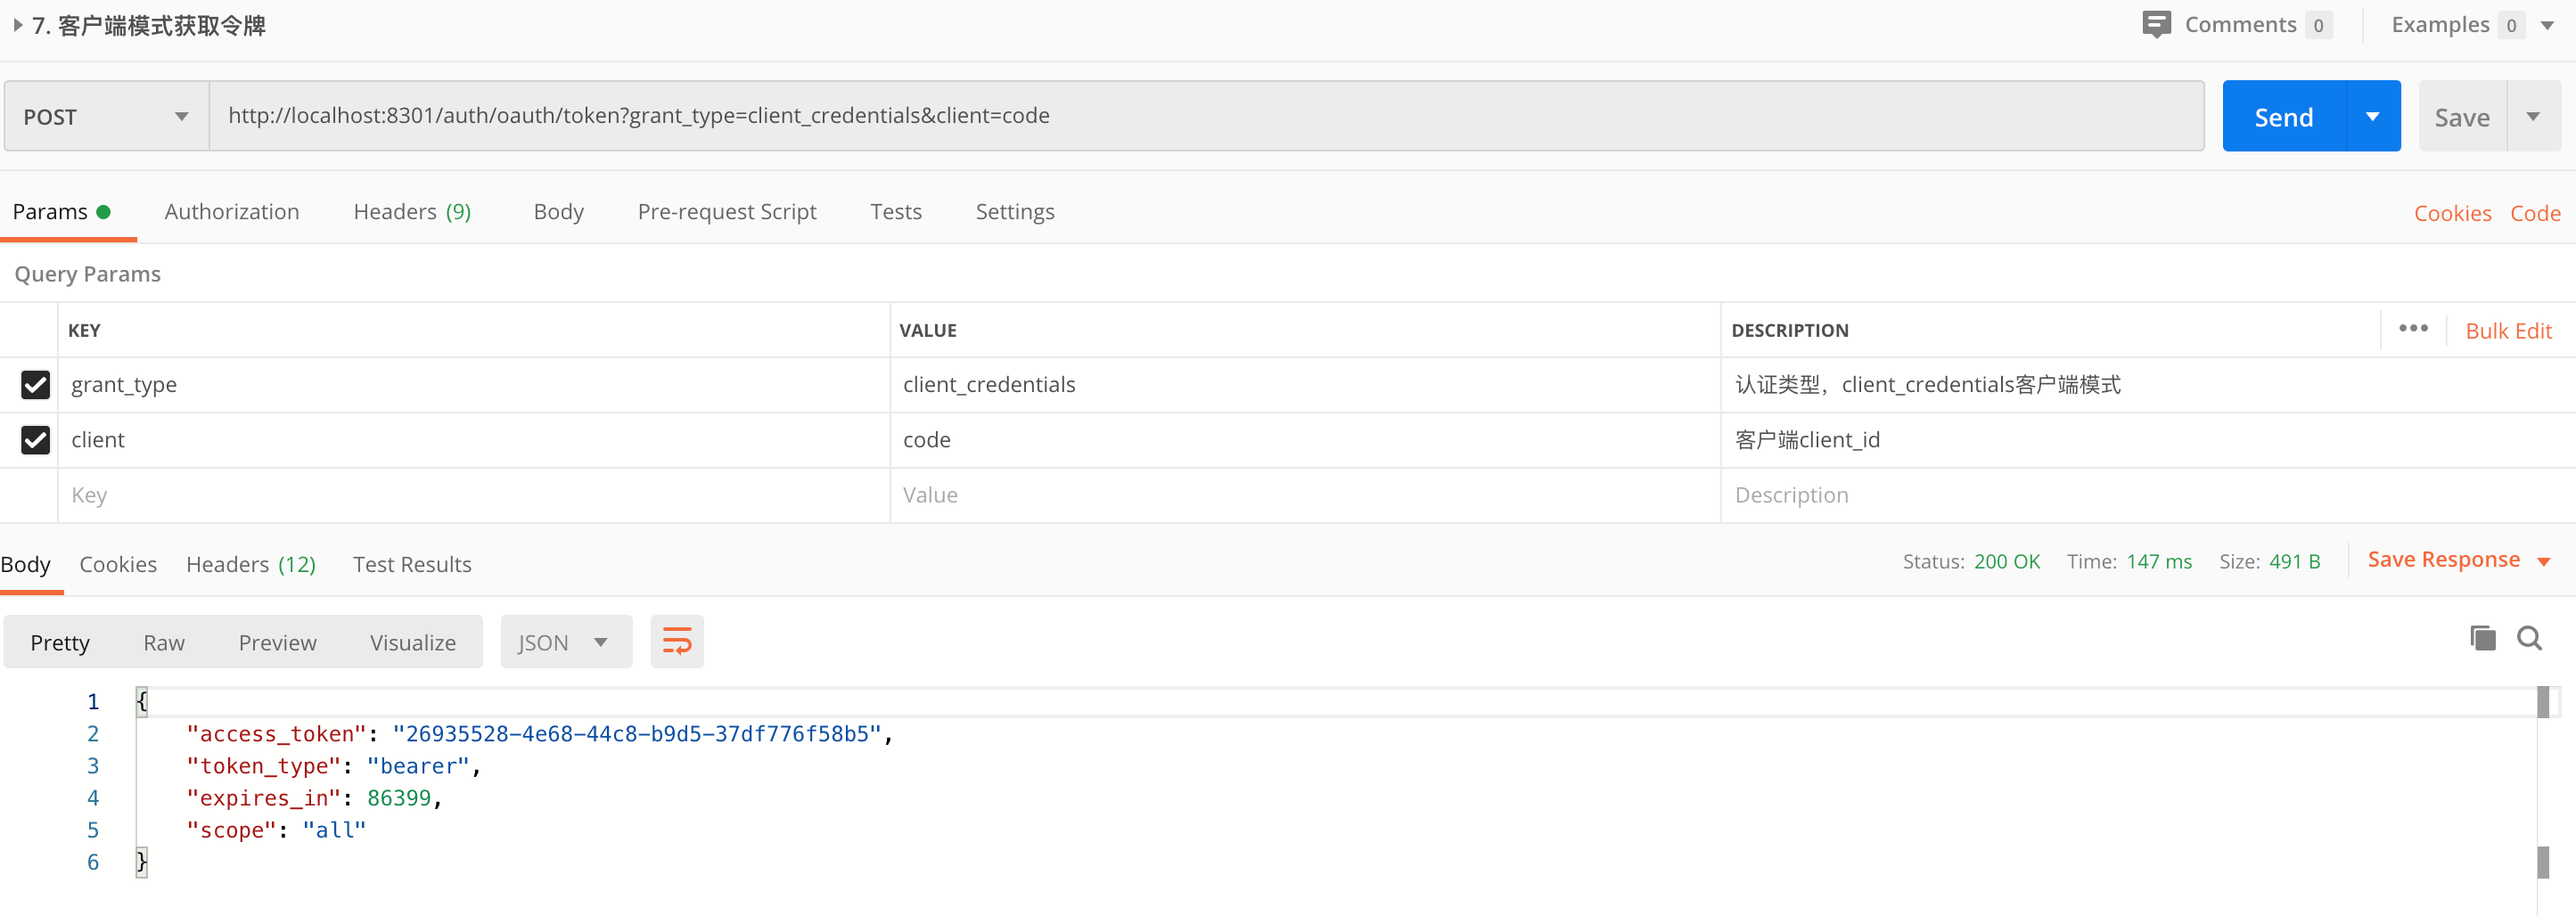
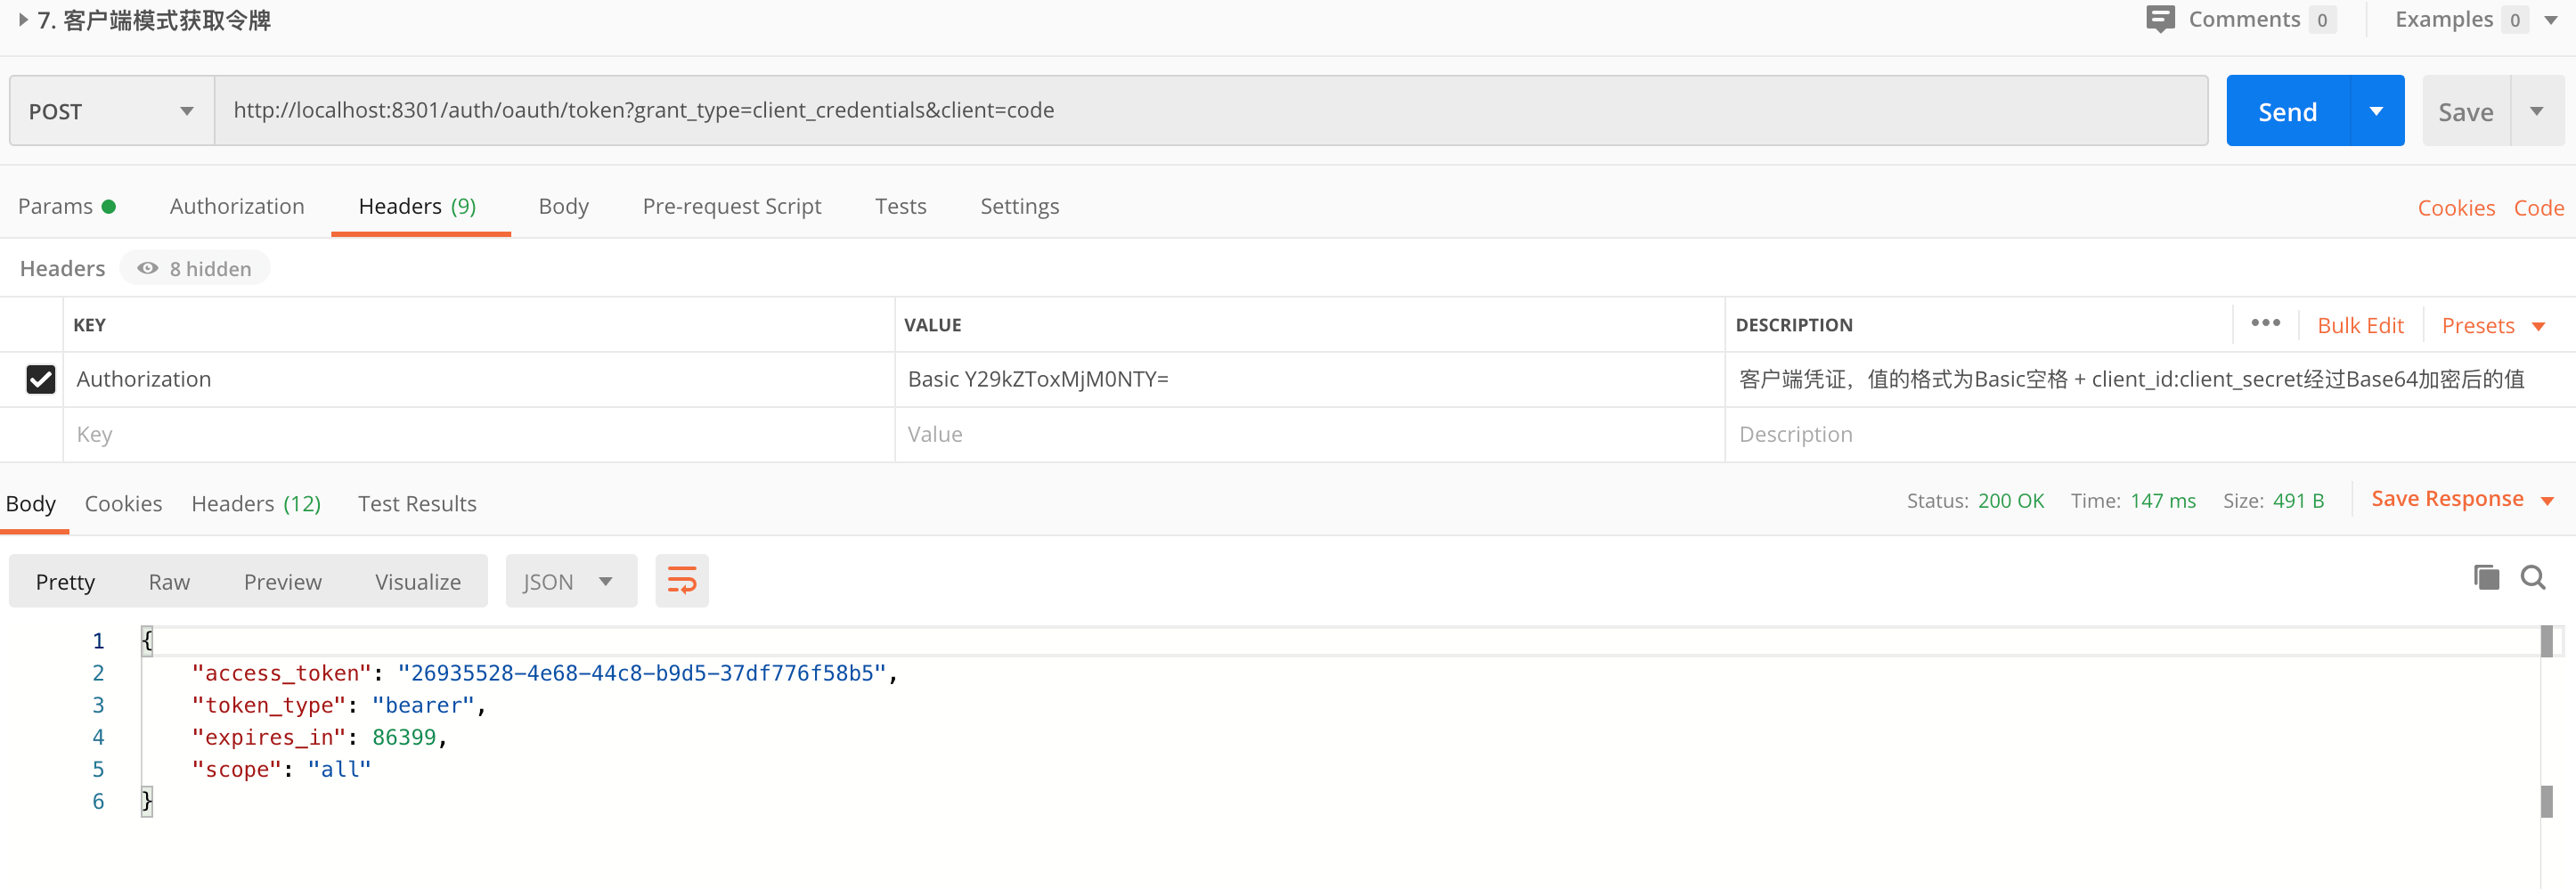
可以看到,只需要提供client就可以获取到系统令牌,并不需要输入用户名密码。但是这也说明了通过这种模式生成的令牌,只能获取需要认证的系统资源,涉及到权限的资源无法获取。
此外,从返回结果来看,该模式不支持刷新令牌模式。
简化模式
简化模式简化的是授权码模式流程。使用浏览器访问:http://192.168.73.106:8301/auth/oauth/authorize?response_type=token&client_id=code&redirect_uri=http://www.baidu.com
访问后,和授权码模式一样,页面将跳转到认证服务器提供的登录页面,输入用户名和密码后,页面重定向到指定的redirect_uri中:
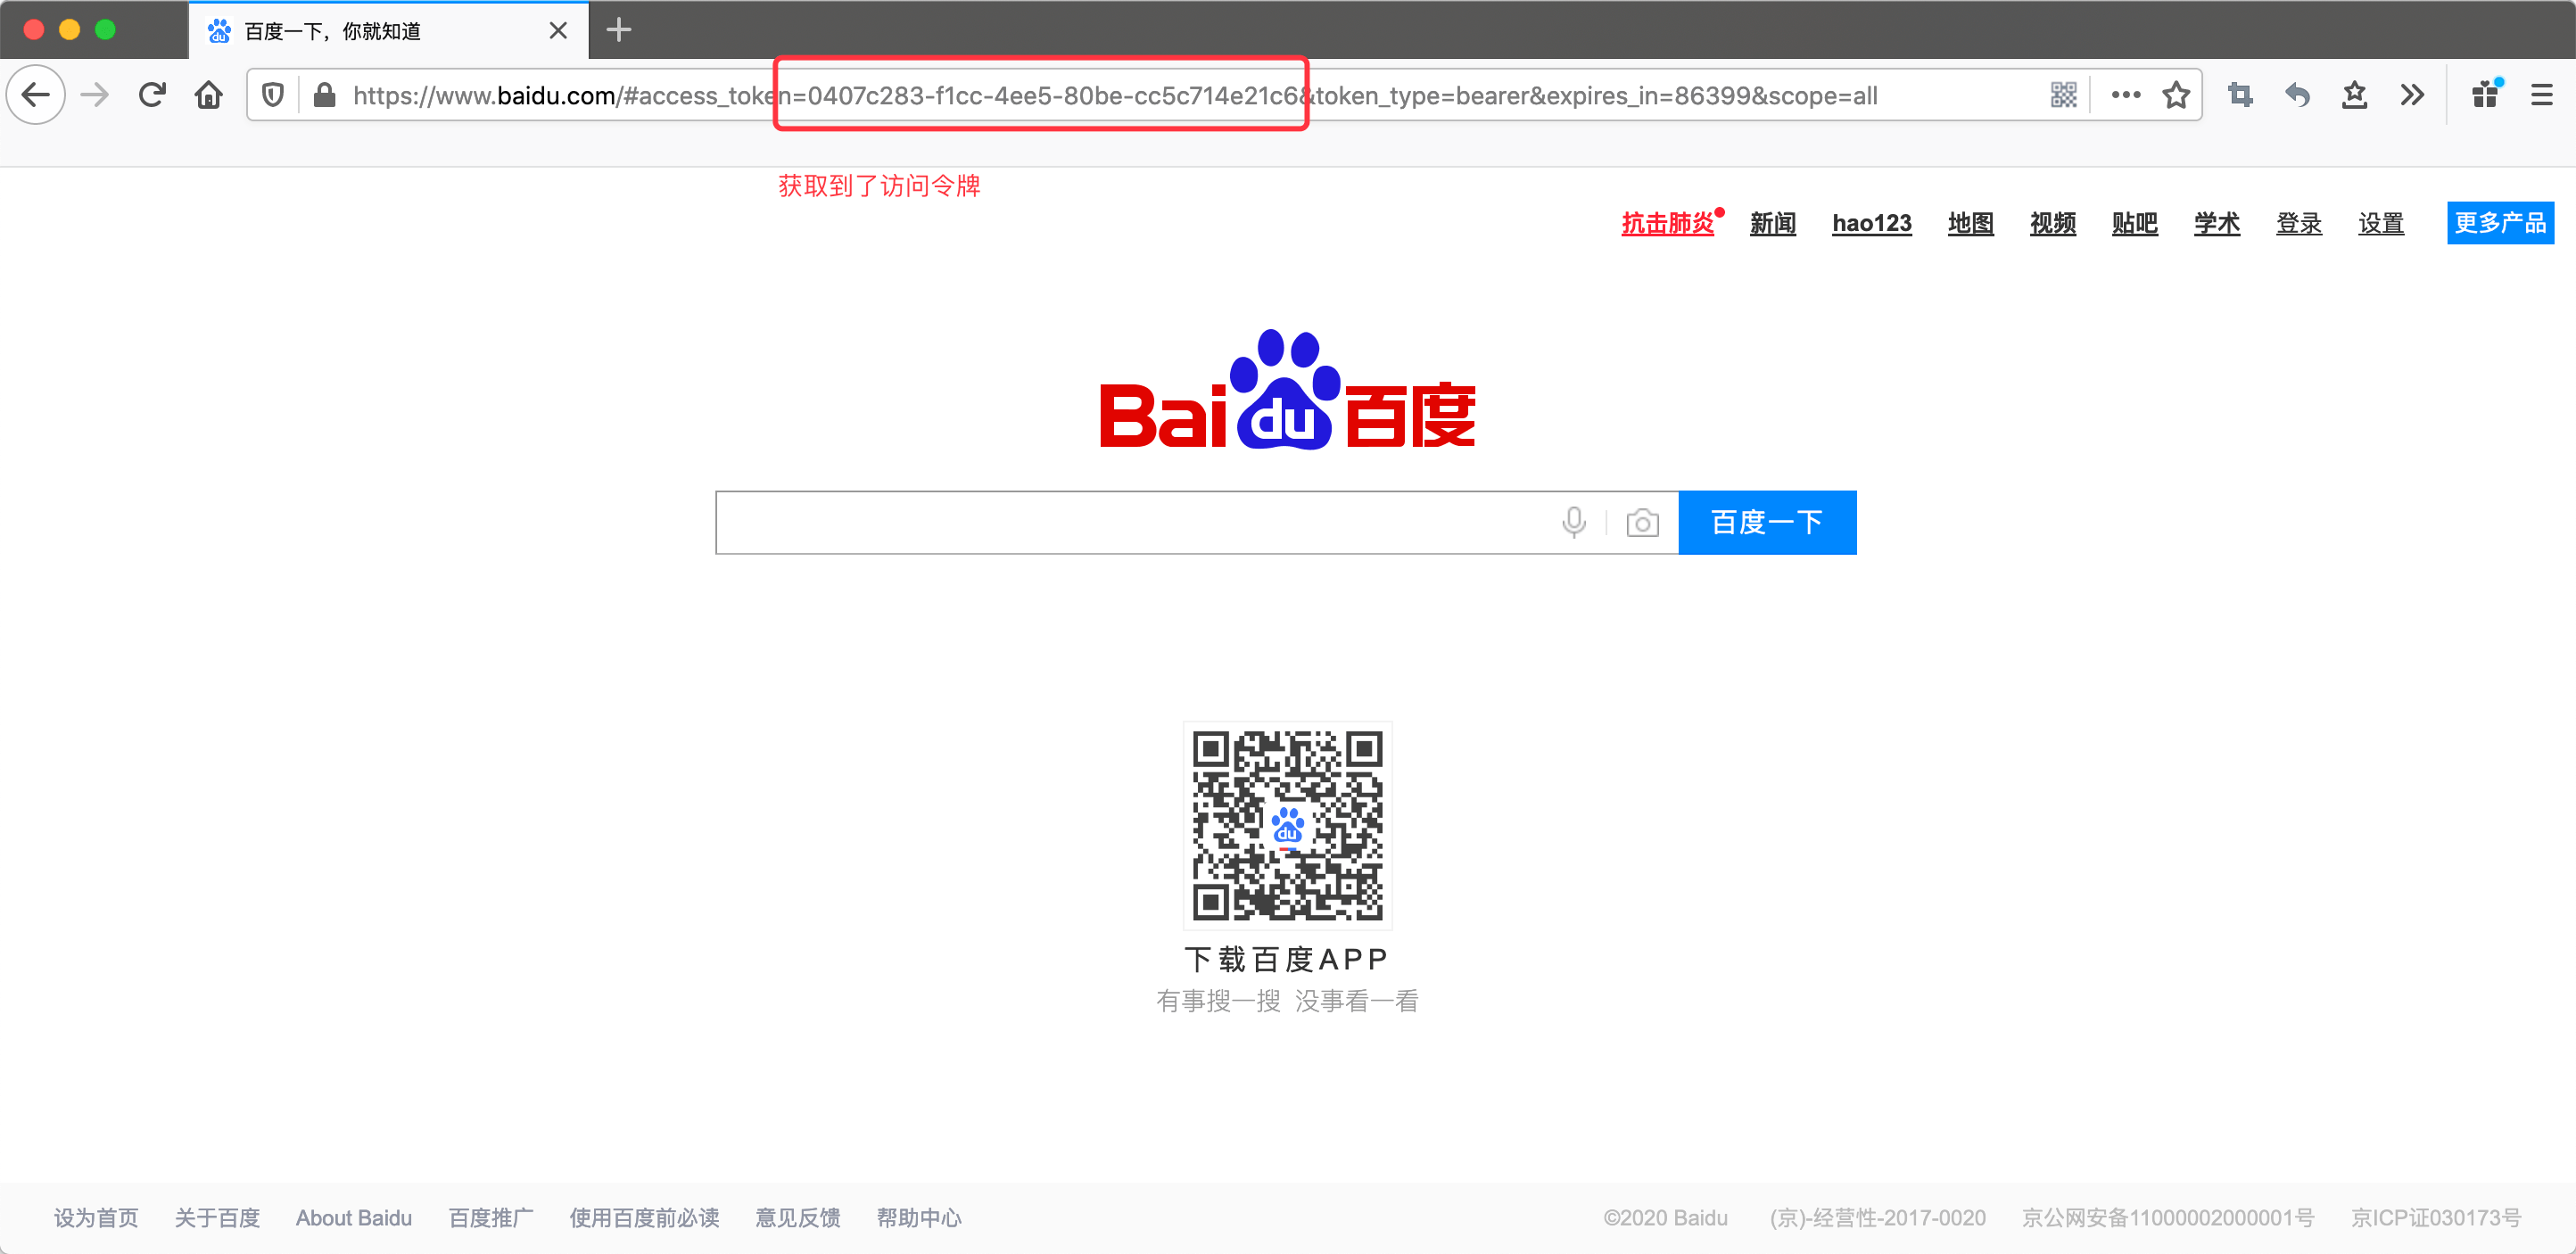
可以看到,重定向后,地址栏已经包含了访问令牌。由此可见,简化模式简化了通过授权码去换取令牌的过程。
免认证配置
免认证也是一个常见的需求,所以这里单独介绍下如何在febs-cloud资源服务器中配置免认证,这里以FEBS-Server-Test为例。
假如需要对/hello资源免认证,则需在Nacos控制台中修改febs-server-test.yaml,添加如下配置:
1 | febs: |
假如需要对以/hello开头资源(如/hello/A,/hello/B等)免认证,则需在Nacos控制台中修改febs-server-test.yaml,添加如下配置:
1 | febs: |
假如需要对FEBS-Server-Test系统所有接口都开启免认证,则需在Nacos控制台中修改febs-server-test.yaml,添加如下配置:
1 | febs: |
或者:
1 | febs: |

